BEST TOOLS TO USE TO APPLY WAX:
Perfect Wax Brush (nice brush if you are on a budget)
Annie Sloan’s Small Wax Brush (if you are painting your kitchen cabinets- do not skimp and get this brush!)
White Scott Shop Towels to remove residual wax from light colored paint
Blue Scott Shop Towels to remove residual wax over darker colored paint
Cheesecloth Great to remove excess wax over “white” colored chalk paint. This is a nice upgrade if you are doing your kitchen cabinets. Consider getting the roll of White Scott Shop Towels also!
I love the Perfect Wax Brush which is good brush if you are on a budget and I especially love Annie Sloan’s Small Wax Brush (which in my opinion- is like the Bentley of Wax Brushes) for applying wax and strongly recommend it to all of my customers as the ONE serious tool you should consider purchasing! It will guide and help you in applying the wax correctly, not to mention efficiently!
How To Apply Clear Wax-
I receive many questions on a daily basis from people around the USA about the proper process to apply Clear Wax. I primarily use Annie’s Clear Wax over Chalk Paint® Decorative Paint by Annie Sloan, but also enjoy Miss Mustard Seed’s Milk Paint and waxes, for the most part, the application of wax is fairly the same.
So, this information applies to all of the above.
Whenever product is purchased through The Purple Painted Lady®, instructional information is always included! Click here to access our on-line shop. Instructions are very helpful, but I personally learn from seeing, hearing and doing. If you are like me, and need to see wax being applied, please feel free to click on this link to watch a very high level video regarding “How To Apply Clear Wax”. I created a bunch of little videos that I have available at my shop – mostly I did this to save on my voice since I would literally have a customer walking out the door and another walking in – and I would be repeating the same information all day!
Again and very important….please also take a few minutes to read the information below!
It is important to apply clear wax in thin and uniformed coats with 100% coverage. I hope this analogy helps in your understanding of how thin to apply it. When I say thin- I mean – not sparse where you are missing sections- but rather a reasonable amount. Basically, as if you are applying a facial moisturizer before bed. A light veil of wax that is gently rubbed into the surface. Some people explain that applying wax it is like buttering toast.
Will the wax change the color of my Chalk Paint®?
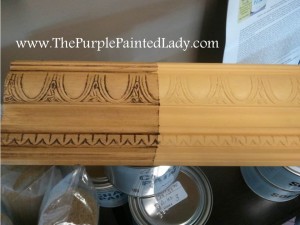
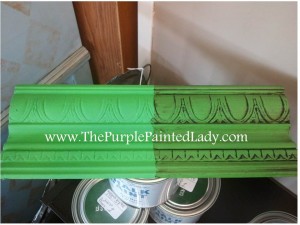
No, it will not change the color, but when wax is applied over the Chalk Paint® – it does intensify the color. Imagine having a wet finger and wiping it on a black board or chalkboard. You can see the deepening of the color from the moisture. That is similar to applying wax over Chalk Paint®.
As you apply the wax- make sure the pressure is uniformed and that you get coverage all over – so apply the wax 100% all over your painted area. Not just in some spots. This is easiest when working with colors versus a white Chalk Paint®. You cannot always “correct” this after the wax has dried.
Apply the wax and as shown in my video- gently push the wax into the paint. (please make sure to watch my video since reading instructions is very different then seeing someone actually do it.)
How long does the chalk paint® have to dry before I can apply clear wax?
It needs to be completely dry. This could take a total of 30 to 45 minutes. I think it is important to understand- that if you only apply one coat of Chalk Paint® to your project – and then begin to apply the wax right away……if you press too hard when applying the wax or removing the wax…that on the corners and edges- that may effect your project as though you are attempting to do a wet distress effect and remove some of your dried paint. Keep in mind- there is a lot of chemistry and science to paint products. The paint will continue to adhere and grip over a period of time as it cures. You can wax right away- but you should be aware of this and be conscientious on the edges and corners. You should not be breaking into a sweat or hurting your shoulder or wrist when applying or removing wax.
Chalk paint and wax is just like putting conditioner on your hair:
Just like when you wash your hair and put conditioner on it- what do you do next?
You rinse all the conditioner off. And why is that?
Because your hair absorbs only what it needs. If you leave extra conditioner on your hair thinking it is going to make your hair better, what does it actually do?
It gives you a lousy hair day! This same concept applies to the wax.
Chalk Paint® Decorative Paint by Annie Sloan will absorb the wax that it needs. All excess beyond that- will just sit on your piece and make it feel tacky, gummy, or even sticky. (often this is where someone phones me and says- I applied the wax days ago and it is still tacky)
After I apply the wax and remove it as I show in my video…I can run my fingers over the surface and my fingers glide over the painted and waxed surface. The surface is not tacky – it may feel moist and cool…but there is no drag.
If I want to make the surface feel like glass after waxing (and multiple coats of clear wax are needed for this technique) …… after the surface has cured for a day – I might take some Steel Wool Grade 000 or a very fine piece of sand paper and lightly rub my painted and waxed piece with the grain of the brush strokes. This option only works if you have a couple coats of wax applied. And you need to be careful if your paint is a light color. I do not recommend doing this over “white” colored paints since it can leave a grey color behind. Click HERE to read more about the steel wool.
IS YOUR WAX BALLING UP when you apply it and looks like crumbs from a sugar cookie?
If you are getting little granules that look like crumbs from a sugar cookie when you apply your clear wax, that happens because:
1. You are using a damp wax brush…OR
2. You are pushing down a little too hard with wax brush that it starts to ball up…like when you make a snowman …OR
3. Your wax may be a little too hard or cold? Sometimes people may take the tin of wax….and while the lid is tightly secured, they will warm the container by placing it in a bowl with hot water. This will soften it and make it more malleable. With that said, NEVER heat your wax with a heat source. It could be a fire hazard!
Usually- the “cookie crumbs” blend in when using a cotton rag when you remove the excess wax. If they do not- you may follow the steps below.
Now- some of you may be thinking- how do I know if I have too much wax?
A. When you apply the wax- if you can run your finger across it and see a mark or a ridge left behind- YOU HAVE TOO MUCH WAX on it!
B. Your project was a small side table or short shelf unit and you used a half tin of wax. Guess what…YOU HAVE TOO MUCH WAX on it!
Keep in mind- even if you applied too much wax it is not horrible if you like the look of your piece! So, do not worry about it! And move on to your next project- be more aware or present when you apply the wax. Learn from your first project and save money by not overusing your materials.
But again -you know you have too much wax or your wax is not applied uniformly when you see streaking in the wax. All is not lost if this is your situation! And again- we want you to LOVE your piece and want to prevent you from using too much wax because it causes more work for you and wastes your product and your money.
So… to remove excess dried wax (TOO MUCH WAX…feels tacky):
1. Take a clean lint free rag (an old undershirt works great)
2. Grab your low odor mineral spirits (I have found that the “GREEN” mineral spirits do not work well for this application) and put your cloth on the mouth of the container and get 2 dabs of it on the rag. DO NOT SATURATE the rag with mineral- we do NOT want a wet rag dripping mineral spirits.
3. “Wipe” the excess wax off your piece. Do not scrub- and do not work in a small circular motion- you want to remove the wax evenly. So wipe from side to side.
Another option- in case someone has a smaller piece and does not want to bother with the mineral spirits- is to:
1. Let your wax totally dry
2. Sand lightly if surface seems uneven
3. Blow or wipe off dust
4. Re-paint with Annie Sloan Chalk Paint™ right over what you have done! No stripping or priming necessary!
The point of this post – is to help you avoid problem! I don’t want you to waste your time or product.
If you are local to me- I would invite you into my shop for a free quick demo on waxing! : ) Or visit your local Annie Sloan Stockist to inquire about a workshop or assistance they can provide to you.
