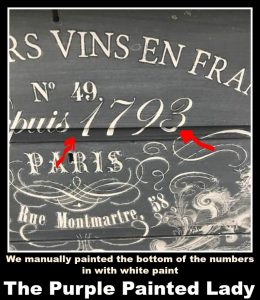
Wow, these Iron Orchid Transfers are the bomb! If you have not used an Iron Orchid Transfer – you should consider doing so! They give you the look that you spent hours and hours hand painting a design or some typography, but really…all it took was about 30 minutes of your time. They are easy to use and will bring your painted pieces to a higher level!
Iron Orchid Transfers come in all different designs. Some are a charcoal color and some are white. Obviously, the base color you are applying them over will dictate which color transfer to use.
They are great to use on walls, furniture and other wood pieces. They should be applied BEFORE you apply your chosen top coat like wax or hemp oil.
These work beautifully over Chalk Paint® or Milk Paint.
You need to be patient when transferring them though. As you rub the back of the transfer and slowly – pull the transfer tape away- make sure that the image has taken to the item you are applying it to. If it has not, lay the transfer back down and carefully rub more.
VIDEOS SHOWING HOW TO APPLY:
We have a couple videos on how to apply the transfers.
Here is one from a Facebook LIVE that we did on December 11th, 2017 showing Courtney and I applying one….check it out HERE.
We also have a Youtube video HERE for you to watch also.
The Facebook LIVE video shows how we cut the transfer when placed over multiple drawers. Sadly- we ruined a small amount of the stencil, but went back in with an artist paint brush and some white paint and “fixed” what we tore.

Once you have carefully applied the transfer, then you can apply your top coat. At The Purple Painted Lady- our top coat of choice, is wax.
HOW TO APPLY WAX OVER A TRANSFER:
Check out our Facebook Video HERE where we show you how to apply the White Miss Mustard Seed Wax over the Artissimo and Transfer. We used an Annie Sloan Wax Brush and Scott Shop Towels to remove teh excess wax.
