Using Artisan Enhancment Transfer Gel- Full Proof Success!

Using Artisan Enhancment’s Transfer Gel-  A “How To” for Full Proof Success!

One of our wonderful Barn Sale Junk Jubilee artisans makes these decorative terra cotta pots that sell out in our shop all the time!  Amy, who owns a business called, “Rachel’s Garden” – which is sentimentally named after her daughter.

Rachels Garden Barn Sale set up

Amy recently wrote up a little post to help all of you re-create what she does using Trasfer Gel.


How to transfer an image using Artisan Enhancements Transfer Gel

You will need:

Transfer Gel

– The manufacturer STRONGLY recommends a LASER PRINTER.  Also- thicker paper (26 – 28 lb) tend to be easier to handle and produce the best results.  (make sue to print in reverse if there are words)

– Scissors

– Smooth surface to transfer to

– Paint brush

– Brayer (optional)

– Water (spray bottle works best)

Slide1

1.  Cut out graphic leaving about 1/8″ around edges.  This helps to ensure edges of graphics adhere well to surface (and prevent that dreaded “Halo” effect some people get.).

Slide2


2.  Apply a thin coat of Transfer Gel to surface transferring to.

Slide3

3.  Apply a generous coat of Transfer Gel to printed side of image.   Tip:  Be sure to lay image on a flat solid surface when applying gel.  I like to put a piece of scrap paper under image to protect my work surface. Also, try to apply gel in one direction – Do not go over image repeatedly or ink may smear.

Slide4

4.  Adhere image to surface.  Smooth and work out any air bubbles or wrinkles.  You can use a brayer to do this.  In addition, I go over the surface several times with my hand and fingertips applying pressure to ensure good contact.  Be sure to go over all the edges applying pressure as well.


Slide5


Slide6


5.  Let dry for several hours.  I prefer to leave it overnight.

Amy Rachel's Garden The Purple Painted Lady Removal

6.  Thoroughly wet paper with spray bottle.  Pat to soak through paper.  Using one finger, begin to rub to loosen paper.  Top layer will roll/peel off easily.

Amy Rachel's Garden The Purple Painted Lady Removal 2


REMOVAL TIP:

I have found it best to work from the center out.  This helps to ensure edges of image don’t peel.

Continue to work a small area at a time by rubbing back and forth lightly with fingertip.  It’s not necessary to rewet surface at this point.  It works best when just damp.. even close to dry.  When most of the paper is off, I soak one or two more times and rub again very lightly to get last bits of paper off.

And…that’s it!

Here are a couple finished projects by Amy Weiner from Rachel’s Garden – Handmade.

Slide11


Slide10


As for buying any of the products we mentioned earlier in this post- I hope that you select The Purple Painted Lady to be your one stop resource!
Now- let’s be honest- there are many places to buy from- what sets us apart is WHY we are here.
And the answer to that question- is that we are here to help you, our customers!  We want you to be successful!  And, just so you know, when you place an order with The Purple Painted Lady:
SOME OF THE REASONS OUR CUSTOMER SERVICE IS THE BEST:
*  If you order before 3pm EASTERN TIME anyday Monday thru Friday – we will ship out your package that same day.
*  We ship orders out every sincle week day all over the US.
*  We offer the lowest flat rate UPS shipping cost so if you are one town away or 10 states away- the shipping cost is the same.
*  We have awesome follow up customer service, too!
And- it is my paint sales that keep me in business and allow me to be here to help you.  (my shameless but honest plug)    Here is a link to our on-line shop=>   http://shop.thepurplepaintedlady.com/
: )  And I will be here to help you as you progress through your future project!  And if I do say so myself- we offer the BEST customer service that you will ever experience!Lastly- if I was helpful to you- ….please consider leaving a positive review on my Facebook business page sharing your positive experience or thoughts about The Purple Painted Lady.  Here is a link to my Facebook page=>  http://www.facebook.com/pages/The-Purple-Painted-Lady/291882785710    This really helps me!  (wink, wink!)
XO
Trish


Chalk Paint® and General Finishes Products- Stunning Piece by Nicki!

The Purlple Painted Lady loves a good “Before & After” story.
 
Here is one worth the time to check out that was done by Nicki.  Nicki has a Facebook page called The Grateful Painter.  Hop on over to her Facebook page and show her some LOVE by LIKING it-  it will be worth your time because she is very talented and puts a new spin on using Chalk Paint®.
 
The Purple Painted Lady General Finishes Glaze High Performance Chalk Paint Nicki whole dresser
 
Nicki wrote me saying one of her favorite Annie Sloan colors is Duck Egg.  And The Purple Painted Lady totally agrees because it is a universal pretty color.
 
CHALK PAINT® COLORS USED:
 
Nicki wanted to try a “faux finish” with Duck Egg– so this is what she wrote me:
 
I chose Annie Sloan Old White and French Linen to compliment it.  
 
 
Duck Egg Blue Sample Board Annie Sloan Chalk Paint  The Purple Painted Lady
French Linen with both Clear and Dark Wax Sample Board - Copy
Old White Sample Board - Copy
 
PAINT BRUSH USED AND PROCESS:
Annie Sloan’s paint brush works well for this technique because it has a bit of a “domed” flat top.
 
The Purple Painted Lady small Annie sloan Chalk Paint brush domed top
 
First, I poured a small amount of each color onto separate paper plates.  
 
(Paper plates, wet wipes, plastic spoons- have lots of these in your “painter’s tool box.”)
 
This is important because you only need a small amount of paint on your brush (and clean up is a breeze… just toss the plates in the garbage when you’re done!). 
 
I dabbed a bit of each color on my brush at the same time and kind of stippled it into the wood. Rather than brushing it on where you use the sides of the brush in a swiping motion- instead I used the top of the brush and a stabbing motion (that sounds kind of scary!). (think of stipplingor pouncing like when you are stenciling)
 
It took about two “coats” of this technique to cover the piece.  I even painted right over the drawer pulls!   
 
Once it was dry I used steel wool to slightly soften the paint.  I didn’t use sand paper because it was important for me to keep the texture created from stippling. 
 
TOPCOAT:
I sealed the piece with three coats of General Finishes High Performance Top Coat using a Foam Brush.  I like using a foam brush because there are literally NO brush stokes!!! 
 
General Finishes FLAT Top Coat The Purple Painted Lady
 
Once the top coat was dry-  I added the glaze.  I chose General Finishes Glaze Effects in Pitch Black.  (ps The Purple Painted Lady sells this)
 
Run a foam brush along the edges (only do small sections at a time.. NOTE!!! This can get messy!) and then wipe away the excess using an old t-shirt. 
 
The Purple Painted Lady Foam Brush General Finishes
 
 
This product spreads easy so a little goes a long way!  After wiping most of the extra glaze off I buffed the rest into the surface.  The small crevices created while painting grab a hold of the glaze giving it an “antique” look.  This product is quite fool proof!  It may look intimidating but if you feel like there is too much on your piece just wipe it off with a wet rag (I did this a lot with this piece!)  Make sure to put the glaze into every corner, along each line and in every little crevice!  
 
INSPIRATION:
I had seen a dresser that Tricia, The Purple Painted Lady had posted with big gorgeous lettering on it.  (HERE IT IS)
 
CoCo dresser with Dark Wax and email
 
In fact- if you want to read on how The Purple Painted Lady created the dresser immediately above- click HERE.
 
When I say it was gorgeous, i mean GORGEOUS!!  She inspired me to try a bit of stenciling.  I ordered mine on Etsy from a shop named Drexart for only $35! 
 
The Purple Painted Lady Nicki Counahan  Raw Stencil
 
Not only are her designs beautiful, she changed the wording for me and emailed me samples before sending it out! 
 
The Purple Painted Lady Nicki Counahan  2 CLOSE UP
 
Finishing the GLAZE PROCESS & STENCILING:
Let your glaze dry overnight before using your stencil.  I applied stencil adhesive that I bought from a craft store— this made it so much easier!  I taped the edges (use blue painter’s tape, NOT masking) onto the piece just to make sure it was extra secure. 
 
Next, use a flat top sponge and dap it into your paint (I used Annie Sloan Graphite).  It is important to have VERY LITTLE paint on the sponge (bleed through happens when there is too much paint!).  I lightly dabbed the sponge onto my stencil and then removed the it promptly after.  This gave me time to clean up the bit of bleed through I had while the paint was still wet.  I found these amazing little Qtips in the beauty aisle that have a pointed end and they were PERFECT for evening out the lettering.  This piece had a lot of wood detailing between the drawers so the scrolls from the stencil were definitely not perfect!  I used a tiny paint brush to fill in the details where the stencil couldn’t reach.   Once I was happy with the finished product I let the piece dry overnight and then added one last coat the General Finishes High Performance Top Coat to seal in the glaze and Chalk Paint from the stencil. 
 
LESSON LEARNED:
If I share any advice on Chalk Paint with a new painter it would be to JUST GO FOR IT!  One of the things I love most about Annie Sloan Chalk Paint is that it is so easy to wipe away or paint over.  Using simple techniques like distressing, waxing and glazing has camouflaged so many of my screw ups and made them look intentional!  Don’t be afraid to ask questions!  There are a ton of experiences painter like Tricia, The Purple Painted Lady on Facebook forums that love to help newbies!  Be confident, have fun, and enjoy what you are doing!  The most beautiful pieces I’ve seen are from people that genuinely love what they do!!
 
Here are some additional STENCIL TIPS from The Purple Painted Lady:
Get paint on the brush and then blot some off…remember we are stenciling and do not want to have that much paint on our brush that it squirts under the stencil. Then with a vertical up and down motion- I blot the stencil. When it comes to stenciling- here are some tips to help you:

Stenciling Tip 1: Use a Professional Tool
Stenciling brushes are round with short, stiff bristles. Use it in a quick up-and-down movement to dab paint onto your stencil. This helps prevent paint getting under the edges. Never apply in a circular motion. A sponge or small roller works well too, but I prefer the brush.  As Nicki stated above, Annie Sloan’s domed top brushes are ideal also.

Stenciling Tip 2: Work from The Outside In

Start panting on the edges of the stencil, working into the center, rather than from the center outwards. Again this helps prevent paint getting under the edges as you’re less likely to accidentally bump the brush against an edge.

Stenciling Tip 3: Less is More
Don’t overload a brush with paint as it will bleed under the edge of the stencil. Load the brush lightly, so that the ends of the bristles are covered evenly- blot or wipe off any excess on a piece of paper or cloth.

Stenciling Tip 4: Think Thin
You will get better results by applying two thin coats rather than one thick one. Wait for the first to dry before applying the second. Do not remove your stencil until you are absolutely sure you are done.

Stenciling Tip 5: Get Sticky
Keep a stencil in place by taping it at the top and bottom with a piece of tape. Painter’s Tape works best as it’s very easy to remove and should not pull off any paint from the surface.

Stenciling Tip 6: Go Multi-Colored
To use more than one color in a stencil, use tape to mask off areas of the stencil you don’t want in a particular color so you do not forget and get carried away with the wrong color.

Stenciling Tip 7: Practice Makes Perfect
If you’re using various stencils together, first try it out on a piece of paper. It’s far easier to find out that something isn’t working at this stage versus having to try to correct it when you’re painting on your final surface.

Stenciling Tip 8: X-rated Stencils
Old x-rays are great for cutting stencils, so if you were unfortunate and have some – put them to good use.

Stenciling Tip 9: Wash Regularly
If you’re doing a repeat design, wash your stencil regularly in warm water to keep the edges free of paint. If there’s some paint on an edge, you won’t get a crisp edge to your painted stencil. As paper stencils don’t lend themselves to washing, acetate stencils are better for repeat designs. With a paper or card stencil, wipe off the excess paint, then leave the stencil for a bit so the paint on it dries, before using it again.

Stenciling Tip 10: Store stencils Flat
A stencil, obviously, needs to be flat to be usable. To stop it from buckling, put it between two pieces of cardboard and store it somewhere flat.


The Purple Painted Lady is so proud of Nicki (The Grateful Painter) and what she accomplished!  I am also honored that she shared with me that a piece I did inspired her.
 
When her and I started to correspond- it made me think about a video I saw on how sometimes- there are things we do, say or an event we participate in- that in general – is something we process in our history and just an ordinary moment.  But, to someone else- that “moment” could have impacted them in a great way.  Hopefully- the way we impact people is always for the better.  I watched a quick video the other day about basically just this.  It was called a “Lollipop Moment.”  If you have a second and want to see it – check it out HERE.
 

BUY PRODUCT FROM THE PURPLE PAINTED LADY™:

As for buying any of the products we mentioned earlier in this post- I hope that you select The Purple Painted Lady™ to be your one stop resource!  We have two locations in western NY.  Check out our Information tab and come and meet us!  Otherwise- if you are not located near me- the following information may apply to you.  This information is directed to those who do NOT have a local stockist.  Because if you do – go and meet them, shop from them and build a relationship with them.  The guidance, information and knowledge they share with you – will be invaluable.  But, if you are in a location where there is no one selling paint products- and you must buy on-line- consider us.  With that said, visit www.anniesloan.com to find a stockist near you.
 
We are here to help you, our customers!  We want you to be successful!  And, just so you know, when you place an order with The Purple Painted Lady:
 
SOME OF THE REASONS ARE CUSTOMER SERVICE IS BEST:
 
*  If you order before 3pm EASTERN TIME anyday Monday thru Friday – we will ship out your package that same day.
*  We ship orders out every sincle week day all over the US.
*  We offer the lowest flat rate UPS shipping cost so if you are one town away or 10 states away- the shipping cost is the same.
*  We have awesome follow up customer service, too!
 
 
And- it is my paint sales that keep me in business and allow me to be here to help you.  (my shameless but honest plug)    Here is a link to our on-line shop=>   http://shop.thepurplepaintedlady.com/
: )  And I will be here to help you as you progress through your future project!  And if I do say so myself- we offer the BEST customer service that you will ever experience!Lastly- if I was helpful to you- ….please consider leaving a positive review on my Facebook business page sharing your positive experience or thoughts about The Purple Painted Lady.  Here is a link to my Facebook page=>  http://www.facebook.com/pages/The-Purple-Painted-Lady/291882785710    This really helps me!  (wink, wink!)Thanks so much to Nicki and you for taking the time to visit our page!
XO
Trish


Painted Kitchen Cabinets- Effects of Dry Winter Air (and then humidity over summer)

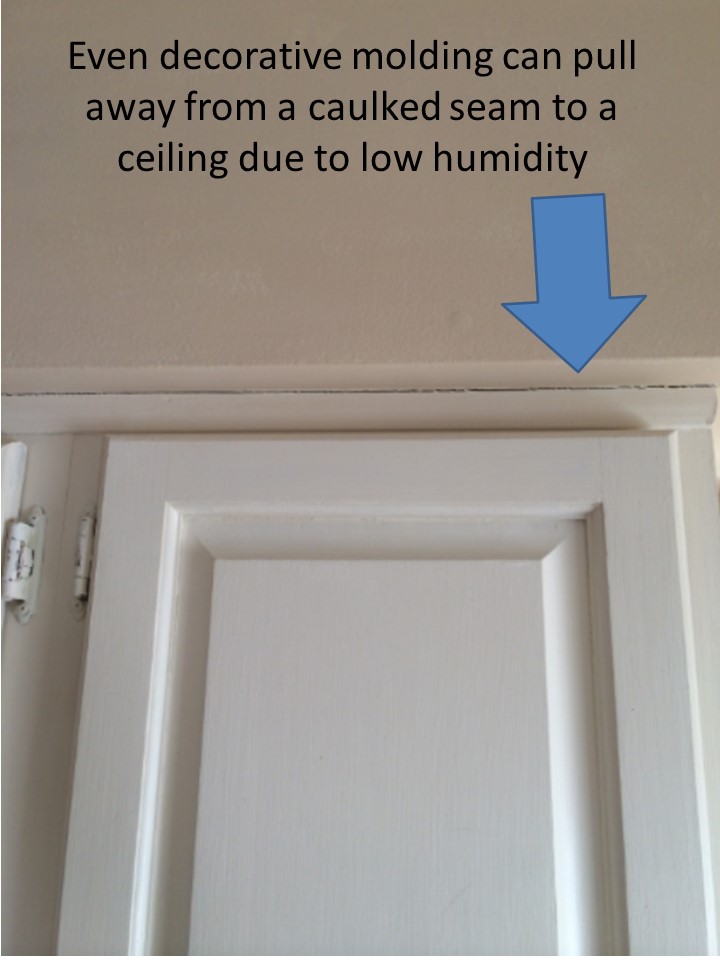
Here is a topic you may not really think about – Kitchen Cabinets-(or wood panels) and the effects of dry winter air and also – the reverse- humidity over summer has on them. It is not a widespread issue, and in fact- most people will not have this problem~ but I want to address it and talk about how to avoid it.

Most importantly- keep in mind- that this issue that may happen during the winter months- will not be an issue once the warmer and more humid air returns. 

Ok- on with my post:

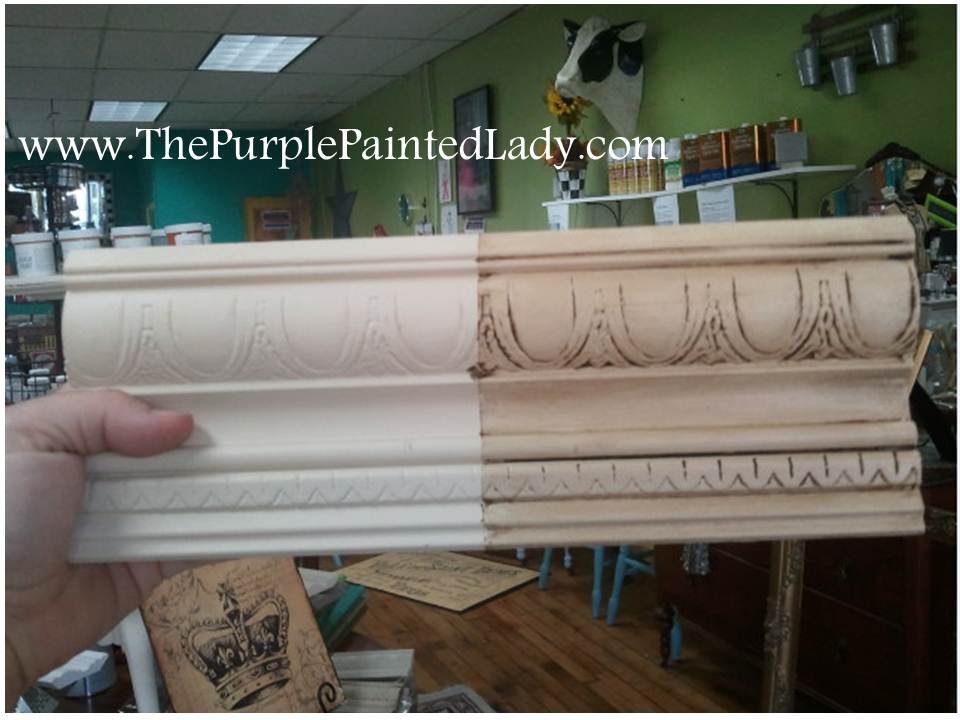
First- when buying a classic 5 piece constructed cabinet door- if you can inquire if the wood used has been kiln dried- that should be your preference. The center panel of a classic 5 piece constructed cabinet door is designed to float and is not glued to the stiles or rails. This is to allow for normal shrinkage and expansion of the woods, and it also prevents the center panel from cracking. The amount of humidity in your home will influence shrinkage and expansion. So, let me just preface that depending on where you live in the world and the type of weather you experience ~ humidifiers and dehumidifiers in your home are important.

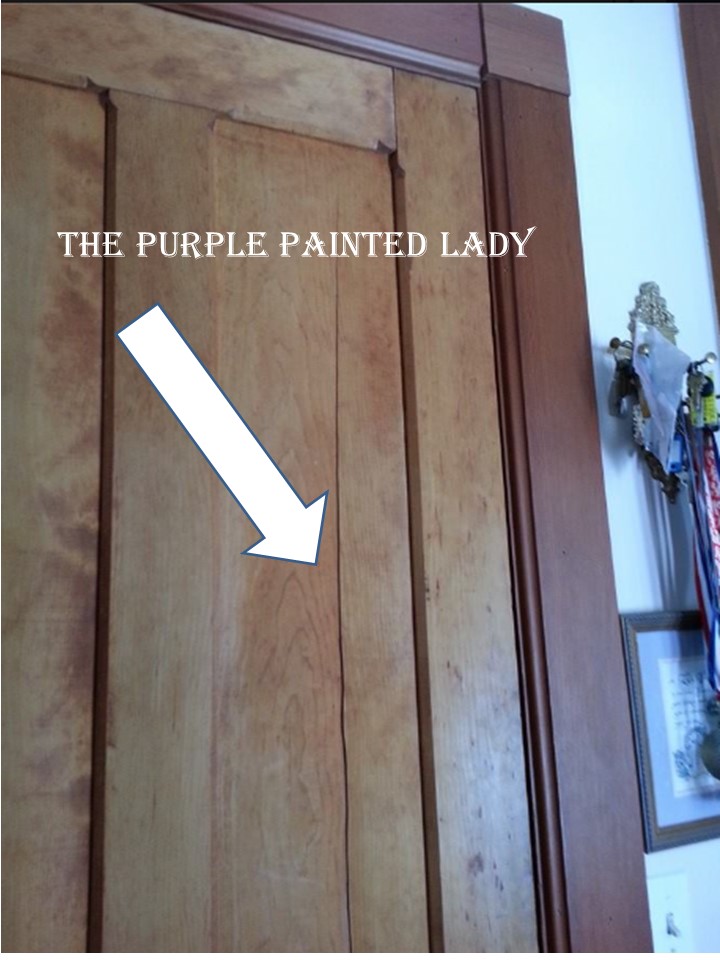
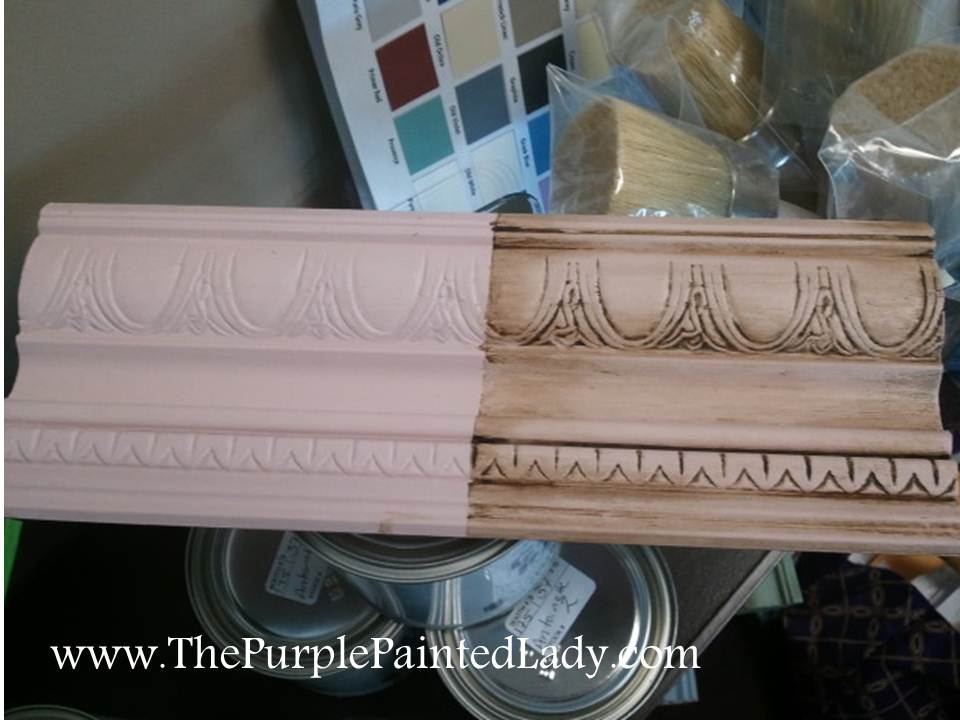
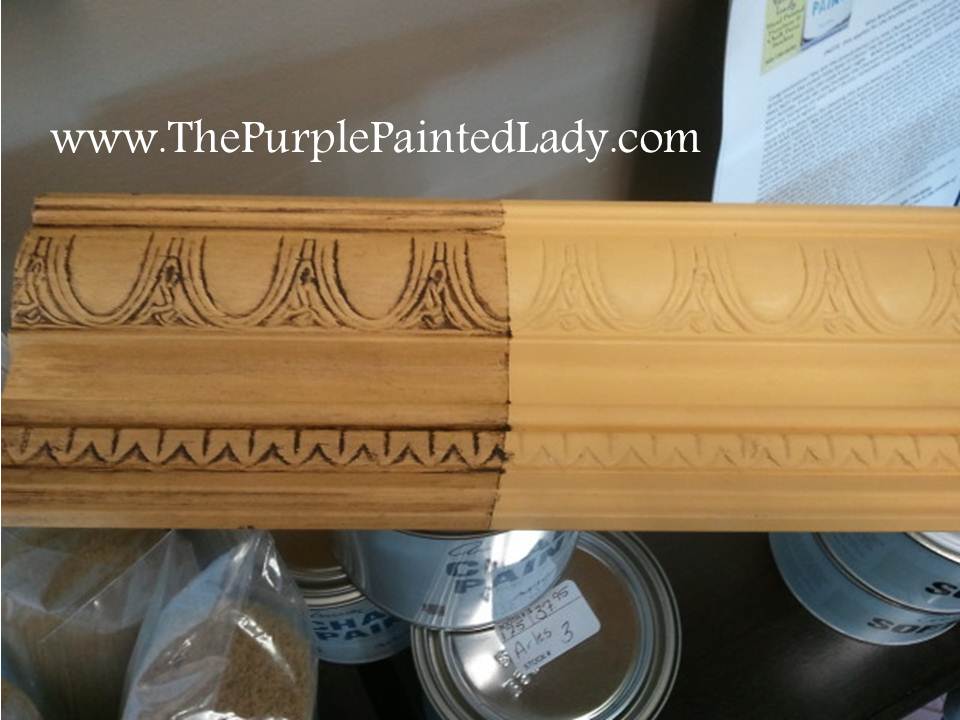
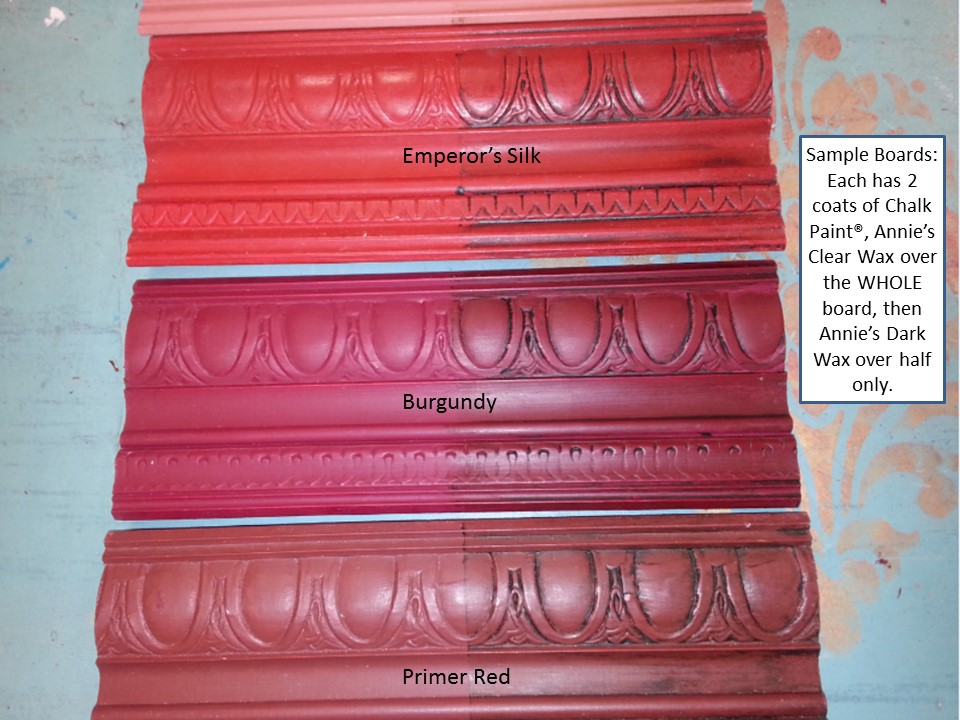
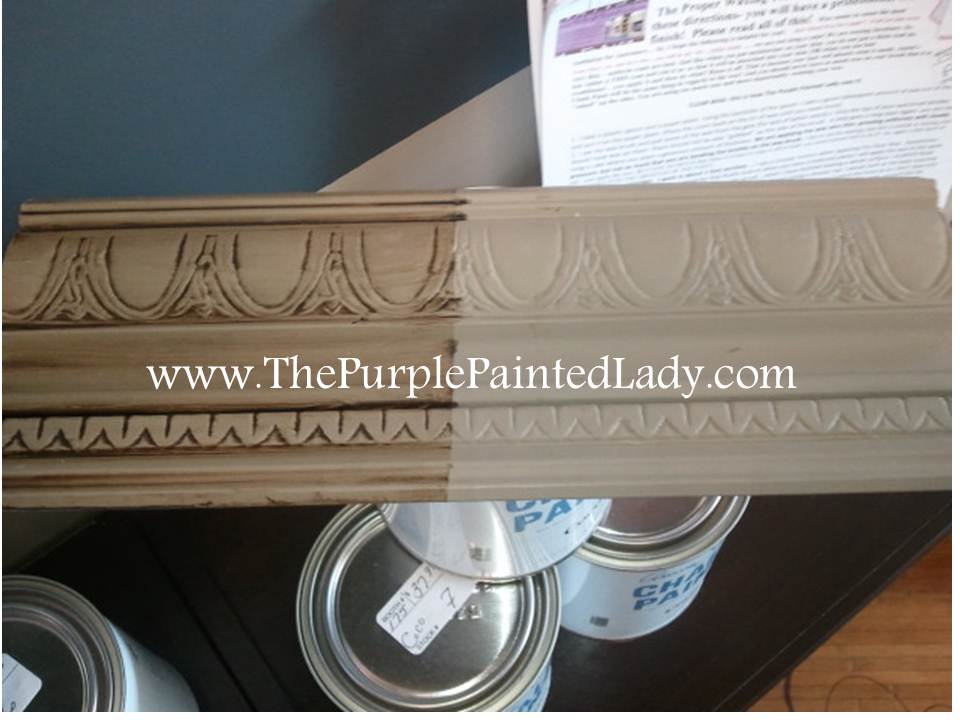
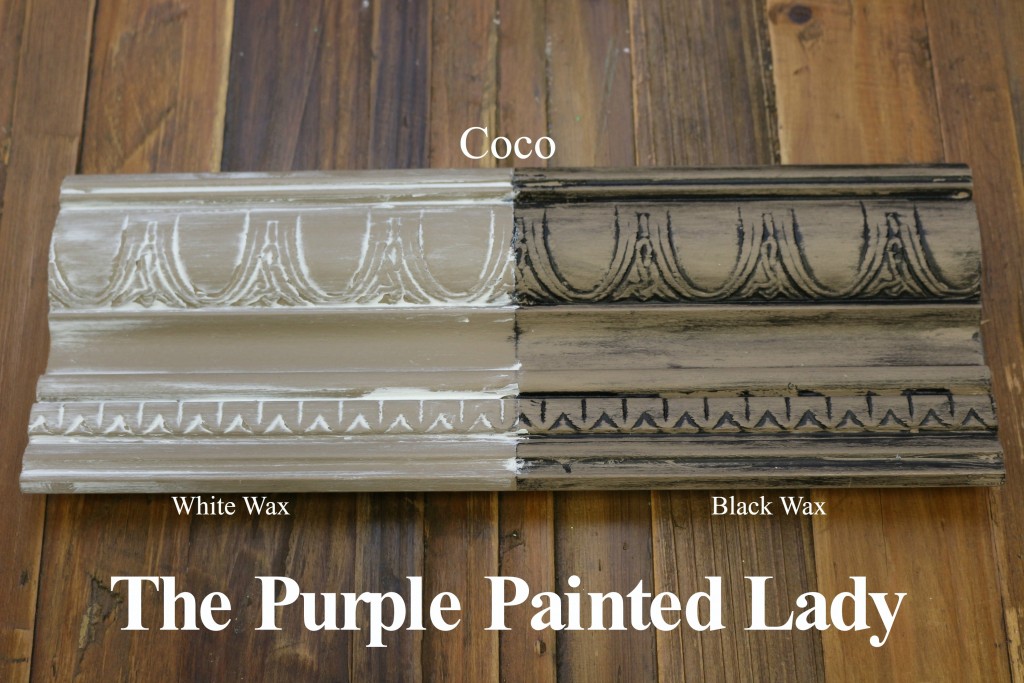
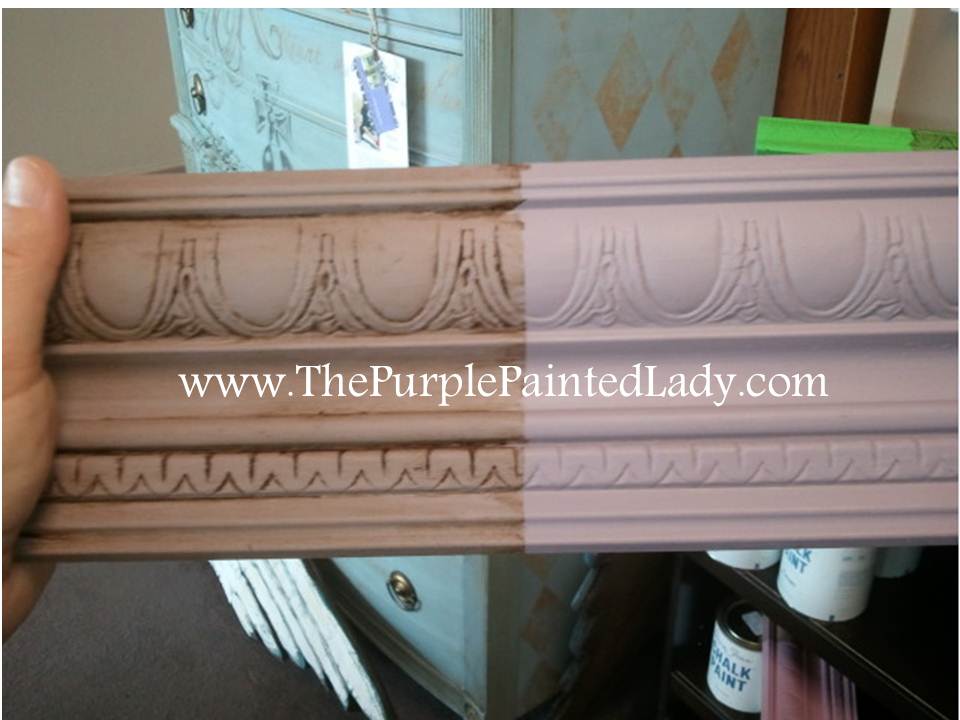
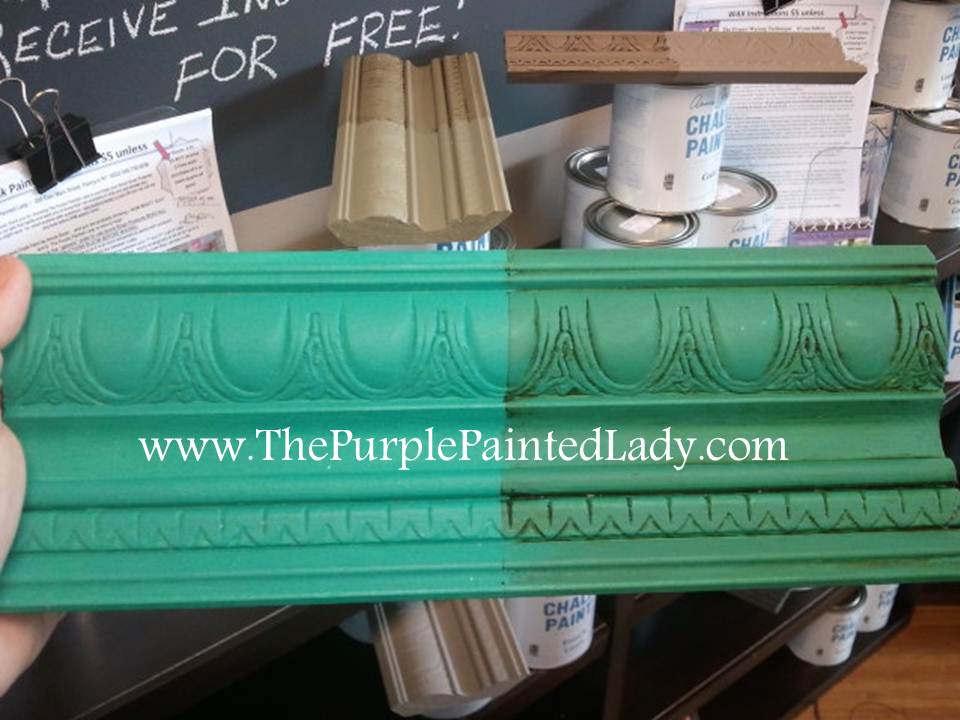
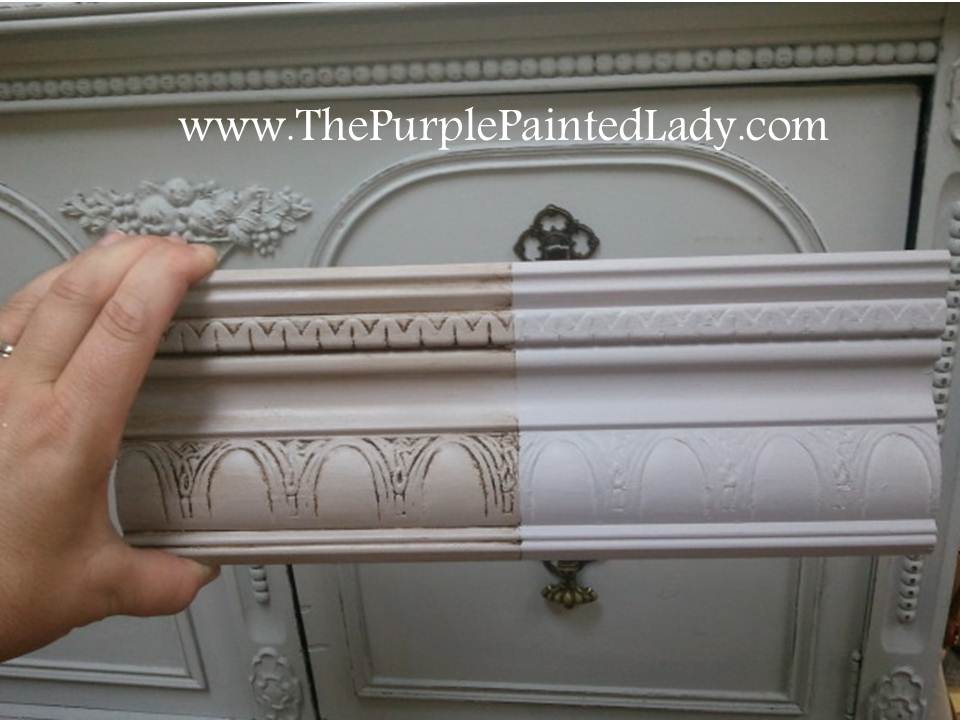
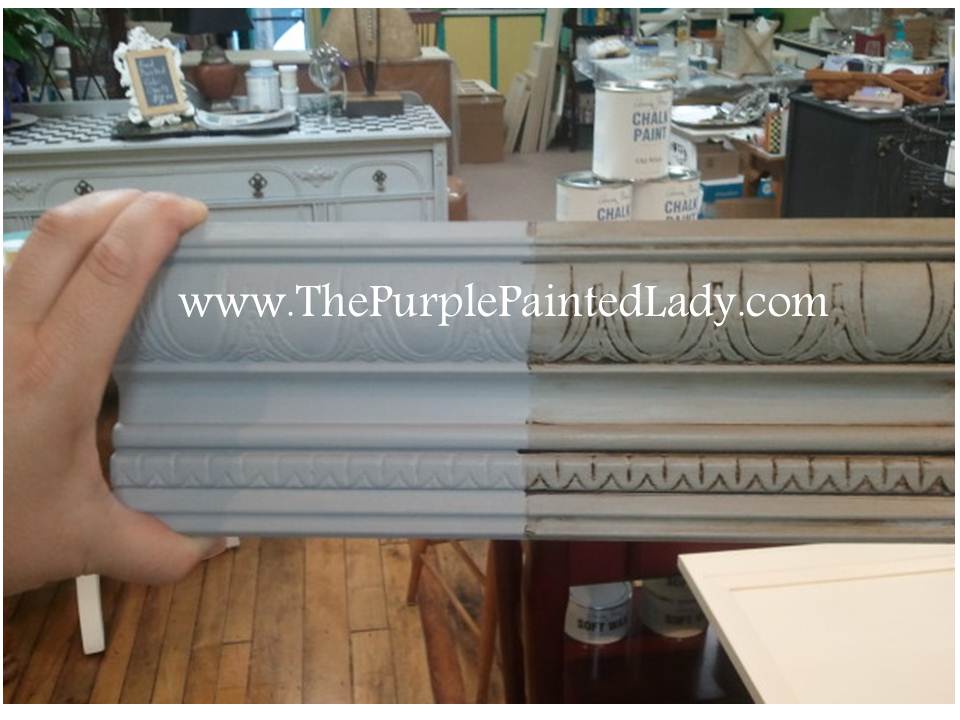
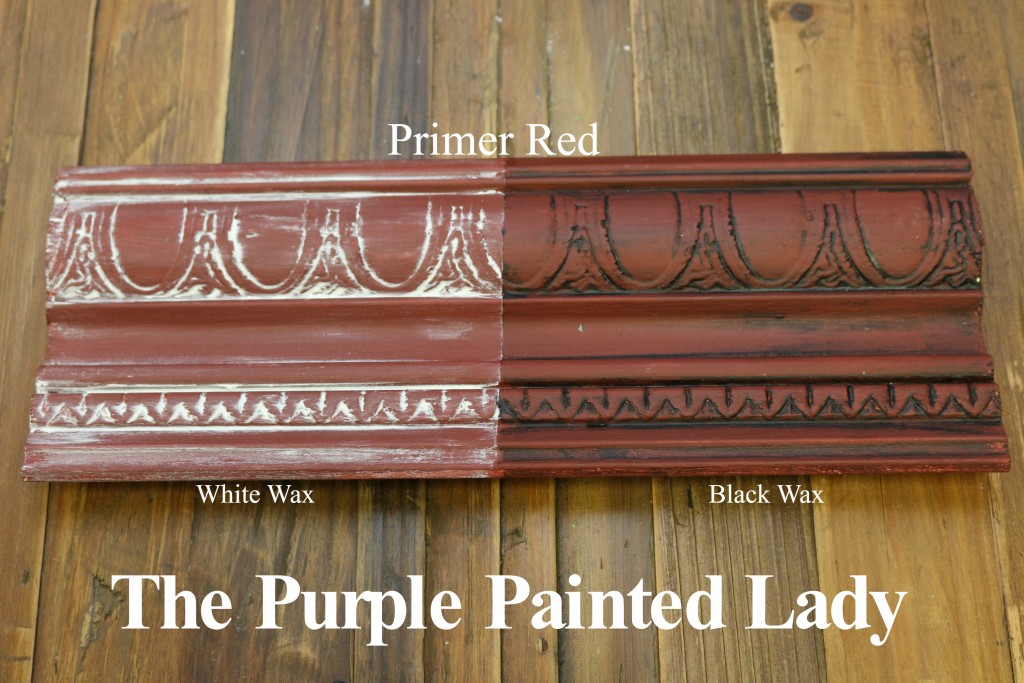
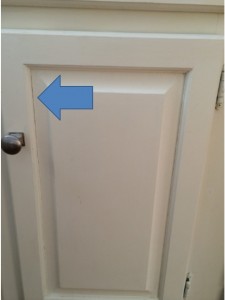
You may have seen a cabinet door where the paint may have cracked slightly.

Depending on where you live in the United States, during the winter months- the lack of aa-the-purple-painted-lady-crack-cabinet-seam
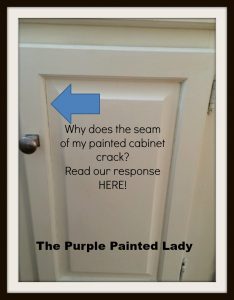
humidity – causing dry air is an issue. Hot, humid summers can be just as much of an issue too. (although I am fantasizing about warm weather at the moment since it is cold here in NY.)

The winter weather – causes the dry winter air to leech moisture out of anything leaving your skin as dry and cracked as a salt flat and your sinuses as parched as the Sahara in summer.

The dry air also contributes to that jarring static shock that practically propels you across the room every time you pet the cat.

Having significant differences in humidity levels in your home through the four seasons, over time- will effect everything. In my old 1880’s home, when we bought the house back in 2003, it had one of those very old oil furnaces. The furnace looked like an octopus and was very inefficient. It also, did not have a humidifier. After we had it removed and installed a gas, high efficiency furnace that had a built in humidifier – my husband set the humidifier to 50%. This caused many things to improve. Our skin was not nearly as dry, I would no longer get shocked when I pet my dog. But the evidence of the years of dry air through winter, and sticky humid summers remained. One example of this is left visible in some of the wood doors. The closet door in my kitchen entrance in fact has a crack down the center of one panel where it bowed slightly due to humidity making it swell.

The Purple Painted Lady Cracked door humidity 2

Some of the doors on the second level of the house- have these cracks too. The wood panels would expand and contract depending due to the level of humidity, and sometimes- that causes cracks over time. Think about it, in NY during the winter- humidity could be as low as 20%. In the summer, there are unbearable times we experience humidity that is 90% or higher. That expansion and contraction effects wood, and the paint on top of it.

So, the wood kitchen cabinets that are painted may show the signs of this situation. The paint is not the problem, but rather evidence that there is this issue.

Slide2Slide3

Again- it is not totally the way you heat your home, but rather the lack of a humidifier- which puts moisture back into the dry winter air – which most of the newest gas furnaces do have.

This same issue can be the result of not having a dehumidifier over the hot, moist summer months.

I would recommend that you proactively manage this as best as possible. Consider getting a Relative Humidity Monitor and measure the level of humidity in your home. I think you can pick one up for $11 at any of the big box stores. There are more expensive ones, but our is just a basic elementary dial indicator and it works fine. It is important that you understand humidity levels should be kept at a reasonable rate (between 40 or 60%.)

This Old House, the television show and magazine has a great post where Norm explains why this happens….again the focus is that no moisture because of heat and winter weather is the culprit. Click HERE to read it.
The Old House logo The Purple Painted Lady

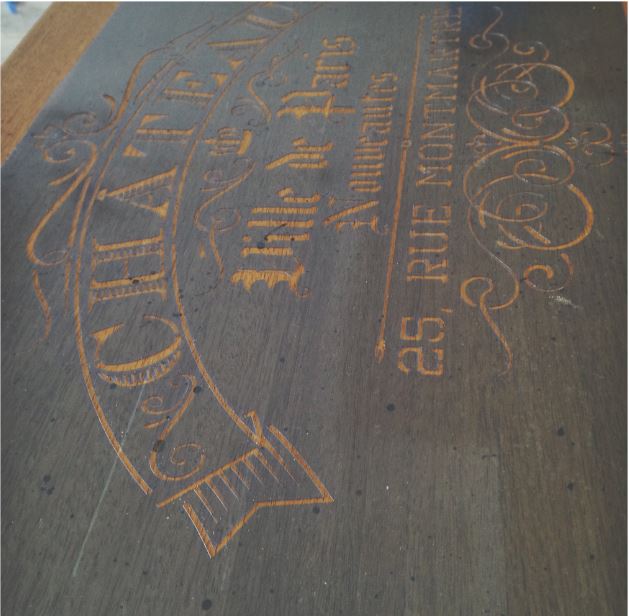
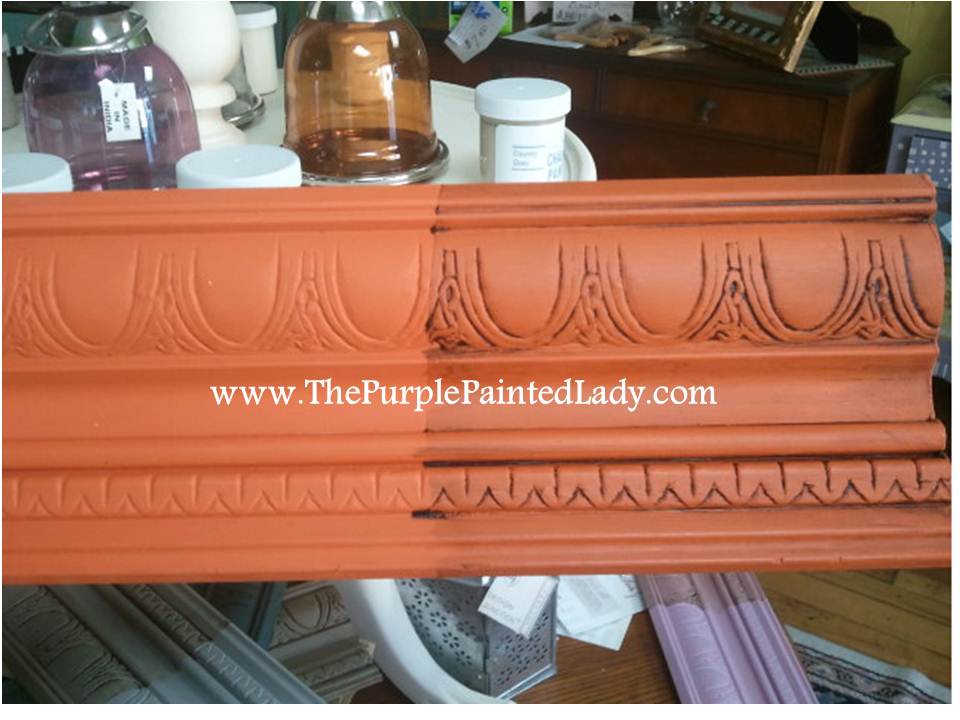
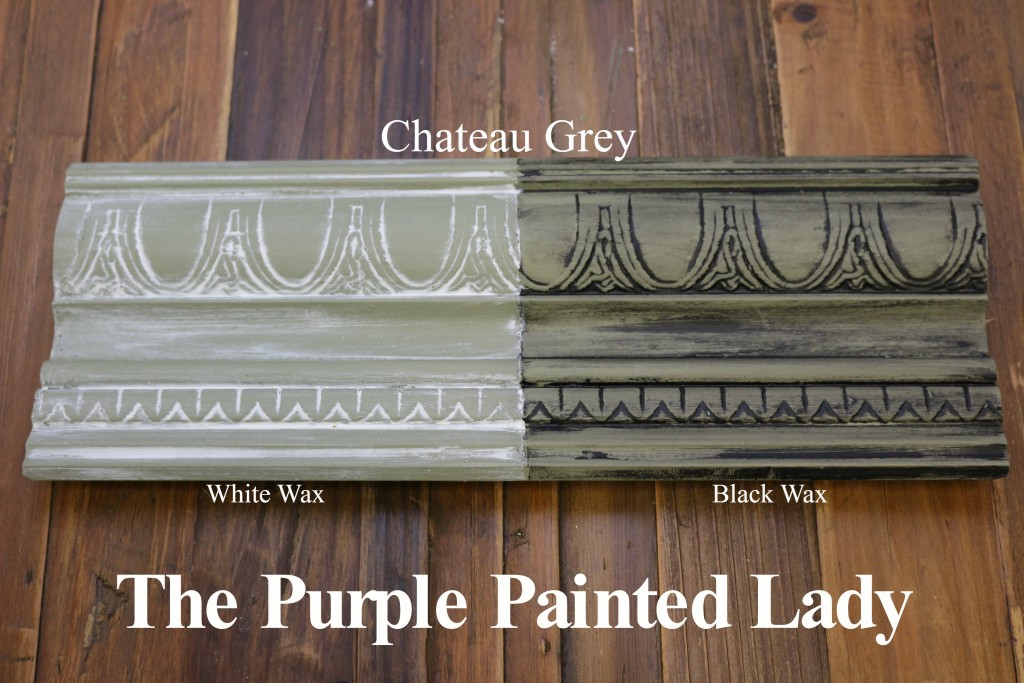
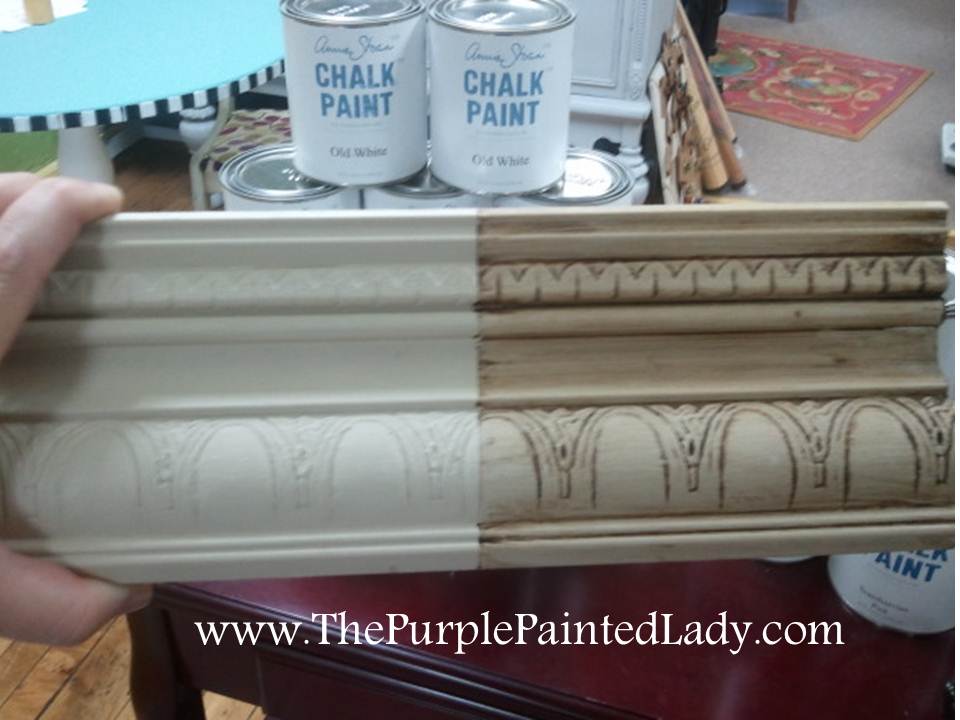
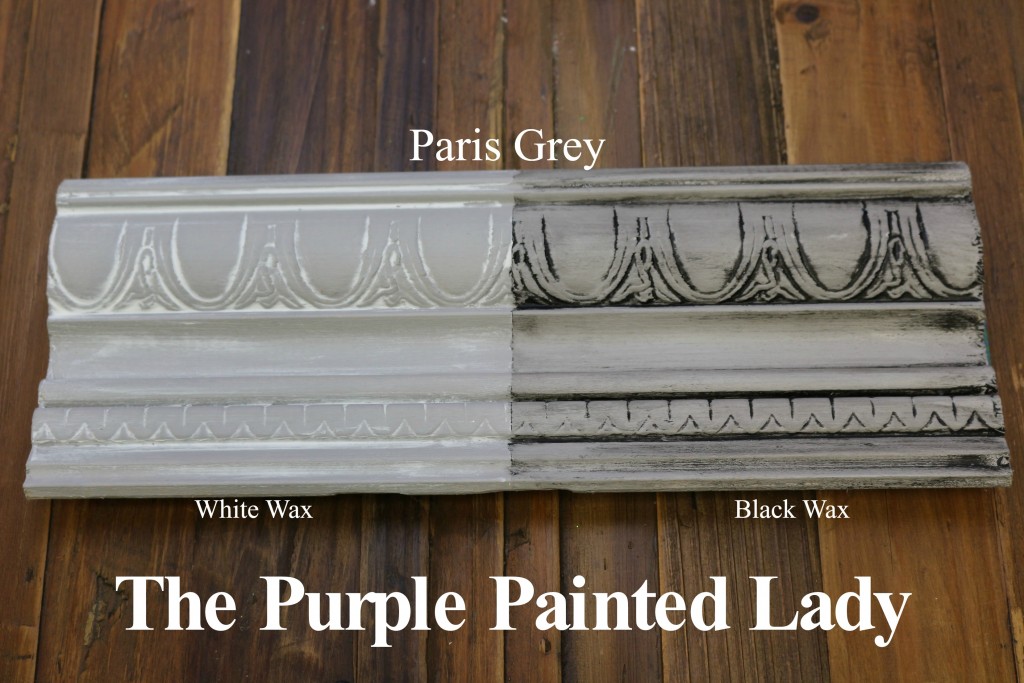
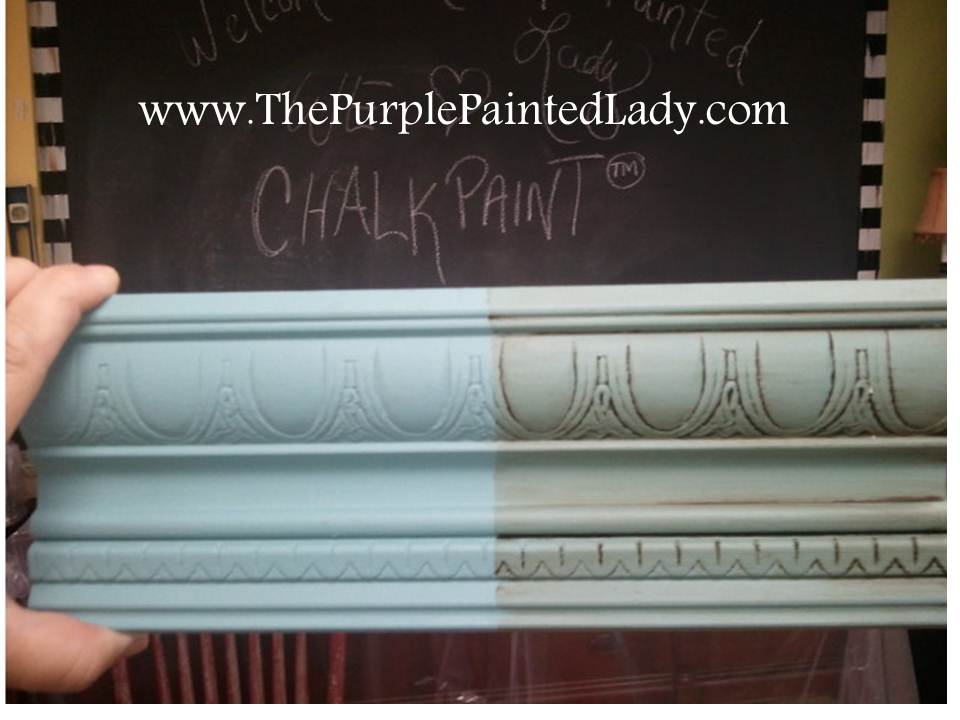
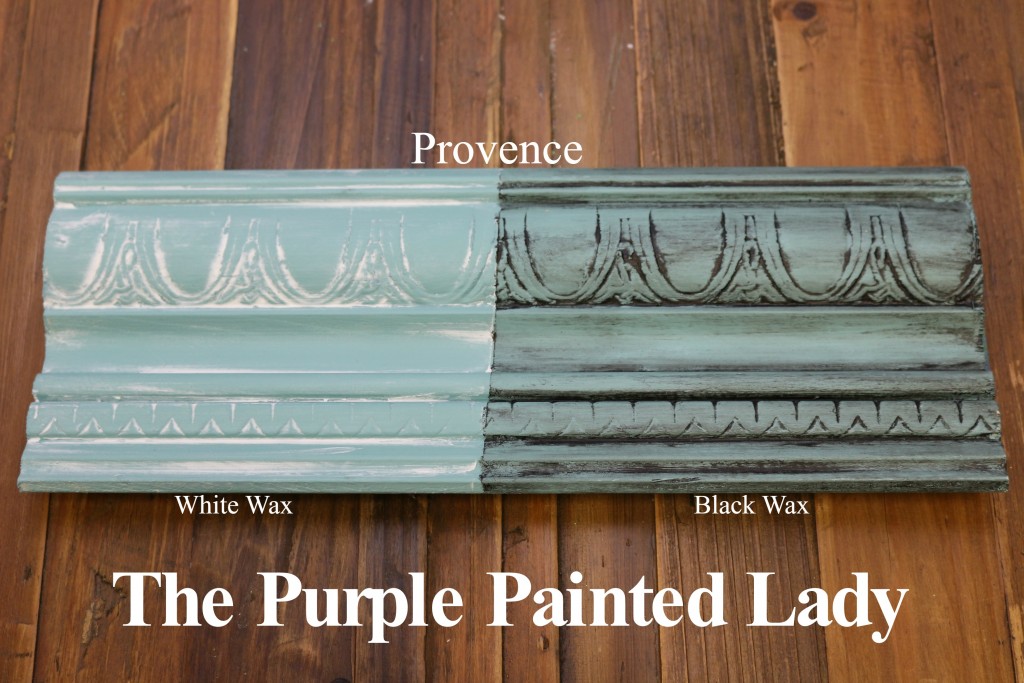
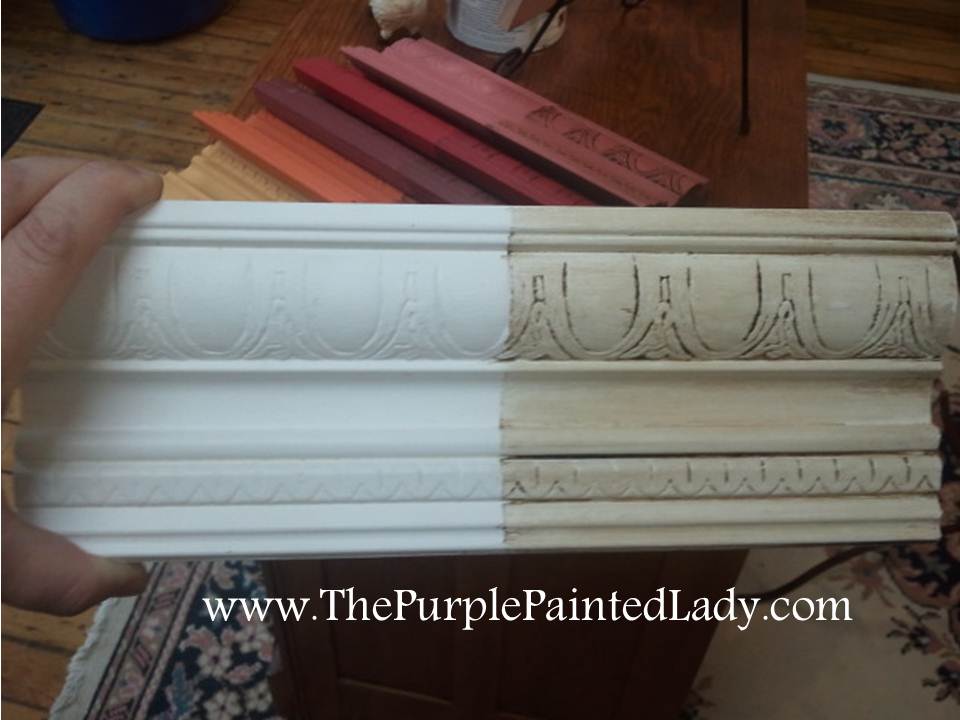
Rose Wilde, another Annie Sloan stockist here in the United States advised, “One way to prevent this from happening is to score the paint and glaze along that line before and after the paint drys. This way you have the separation that will not be as much of an issue down the road.”

I read on-line from Thomas Richard at “TRS Designs” Pro;

“Your kitchen designer should be advising you of this fact, but he/she should not be discouraging you.
What they are describing is, in fact, quite normal and will occur on all cabinet lines from the least to the most expensive. Real wood, like most materials, will expand and contract with changes in humidity levels. Since cabinetry doors are comprised of multiple pieces of wood, with the grain running in different directions, these boards expand and contract at different rates. This movement is called humidification and can be quite extreme, depending on several factors, the major ones being your local climate and the actual HVAC system in your home. When you paint a real wood door, the paint hardens and then when the wood moves, the paint can develop visible lines or cracks at the seams of the cabinet doors. These ‘cracks’ may be more noticeable on “stile and rail’ type doors. Miter doorstyles will experience this too, but because the miter joint is usually more noticeable anyway, it tends to be easier to accept visually.
These ‘cracks’ are actually present on all cabinetry, but with stained cabinets, and their visible woodgrain, you just can’t see them as readily, but they are there. Just drag your fingernail across some cabinetry joints and you will find some.
If you really like the look of paint, but would like to virtually eliminate the ‘cracking’ you can either try to control the humidity levels in your house all year round, OR you could consider a cabinet door made from painted MDF (Medium Density Fiberboard). I personally prefer the strength and solidness of real wood, and I also accept that it is a living material, so the little cracks don’t bother me… In fact, they are proof that you have real wood cabinetry! Sorry if I ran on a little bit, but I wanted to try and be thorough.”

Another person recommended, “if you already have the cabinets your best solution is to sand the joints bare again and apply a very thin bead of painters caulk w/ silicone. It will shrink a little as it drys and should be barely noticeable once painted while still allowing for some minor expansion and contraction. It’s not an ideal situation, but it should be better then the cracked paint.”

The answer I received from Brandy Budzaj Siemens who is another stockist here in the USA and who owns Vintage Style and Designs was, “I was a kitchen designer prior to this. I always had a disclaimer in my contracts of solid wood painted cabinets, that is is LIKELY to happen. It’s the wood and Mother Nature. Solid wood moves. The paint (any) will crack. It should be less noticeable when the humidity comes back.”

Our Technical Director from our US Distributor wrote us, ”

It’s that time of year again in the colder regions of North America … “I’ve painted my kitchen cabinets and now the paint has cracked around the center panel.” It’s not the paint failing … it’s the wood moving. This is unavoidable in any solid wood cabinet … wood is a living, breathing thing designed to expand and contract at different rates with changes in humidty. A painted finish, no matter how good or how carefully applied, just can’t keep up. To minimize this effect and prevent any damage to the actual cabinet door, keep the following in mind:

– The center panel is designed to “float” within the rails and stiles … never seal this expansion joint with caulk as this can cause serious damage.

– Maintain a clean expansion joint while painting … paint the center panel first, and then start painting on the outer edges and work your way in to avoid any heavy buildup of paint … and clean out any excess paint with your brush.

So, there is a suggestion in itself- to leave it alone since if the cabinet has expanded- – we will soon be in a season where in is going to contract.”

I feel the most important part of this post I want to share with you is that dry air and then the opposite- being humidity take their toll on wood. Managing humidity levels in your home is important. Then this issue is no longer a problem.

Painting Laminate or Formica Tops of Dressers

Welcome to The Purple Painted Lady™!

I am often asked- can you paint Formica or laminate?

Yes- I have painted Formica top dressers many times.

My favorite bedroom pieces to paint are from sets that were in many little girls rooms in the 1960’s and 1970’s. You know the set- the white French Provincial style.

French Provincial Bedroom set

These sets almost always have a Formica top. If you are going to paint a piece like this, please follow these directions.:

CLEAN:

1. Make sure to clean it with either Krud Kutter .   ( more about prepping furniture HERE) then always follow back up with a new rag that is moisten with water to REMOVE and residual cleaner that you used!


PAINT:

2. Apply your Chalk Paint®:

The most important thing during your first coat of Chalk Paint®- is to thin the paint with water slightly.

Painting formica laminate

Add about 20% water to whatever amount of paint you think you will be using. Then paint your first coat. Apply a uniform coat, and remember to lay your paint in the finish stroke so you have one cohesive – smooth stroke.

Then WAIT!

Wait at least 24 hours…the longer the better. Can you be patient? Wait 2 days – then apply your second coat. There is LOTS of chemistry in paint products and stains.

Union Jack email

That statement applies across the board – no matter what product line you are using.

So, by waiting a day or two- it gives the paint the time it needs to really grip and bear down. Once all done with painting- wax as usual.

Remember the products will continue to cure for about 3 weeks (just like all products do) during this time- use of the piece is fine- but take caution to save the abuse for a month or two down the road.

dresser with just antoinette and stencil

Remember => this wait time is not necessary when painting “normal” wood furniture versus a super slippery surface.

DO I NEED TO SAND?

Some people may recommend that you sand the laminate. I did not sand mine- but if you do- do it in the SAME direction you plan to have brush strokes and use like a 180 grit piece.  Again, I just want to reiterate to NOT sand in a circular motion.

All piece shown in this post were sold to customers over 2 years ago now. Let me know if this helped you!

Old Violet Annie Sloan dresser - Copy

French Gilding Wax Empire Antoinette Dresser

The Purple Painted Lady How to Paint Formica Laminate Pic


Visit our Facebook page HERE – we would LOVE to hear from you!

BUY PRODUCT FROM THE PURPLE PAINTED LADY™:

As for buying any of the products we mentioned earlier in this post- I hope that you select The Purple Painted Lady™ to be your one stop resource!
 
Now- let’s be honest- there are many places to buy from- what sets us apart is WHY we are here.
 
And the answer to that question- is that we are here to help you, our customers!  We want you to be successful!  And, just so you know, when you place an order with The Purple Painted Lady:
 
SOME OF THE REASONS OUR CUSTOMER SERVICE IS THE BEST:
 
*  If you order before 3pm EASTERN TIME any day Monday thru Friday – we will ship out your package that same day.
*  We ship orders out every since week day all over the US.
*  We offer the lowest flat rate UPS shipping cost so if you are one town away or 10 states away- the shipping cost is the same.
*  We have awesome follow up customer service, too!
 
 
And- it is my paint sales that keep me in business and allow me to be here to help you.  (my shameless but honest plug)    Here is a link to our on-line shop=>   http://shop.thepurplepaintedlady.com/
: )  And I will be here to help you as you progress through your future project!  And if I do say so myself- we offer the BEST customer service that you will ever experience!Lastly- if I was helpful to you- ….please consider leaving a positive review on my Facebook business page sharing your positive experience or thoughts about The Purple Painted Lady.  Here is a link to my Facebook page=>  http://www.facebook.com/pages/The-Purple-Painted-Lady/291882785710    This really helps me!  (wink, wink!)
XO
Trish

The Purple Painted Lady™ ~ the serial no. is 86/641,416 with the US Trademark Office

Chalk Paint® Sample Board Colors- all in a row

Watch our video HERE where we open EVERY container of Chalk Paint® and show the color inside the can!

Chalk Paint® Colors- all in a row…..

I hope this page will be helpful – seeing all Chalk Paint® sample boards in one spot. Click on the name of the color to launch the shopping cart page where we have a written description of the color too.  All Sample boards below are painted with TWO coats of paint over raw wood.  Then, a coat of clear wax was applied over the WHOLE board and then dark wax on half, or in the second image – it shows the white wax and black wax.  Do you need to use the dark wax, or the white wax or the black wax?  Of course not!  That is like saying you MUST have ketchup with your fries or sugar in your tea.    But, in most cases- you REALLY want to have a clear wax base BEFORE applying the dark wax or the black wax.  Read this POST HERE ABOUT DARK WAX WHEN YOU HAVE TIME:   

Amsterdam Green:

amsterdam-green-sample-board-the-purple-painted-lady


Antibes Green

Antibes Green Sample Board

The Purple Painted Lady Antibes Chalk Paint Annie Sloan Black White Wax

AntibesGreen Extended Color The Purple Painted Lady Chalk Paint

Antoinette    The Color of a ballerina’s slipper

Antoinette Sample Board

The Purple Painted Lady Antoinette Chalk Paint Annie Sloan Black White Wax

Antoinette Extended Color The Purple Painted Lady Chalk Paint

Arles
Arles Sample Board

The Purple Painted Lady Arles Chalk Paint Annie Sloan Black White Wax

Arles Extended Color The purple painted lady Chalk Paint

Athenian Black


Aubusson Blue

Aubusson Blue Sample Board

The Purple Painted Lady Aubusson Blue Chalk Paint Annie Sloan Black White Wax

AubussonBlue

Barcelona Orange
Barcelona Orage sample board with clear and dark wax

The Purple Painted Lady Barcelona Orange Chalk Paint Annie Sloan Black White Wax

BarcelonaOrange

Burgundy

Sample Board Burgundy Emperor's Silk Primer Red Chalk Paint The Purple Painted Lady

The Purple Painted Lady Burgundy Chalk Paint Annie Sloan Black White Wax

Capri Pink

Chateau Grey

Chateau Grey Sample Board The purple Painted Lady Annie Sloan

The Purple Painted Lady Chateau Grey Chalk Paint Annie Sloan Black White Wax

ChateauGrey

Coco

Coco Sample Board - Copy

The Purple Painted Lady Coco Chalk Paint Annie Sloan Black White Wax

Cocoa

Country Grey

Country grey Sample Board with Clear and dark Wax - Copy

The Purple Painted Lady Country Grey Chalk Paint Annie Sloan Black White Wax

CountryGrey

Cream

Cream Sample Board with both Clear and Dark Wax - Copy

The Purple Painted Lady Cream Chalk Paint Annie Sloan Black White Wax

Cream

Duck Egg Blue

Duck Egg Blue Sample Board Annie Sloan Chalk Paint The Purple Painted Lady

The Purple Painted Lady Duck Egg Chalk Paint Annie Sloan Black White Wax

DuckEgg

Emile

Emile Sample Board with Darl and Clear Wax - Copy

The Purple Painted Lady Emile Chalk Paint Annie Sloan Black White Wax

Emile

Emperor’s Silk  ………Check out our Pinterest Board HERE
Primer red Sample Board Comparison The Purple Painted Lady Chalk Paint Antoinette Emperor Silk Close up Chalk Paint

The Purple Painted Lady Emperor's Silk Chalk Paint Annie Sloan Black White Wax

EmperorsSilk

English Yellow

Sample Board The Purple Painted Lady Chalk Paint English Yellow

The Purple Painted Lady English Yellow Chalk Paint Annie Sloan Black White Wax

EnglishYellow

Florence
Florence Sample Board

The Purple Painted Lady Florence Chalk Paint Annie Sloan Black White Wax

Florence

French Linen
French Linen with both Clear and Dark Wax Sample Board - Copy

The Purple Painted Lady French Linen Chalk Paint Annie Sloan Black White Wax

FrenchLinen

Giverny:


giverny-sample-boards-chalk-paint-the-purple-painted-lady

Graphite

Graphite Sample Board - Copy

The Purple Painted Lady Graphite Chalk Paint Annie Sloan Black White Wax

Graphite

Greek Blue

Greek Blue Sample Board - Copy

The Purple Painted Lady Greek Blue Chalk Paint Annie Sloan Black White Wax

GreekBlue

Henrietta
Henrietta Sample Board

The Purple Painted Lady Henrietta Chalk Paint Annie Sloan Black White Wax

Henrietta

Honfleur

honfleur-chalk-paint-sample-boards-the-purple-painted-lady


Lem Lem 


Louis Blue
Louis Blue Sample - Copy

The Purple Painted Lady Louis Blue Chalk Paint Annie Sloan Black White Wax

LouisBlue

Napoleonic Blue

Napoleonic Blue Clear Dark Wax Annie Sloan Chalk Paint The Purple Painted Lady


The Purple Painted Lady Napoleonic Blue Chalk Paint Annie Sloan Black White Wax

NapoleonicBlue

Old Ochre

Old Ochre Sample Board - Copy

The Purple Painted Lady Old Ochre Chalk Paint Annie Sloan Black White Wax

OldOchre

Old Violet

Old Violet Sample Board

The Purple Painted Lady Old Violet Chalk Paint Annie Sloan Black White Wax

OldViolet

Old White

Old White Sample Board

The Purple Painted Lady Old White Chalk Paint Annie Sloan Black White Wax

Olive

Olive Sample Board - Copy

The Purple Painted Lady Olive Chalk Paint Annie Sloan Black White Wax


Olive

Oxford Navy

Paloma

Paloma shown in front of Paris Grey Buffet

Paloma shown in front of Paris Grey Buffet

The Purple Painted Lady Paloma Chalk Paint Annie Sloan Black White Wax

Paloma

Paris Grey
Paris Grey Sample Board

The Purple Painted Lady Paris Grey Chalk Paint Annie Sloan Black White Wax

ParisGrey

Primer Red

Primer red sample with clear and dark wax

The Purple Painted Lady Primer Red Chalk Paint Annie Sloan Black White Wax

PrimerRed

Provence

Provence Sample Board

The Purple Painted Lady Provence Chalk Paint Annie Sloan Black White Wax

Provence

Pure White
Pure White Sample Board

The Purple Painted Lady Pure White Chalk Paint Annie Sloan Black White Wax

PureWhite

Scandinavian Pink
Primer red Sample Board Comparison The Purple Painted Lady Chalk Paint Scandinavian Pink Chalk Paint

The Purple Painted Lady Scandinavian Pink Chalk Paint Annie Sloan Black White Wax

ScandinavianPink

Svenska Blue


Versailles

Versailles Sample Board

The Purple Painted Lady Versailles Chalk Paint Annie Sloan Black White Wax

Versailles