Creating a Diamond (Harlequin) Pattern

Cute Little Dresser- Basic Painting “How To” and Harelquin (Diamond) Pattern
On my Facebook Page I like to post notes about what I am doing in my shop- here is a flash from my past!

It was an adorable little dresser that I painted in many Chalk Paint® decorative paint by Annie Sloan colors: My color choices? Well…..I was a bit indecisive so I selected Paloma, Old White, Country Grey, Versailles, Emile, Henrietta & Old Ochre.

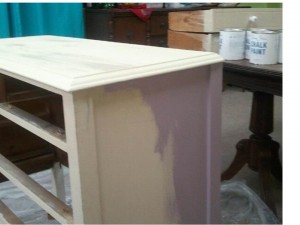
There are many reason why I love Chalk Paint®…one of them is the ease of use of the paint. It is exactly like how Annie Sloan describes it – it is a kind paint. First of all- it is super easy to apply. And – the process is super quick. All I did to “prep” this piece was wipe it down with some Odorless Mineral Spirits and I shop vac the drawers out. I started by painting the top in Annie Sloan Chalk Paint Old White..which took a whole 5 minutes.

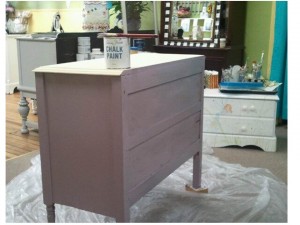
There was specs of dark “stain” on the top…and the Old White covered it all. Next I started to paint the body of it in Annie Sloan’s Emile- which is a beautiful warm soft aubergine color with pink red undertones giving it a rich complexity that makes a sophisticated lilac tone. I LOVE this color!!!!! I started the whole process at 11:03 am and finished painting the entire skeleton of the dresser within 15 minutes. (Now keep in mind- my store is open on Saturdays and I am doing this all the while I have visitors.) I didn’t use anything fancy to paint the dresser – in fact- I used one of my handy old brushes.

Here are a few suggestions that may be helpful for you.

1. I always put whatever I am painting, up on scrap blocks to elevate it off the floor. You can see my blocks in the photo above. It will make painting the ends of its legs easier, especially if you have a drop cloth on the floor. For some reason- drop cloths always bunch UP and get in the way of painting.

2. If you paint pieces to sell or if this is for your home…please don’t forget to paint the back of it. I like to use the analogy that when a woman goes to the hair dresser she still gets a cut & color on the back of her head…even though she cannot see it. The same applies to furniture. And this includes painting inside the drawers. By putting in this little extra effort – it gives the piece double duty in case you want to use it to divide a space in a room or, depending the size of the dresser, if it is small enough, place it at the foot of the bed. The back can be kept the same color, or use a surprise color! But definitely paint it. A piece that is painted all the way around – conveys that it has more value and commands a higher price)

3. That whole surprise color idea- applies to inside of the drawers too. Use a fun accent color for a bit of whimsy. Or- if this is for your teenage daughter who insisted she wanted her walls of her painted in bright neon orange, but you compromised on a different color- use the orange in the drawers! She will love it!!! Annie Sloan likes to refer to this surprise color inside as, “Quiet Riot.” I think that is so cute!

REMOVE THE HARDWARE:

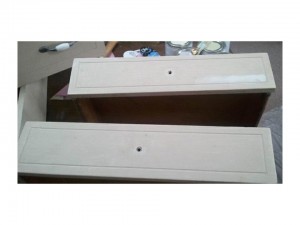
Now I know we are all in a hurry and time is of the essence- but go to the effort and take the knobs off the drawers as shown below. It will make painting much easier- and besides- now you can decide to use the existing knobs or purchase new ones without the worry of having to match the shape and size. Also, you won’t have the existing hardware painted on- which prevents switching them later. Seems elementary, but thought I should write it.

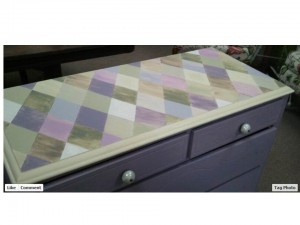
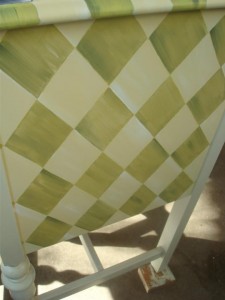
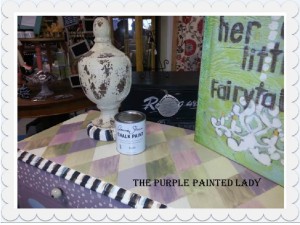
For the top of the dresser, I love whimsy. So, how about a little Harlequin design? I think….yes!
So many of you tape this pattern…and I often wonder why? That takes so much time and you run the possible risk of pulling up your previously painted base.

CREATING A TEMPLATE:

I personally like to create a template and then a simple grid…and map out my diamonds.

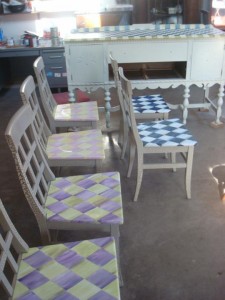
This process works great on dresser tops, the side of dressers, on buffet doors, front doors, seats of chairs, FLOORS!…..you name it! Keep reading below and you will understand!

To begin this “harlequin” step, first I determine what size I personally think would look good for the diamonds. I take a ruler and place it from the front to the back dresser and measure the depth. From here – I decided that three FULL diamonds or close to it would look best.

HELPFUL SUGGESTION:

When doing a layout of diamonds- personally I do not like seeing a diamond pattern on a piece of furniture where the diamonds are not centered and one side of the pattern is cut off,

OR

The last row of diamonds is cut off in half, but all other rows are full diamonds.  This looks very…amateur to me. (I apologize- if that offends you, but that is really what I think when I see a poorly planned pattern) So, take the extra minute and plan out your pattern.  Measure twice, so you can create a layout that looks cohesive and professional on the first attempt.

Take the measurement using a ruler and divide it by 3. (Find your old yard stick – and just make sure that the ruler is not bending or warped)

The rule of thumb for a Harlequin /diamond is that the height of the diamond should be twice the width.
This is just a guide- if you prefer more of a square shape- do that instead, this is your dresser.

Next, I created a template using card stock or some heavy paper. I mapped out my diamond, draw the shape using a pen, and then cut the shape out. I like to leave the lines visible inside my cut edge.
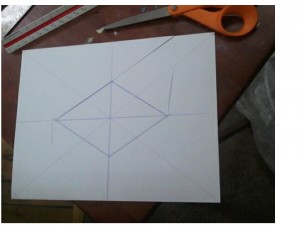
I then find the center point on top of my dresser and using water color pencils – I draw my lay out. Remember that watercolor pencils will blend once wet- so make sure to use a color lead that is similar to the color you plan on painting. Why is this helpful? Well, if you are doing a layout and plan to paint pink diamonds on a white base- choose a light pink watercolor pencil. Once you paint over the pink lines- they will blend in perfectly with your design, versus the grey from a graphite pencil.

So, just in case you missed what I was trying to stress above…..never use regular lead / graphite pencils since the lead smears and is difficult to cover. And although Chalk Paint® has wonderful coverage qualities, keep it easy for yourself – and do not use your kid’s school pencil. The Graphite pencil is a very stable material. It does not fade in light. It does not bleed in water unless other dyes are added and for other reasons, lead from “traditional” pencils can just be messy.

WHERE TO BUY WATERCOLOR PENCILS:

I typically buy my watercolor pencils from Hobby Lobby or Michael’s Crafts, but I think you can find them at WalMart too.

watercolor pencil

How I approach this is that I make a grid to find the center point easily. I place my “diamond” template centered on top of the dresser and begin my layout always using either a watercolor pencil (some people use a piece of chalk- but I don’t – they tend to smear a little)

Again…I suggest to not use your run of the mill lead or graphite pencil because depending on the paint you are using- it can be a bear to cover and the lead will smear in you paint and alter the color.

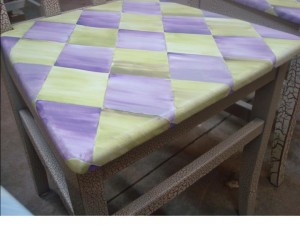
When I painted the diamonds in using about 6 different colors- to get more interest- I would thin out the paint- almost to a “wash” consistency just to get variation in hue and depth of color. It gives the piece more of a water color feel. I personally- like to make sure that the brush strokes always go in the same direction. Also- use a “Flat Bristle” artist’s brush. Click HERE to see an example of some at Hobby Lobby.

Flat Brush Hobby Lobby

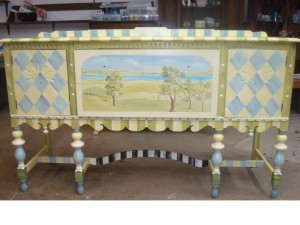
When I was doing all of this – my shop was open and I had multiple paint sales and people coming in with questions about Chalk Paint®. So- I did not finish the piece that day. Below are some additional photos of how it looked through the progress. I painted out the front panel on the drawers in a cream because my next step after finishing the harlequin pattern was to add a pretty landscape of one of our beautiful NY Finger Lakes.


For this project- I used my Chalk Paint® by Annie Sloan​ as if I was painting with water colors. I mixed the paint with water to give it a soft, muted effect.   To do this, I will use a picnic styrofoam plate.  This allows me to put paint in one section, water in another- and then I will use the remaining compartments to mix water in different amounts to get a different degree of the color.Styrofoam plate The Purple Painted Lady


Side of buffet

  • HandPainted Buffet
    Slide2
    Buffet and chairs PORTRAIT
    Slide 10 2nd table top view
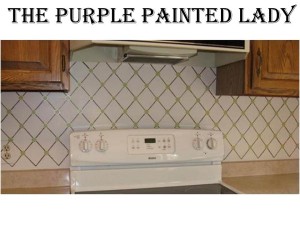
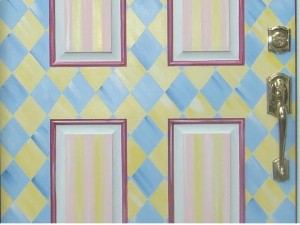
    Harlequin kitchen backsplash with nameHarelquin website picmonkeyLisa Close up of door

Visit our Facebook page HERE – we would LOVE to hear from you!

BUY PRODUCT FROM THE PURPLE PAINTED LADY™:

As for buying any of the products we mentioned earlier in this post- I hope that you select The Purple Painted Lady™ to be your one stop resource!  We have four locations in western NY.  Check out our Information tab and come and meet us!  Otherwise- if you are not located near me- the following information may apply to you.  This information is directed to those who do NOT have a local stockist.  Because if you do – go and meet them, shop from them and build a relationship with them.  The guidance, information and knowledge they share with you – will be invaluable.  But, if you are in a location where there is no one selling paint products- and you must buy on-line- consider us.  With that said, visit www.anniesloan.com to find a stockist near you.
 
We are here to help you, our customers!  We want you to be successful!  And, just so you know, when you place an order with The Purple Painted Lady:
 
SOME OF THE REASONS OUR CUSTOMER SERVICE IS THE BEST:
 
*  We sell Chalk Paint® for $34.95
*  If you order before 3 pm EASTERN TIME any day Monday thru Friday – we will ship out your package that SAME day.
*  We ship orders out every since week day all over the US.
*  We offer the lowest flat rate UPS shipping cost so if you are one town away or 10 states away- the shipping cost is the same.
*  We have awesome follow up customer service, too!
 
 
And- it is my paint sales that keep me in business and allow me to be here to help you.  (my shameless but honest plug)    Here is a link to our on-line shop=>   http://shop.thepurplepaintedlady.com/
: )  And I will be here to help you as you progress through your future project!  And if I do say so myself- we offer the BEST customer service that you will ever experience!Lastly- if I was helpful to you- ….please consider leaving a positive review on my Facebook business page sharing your positive experience or thoughts about The Purple Painted Lady.  Here is a link to my Facebook page=>  http://www.facebook.com/pages/The-Purple-Painted-Lady/291882785710    This really helps me!  (wink, wink!)
XO
Trish

The Purple Painted Lady™ ~ the serial no. is 86/641,416 with the US Trademark Office

Tricia Migliore Kuntz ~The Purple Painted Lady ~
Design/Consulting, Kitchen Cabinet Refurbishing, Custom Painted Furniture, Chalk Paint® & MMS Milk Paint Retailer & herRochester Blogger

PHONE: 585-750-6056

Come visit us:

At our MAIN STORE at 77 West Main Street in Macedon, NY 14502 OR

STARTING JULY 1st, 2015 ~ 650 South Ave. in Rochester, NY 14620 OR

3200 West Ridge Road in Rochester, NY 14626 (The Shops On West Ridge) OR

Our Syracuse, NY location at 1 West Genesee Street in Baldwinsville, NY 13027

Please LIKE me on Facebook!   http://www.facebook.com/pages/The-Purple-Painted-Lady/291882785710
Check out our website and online store!   http://www.thepurplepaintedlady.com/

(How did I get that business name you ask?……I started the business in my 1885 purple painted Victorian – and I LOVE to paint – so the business name just fits perfectly!)

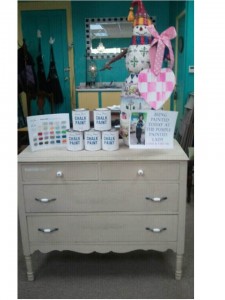
Do Your Kitchen Cabinets Look Tired?

Do your cabinets look tired?
OR, are you tired of your cabinets?

The easy, affordable and beautiful solution is to paint them using Chalk Paint decorative paint by Annie Sloan…the “No Stripping, No Sanding, No Priming” “World’s Best Paint!”
PicMonkey Collage The Purple Painted Lady Painted Caninets susan Old White

If interested in painting your cabinets but are afraid to- please don’t be. All of us at The Purple Painted Lady are here to help you through your project.

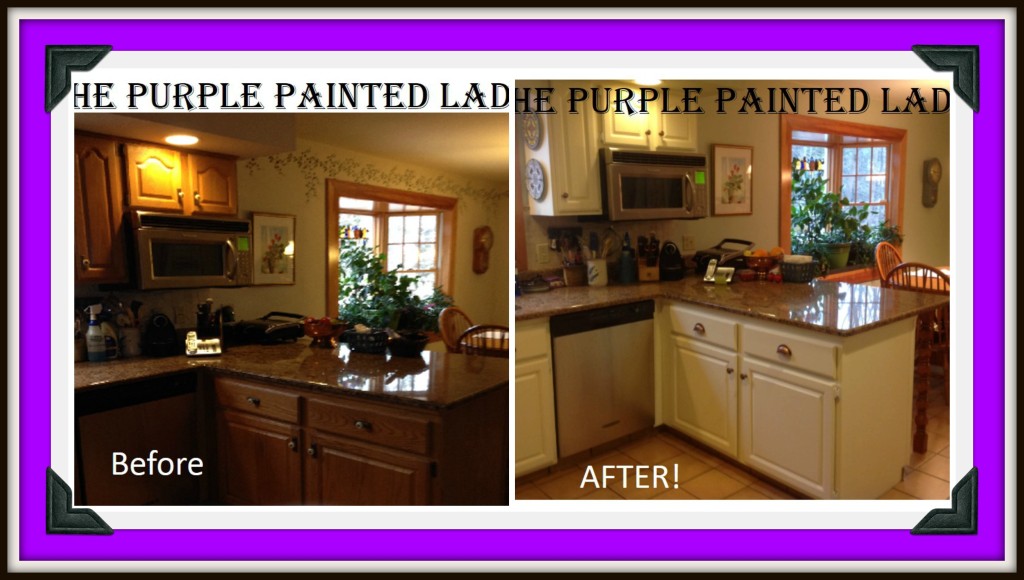
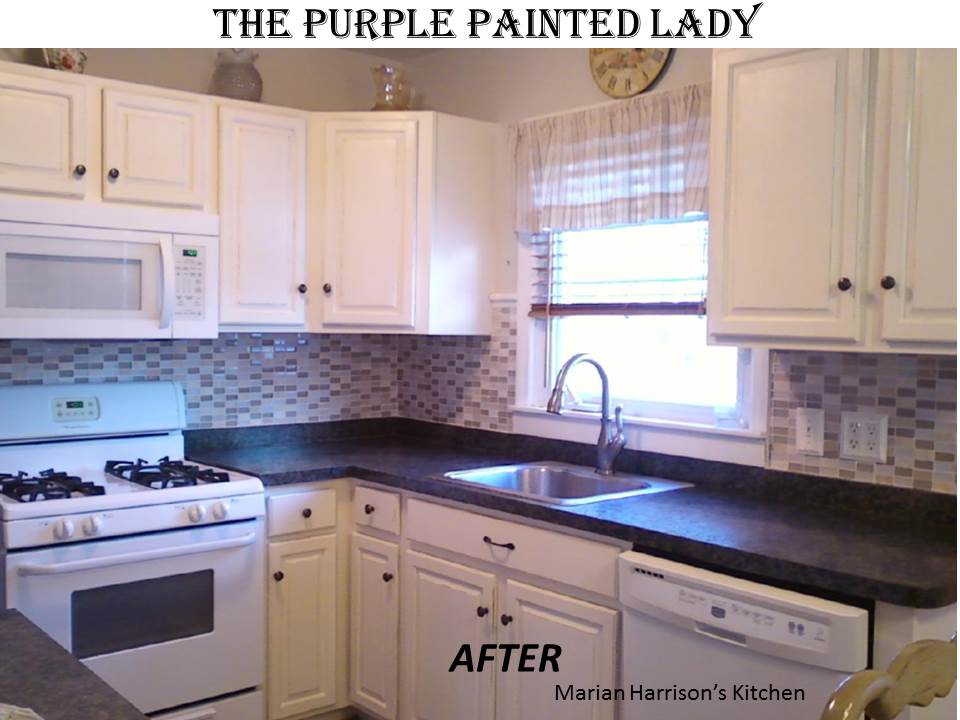
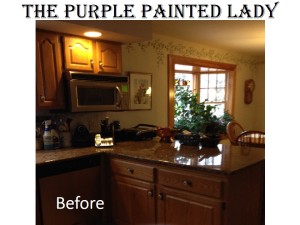
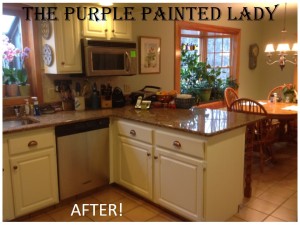
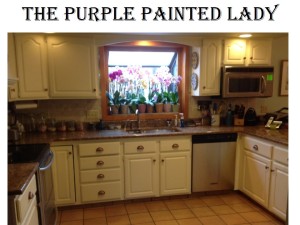
Check out the amazing transformation that my customer Marian Harrison completed in her kitchen. Between the two Before & After photos, nothing changed, other than the cabinets were painted and waxed.

Slide1
purple painted lady chalk paint

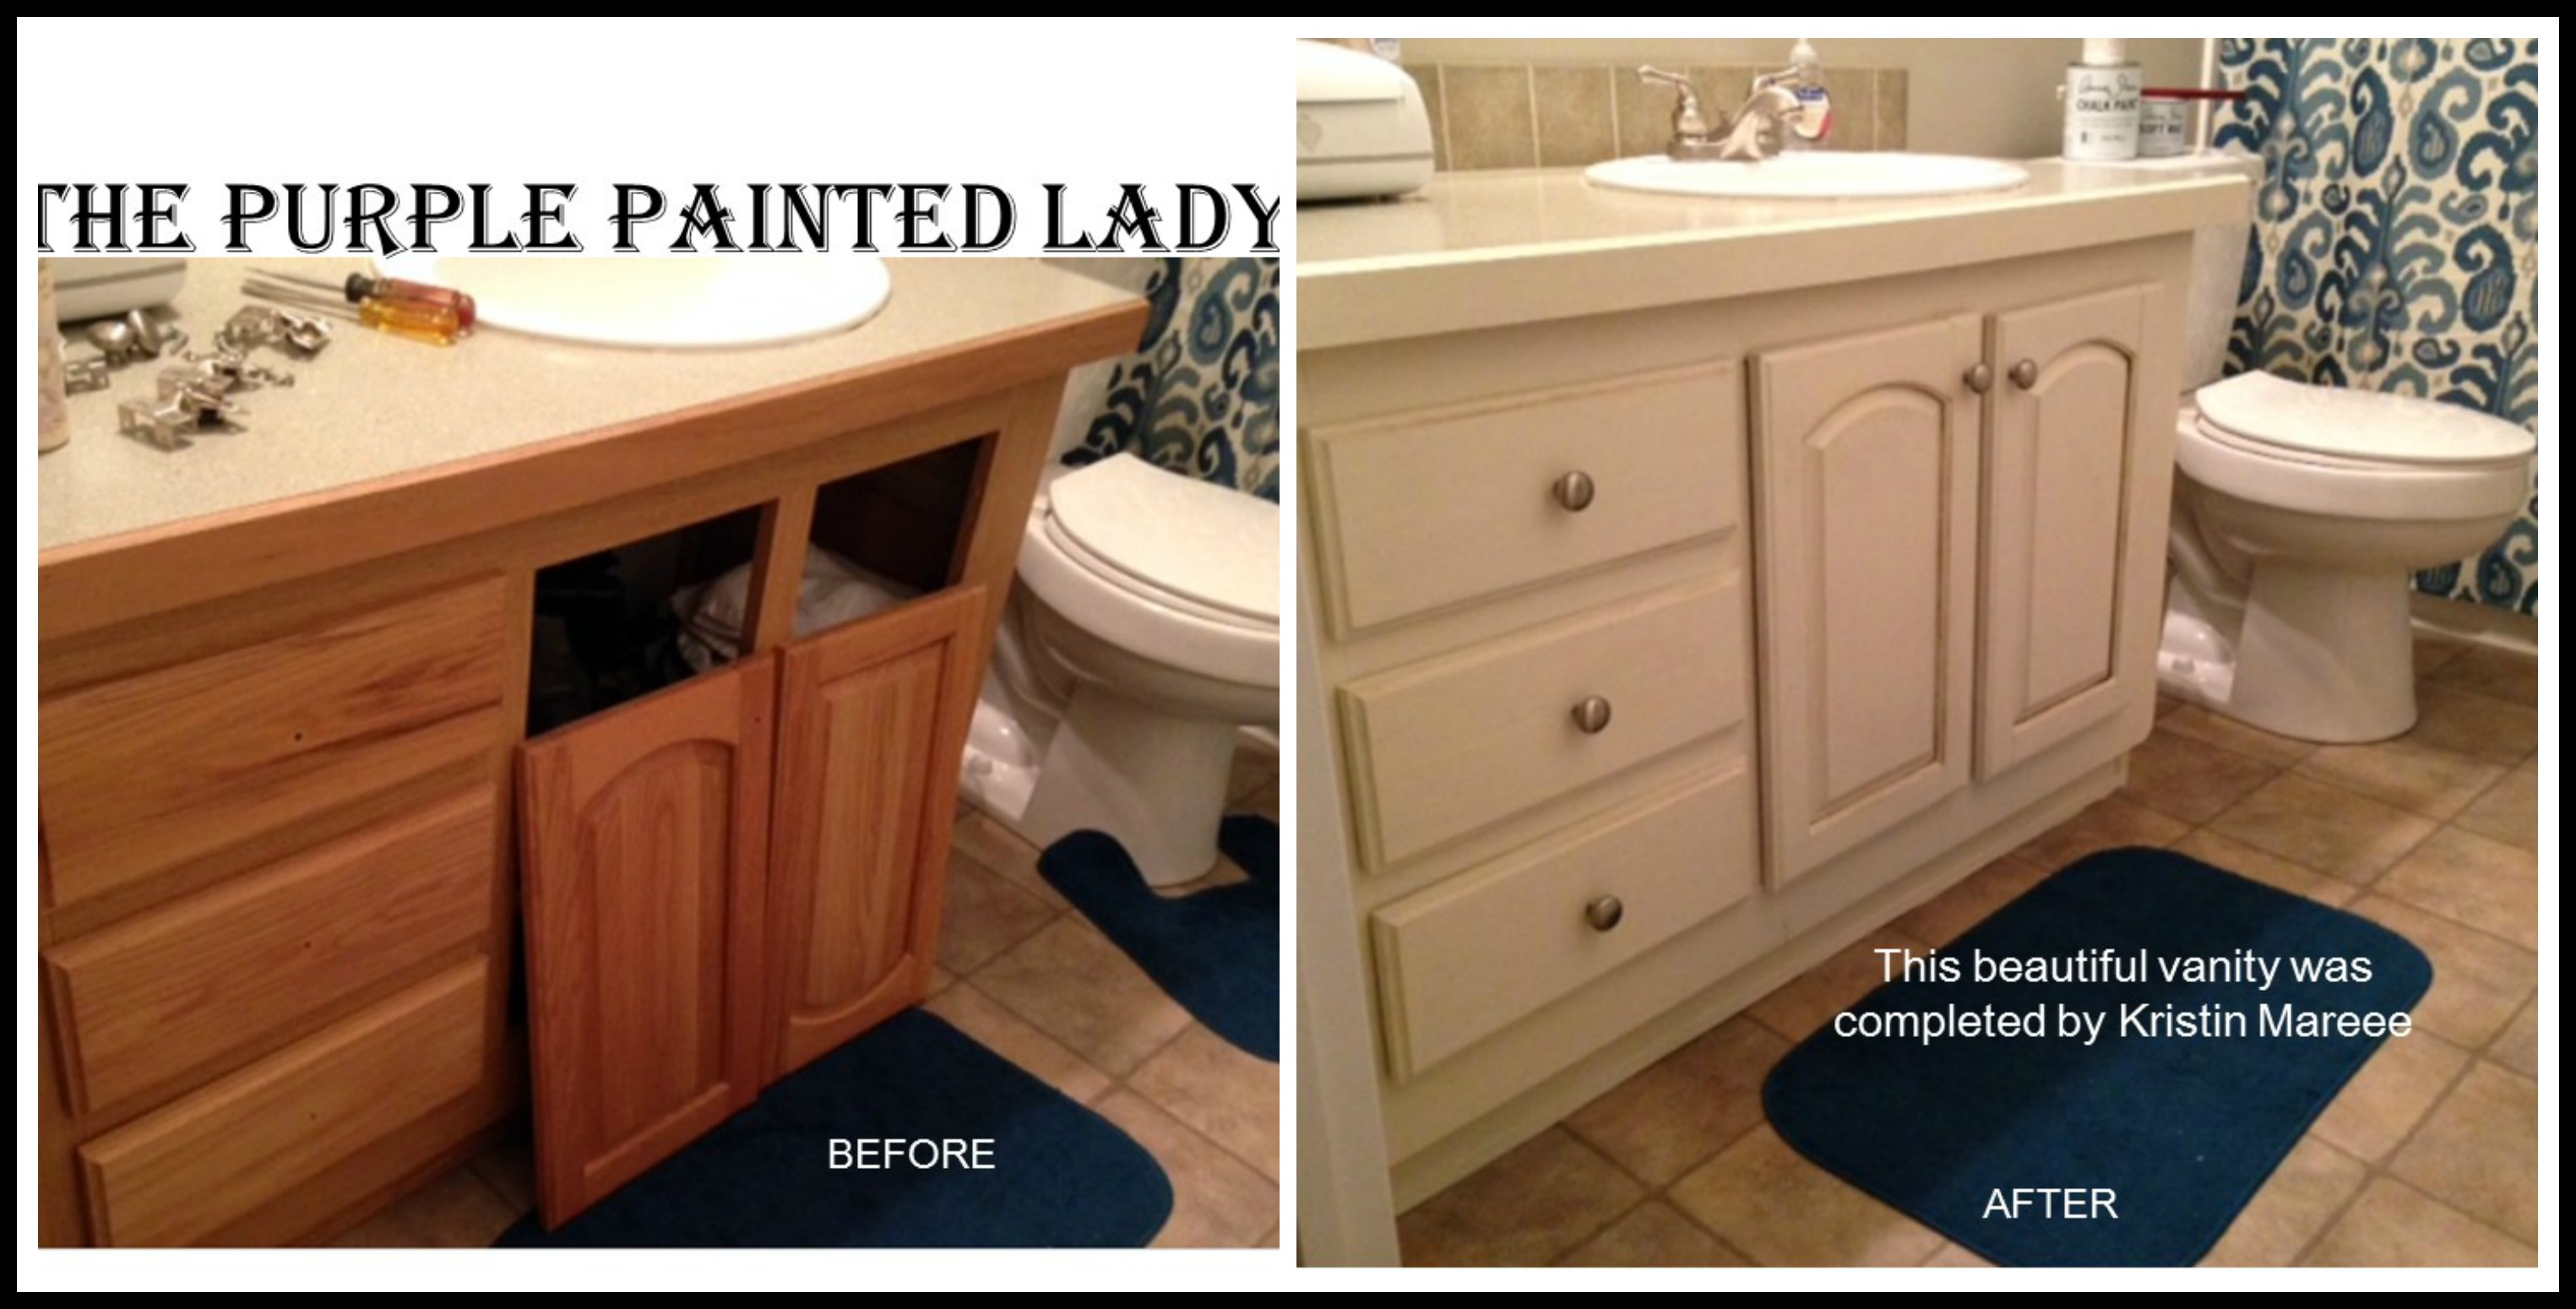
And that old bathroom vanity? Freshen it up!

The Purple Painted Lady Vanity Before & after Chalk Paint PicMonkey Collage

Amazing transformation, yes? I think so!

Many customers want to paint their kitchens but have questions, such as:

* What prep is there when painting a kitchen?

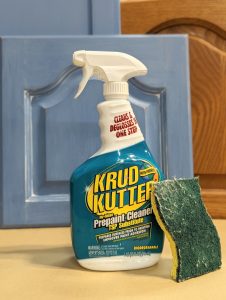
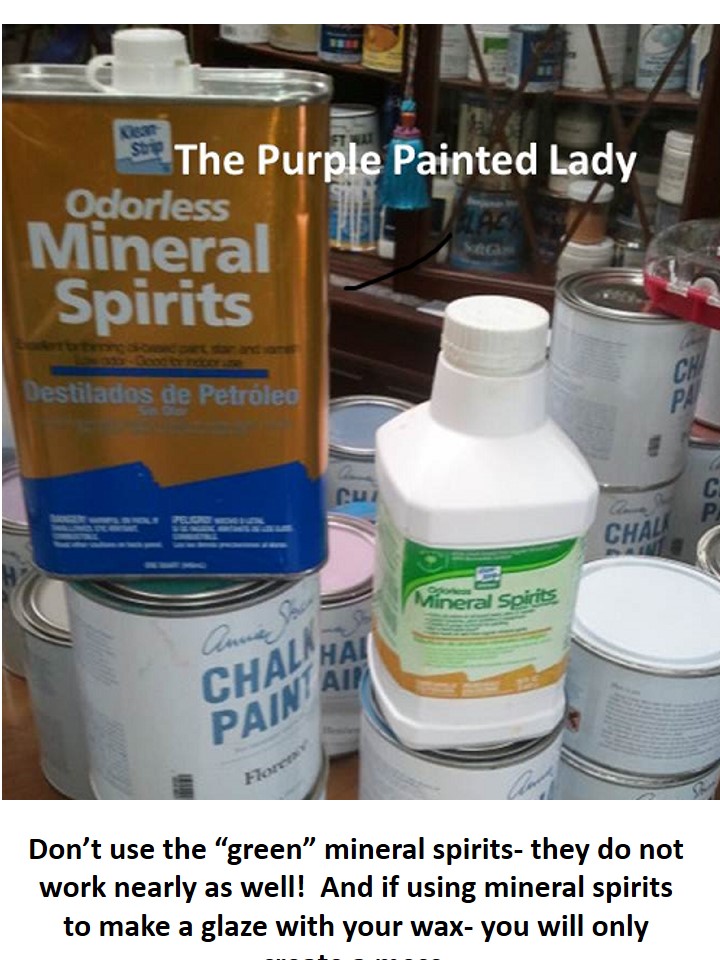
ANSWER: Before painting, it is necessary to clean your cabinets. When you cook, fry, broil or boil whatever you are making, even with a fan- steam goes into the air. It eventually settles on your cabinets. If you have children or a dog, who knows what else might be stuck to them. Get some Odorless Mineral Spirits and wipe down the cabinets using a rag or even a ScotchBrite Scrubbie. Note that the image of the Mineral Spirits shows different packaging that is available. The key thing here is to purchase the regular Odorless Mineral Spirits. NOT the environmentally green Mineral Spirits which is shown in the white packaging in the right of the photo. Mineral Spirits The Purple Painted Lady - Green vs Odorless regular

* Will the Chalk Paint adhere to the sides of my cabinets, they are made of a laminate material?  Can I paint my Laminated (faux wood) plasticie (is that even a word?) end caps?

YES- you can paint the laminate end cap. But you will want to lightly sand in the same direction you will apply your paint with a 180, 200 or 220 grit sanding block or paper.  ALWAYS sand in the same direction as the wood grain. (even if it is a faux wood grain.)

Then, clean the surface per the insructions we provide.

Thin your paint with a little water and paint a uniform, thin coat- making sure to “lay” your paint from top to bottom at the very end of every stroke- so you get rid of any small segmented brushstrokes. Then….WAIT 24 hours till you apply coat number two. Don’t try to scratch the paint with your thumbnail during this period…because you will be succussful.

There is a lot of chemistry in paint and you need to allow that chemistry to do it’s thing! Once all done painting, apply the wax top coat per the instructions and voila…..you will be amazed!

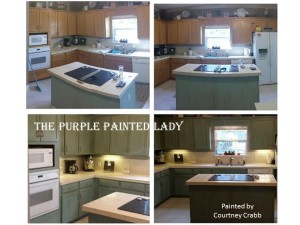
Painted Kitchen Cabinets Courtney Crabb MY CUSTOMER The Purple Painted Lady

* I have old cabinets and the protective top coat is worn, especially around the hardware. Is there anything I should do?
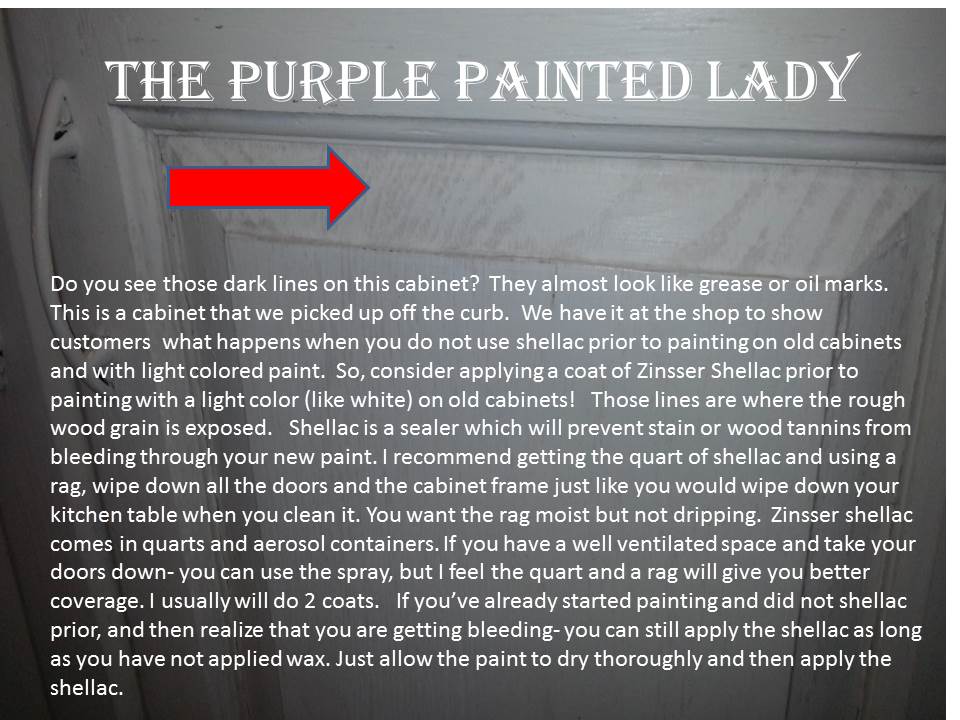
ANSWER: YES! You will most likely need to apply shellac to your doors. Shellac is a “sealer.” that means it seals in the surface – preventing stain or wood tannins from bleeding through to the paint.

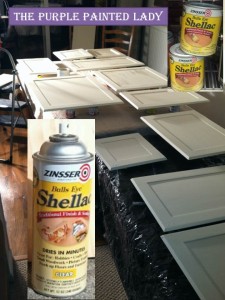
We prefer the clear Zinsser shellac. Again, note that shellac is a sealer so it will seal the surface preventing stain or wood tannins from bleeding through your new paint. I recommend getting the quart of shellac and using a rag, wipe down all the doors and the cabinet frame just like you would wipe down your kitchen table when you clean it. You want the rag moist but not dripping. I cover the whole cabinet in a linear fashion, making sure to NOT miss any spot and to catch the edges also!

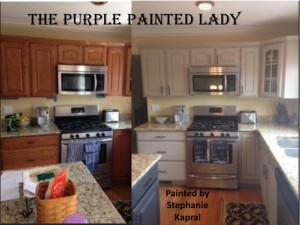
Kitchen Cabinet Stephanie Kapral MY CUSTOMER The Purple Painted Lady Chalk Paint

Spraying the shellac using an aerosol can is also an option. I have done this many times. On a small job this is good, but remember to spray 2 coats. Aerosol cans of shellac will cost more than buying the quart, so for large jobs- I recommend the quart.
Kitchen Cabinets shellac Zinsser

Zinsser shellac comes in quarts and aerosol containers. If you have a well ventilated space and take your doors down- you can use the spray, but I feel the quart and a rag will give you better coverage. I usually will do 2 coats.

If you already started painting and did not shellac prior, and then realize that you are getting bleeding- you can still apply the shellac. Just allow the paint to dry thoroughly and then apply the shellac. when to use shellac on kitchen cabinets bleed tannin

* Do I have to take the doors off to paint using Chalk Paint?

ANSWER: NO…you can leave the doors hinged and on the cabinets when painting. Many do this! However, when I am painting a kitchen- I typically take the doors off and will number them. I then lay them down flat and process them a bit like a production line. If you choose to paint them while they are hanging and plan on painting the hinges, just lightly dry brush the hinges so they are not “caked” with paint.
Raw Cabinets

* How do I calculate how much paint I need?

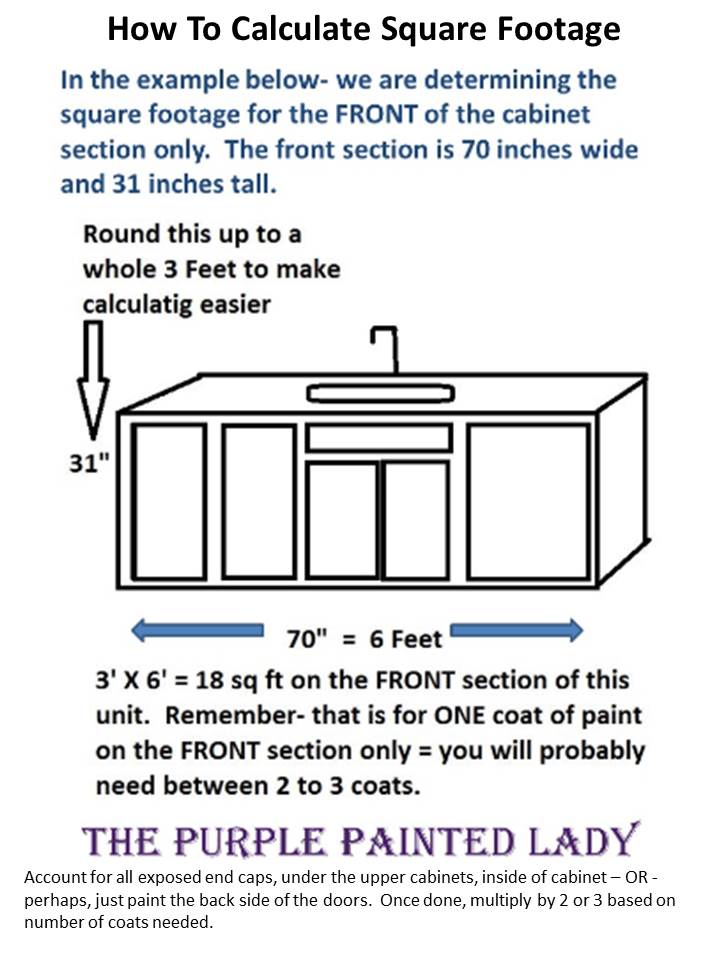
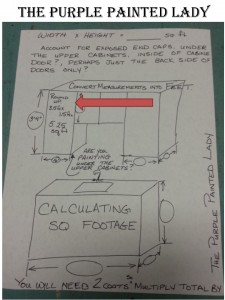
ANSWER: I will take a piece of paper and make a drawing of the kitchen layout. Literally drawing out the each section of cabinets. I then note the height, width and depth of the cabinets. You need these measurements in order to determine the square footage.

Calculating the square footage is very easy. For each section, multiply the height times the width. The result is your square footage for that section.

Once you have this initial number- understand that this would be for only one coat of paint. A typical kitchen project will take 2 coats. Sometimes, even 3 coats of paint depending on the color you select and the color of your cabinets.

Because you will probably need 2 coats of paint- you will need to double your square footage in the end. Also- don’t forget to paint the underside of your top cabinets. This is the part that is directly over your counter top. And- are you planning on painting the inside of the door? If yes, (and most do) account for that in your total.

A quart of Chalk Paint® will roughly cover about 150 square feet. So take your total amount of square footage and divide by 150. The number from this calculation will be how many quarts of paint you need. And always error on the side of an additional quart so you have enough for your project.
Old Ochre Cabinet with name

* I want durability- will this paint work?

ANSWER: Yes! Chalk Paint® is extremely durable and when you finish the paint with the wax- it becomes even harder. Something I suggest to my “kitchen Cabinet” painting customers is to apply a uniform – thin even coat of paint and then wait 24 hours before painting the second coat. There is a lot of science that goes into paint products in general. In the first 24 hours- the paint will really bear down and tighten its grip to the surface. I was once told to think of the paint molecules as floating around with space between them, then as it dries over that first 24 hours- the space between them gets smaller and the paint gets tighter against the surface. Allow science to do its thing and for the first coat of paint to have 24 hours.

* What is the process when it comes to painting cabinets using Chalk Paint®?

ANSWER: If you are looking for texture, use the Chalk Paint® directly from the quart in the consistency it is made in. However, if you are looking for a more traditional smooth finish, consider applying your first coat directly from the quart. Once the first coat is dry, pour some of your Chalk Paint® into another container and add some water to thin it. I would say add about 10 to 15% water in comparison to your paint. Use a cheap measuring cup so you can easily reproduce this thinned mixture. Apply your second coat of pant with this thinned Chalk Paint®. This will allow to get a smoother finish and it will even stretch your paint a bit.
The Purple Painted Lady apply chalk paint thinned with water to cabinets during second coat kitchen bathroom

* Can I paint the cabinets outside in my garage?

ANSWER: Maybe! You should only paint pieces, cabinets or any furniture for that matter if it is at room temperature consistently. The same goes for all of your paint products. Never let them freeze or sit in a 100 degree garage. Temperature will effect your products. This recommendation applies to even while they are drying, curing and the time in between!

A space heater is not adequate and definitely not sufficient if only being used while you are in the workspace.

The best thing to do – is set up a painting area in the house where you know the temperatures will be within normal range consistently and that there will not be any excessive dust.

* Should I paint the inside of the cabinets?

The answer to that is really totally up to you. I always paint the back of the door, but not always do we paint inside the cabinet box. It will add more time and cost to the project and many people are fine with leaving them as is…so consider what is best for you. Consider though when it comes to the resale of your home- having the inside of your cabinets finished nicely is a plus!

* What type of brush should I use?

We recommend using a natural bristle brush. Annie Sloan has amazing brushes available-but I still like to use a 1.5 inch Purdy brush that has an angled brush. These are very nice if you are “cutting” an edge.

* How many coats of wax do you recommend?

I always apply two coats of wax on cabinets that I am doing. Three if I need to add a dark wax glaze.

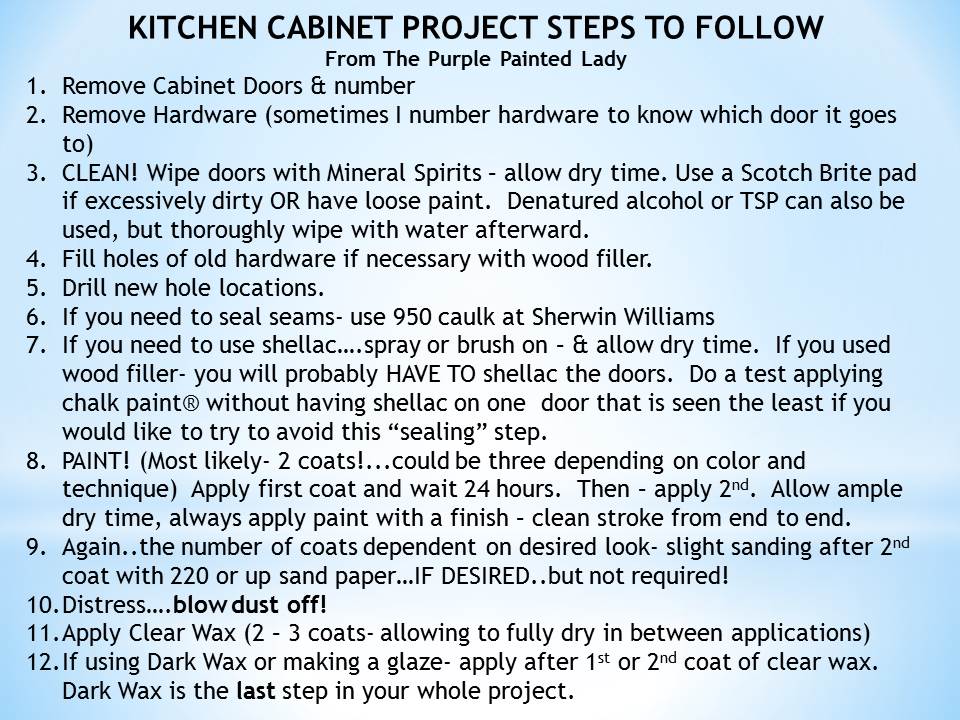
Here is some additional high level information / steps to reference if planning on doing your kitchen.

Lastly- please consider using The Purple Painted Lady if needing to purchase your chalk paint on-line.

Thanks,
Trish
Kitchen Cab ReFAB workshop Facebook 2014
The Purple Painted Lady Kitchen BEFORE AFTER SUsan Old White 1

The Purple Painted Lady Kitchen BEFORE AFTER SUsan Old White 2
The Purple Painted Lady Kitchen BEFORE AFTER SUsan Old White 3

Do You Paint Pieces Professionally- Always Have A Contract

Some of you may be able to relate to this scenario ~ you learn about Chalk Paint decorative paint by Annie Sloan and decide to buy some. You get it, paint something in your home and everyone loves it.

Then all of a sudden…BAM! People are asking you to paint pieces for them.

If you start doing projects for others and don’t write up a contract- you are setting yourself up for an eventual problem.

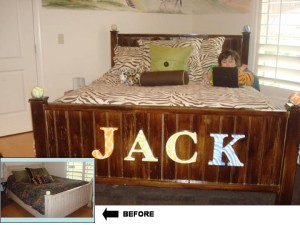
Bed with before and afterI always write up a contract using Microsoft Word. Here are some things I account for when creating one.
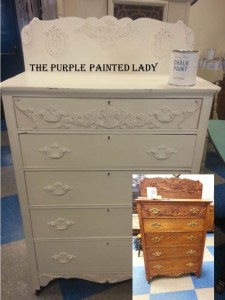
Old White dresser Before and after

Always list out the following in a contract:

Note the customer’s contact information such as address, cell phone, email.

Specify the dimensions of the piece. This is especially important if you quoted the piece via email. Sometimes people make mistakes in estimating the size of their furniture. If it arrives bigger than what was quoted- increase your price since you will use more materials and spend more time on it.

Note down the required preparation you will have to do, such as cleaning, sanding out scratches, applying wood filler, applying shellac, etc?

Specify the paint color(s) that are to be used.

How many coats of each color will be applied- (sometimes I note a minimum of 2 coats of paint.)

What is the type of finish your client desires? (smooth, are visible brushstrokes ok?)

If you will need to sand to reduce brushstrokes (charge more!)
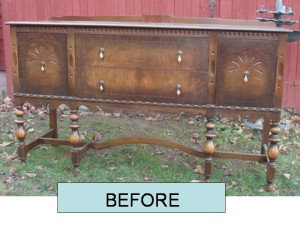
Does your client want distressing? If yes, how much? Do they want it just on the corners and edges- or more aggressive distressing on even some of the flat surfaces?

Specify the top coat you will use. I prefer wax! So, specify color of wax, number of applications of wax.

Will there be gilding applied? If yes, specify how heavy it will appear and approximate locations.
Slide1Slide2

Will existing hardware be used? Or will new hardware be used? If new- do new holes need to be drilled and old holes filled? (requiring wood fill & shellac)
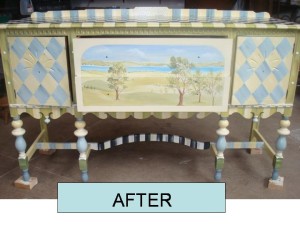
If current hardware will be used, will it be painted or left as is?

Are you painting the hinges or not?

What about the inside of the piece? Will it be painted & waxed? (charge more!)

I like to suggest a fun color for inside drawers.

Note if there are requests to change the contract after it has been signed – the customer will potentially incur an additional expense.

Do you offer pick up and delivery to and from the customer’s home? Account for this time and expense.)

Make sure that the piece is properly stretched wrapped for delivery to ensure safety. Include the cost of all materials in your quote estimate.

I always note that the piece is to be paid in full upon delivery. If payment is not made within 30 days of completion, piece becomes the property of “your business.”

Include an image of the piece you are painting “as is” before painting.

Always ask customers if there is an example on-line of a piece they want theirs to look like once done (include that “inspiration” image and url to find it again on line in the contract.) This will be very helpful for you when you go back to the contract later in time since it will remind you all that you need to do!

Add a notation that all hand painted pieces will have unique characteristics.

And lastly- the more detailed architecture on a piece of furniture equates to more time you will spend painting and waxing. Always make sure to account for that in your quote calculation.

I personally like to paint the back of all pieces I do and the bottom (but do not wax.) The “bottom” meaning if you were laying on the ground looking up – it is all painted!

Protect yourself after delivering the furniture by including a care tag for the customer so they know how to properly maintain their painted piece! I wrote a post with some suggestions on what to include in your care tag. Click HERE to read that post.

And lastly, I add a note that the “delivery date” is a target date and based on being a small business- adjustments may happen. (I do this cover to myself in case of delays) Have the customer sign off and date your contract and give them a copy. This was especially helpful last month when my husband and I experienced quite a few deaths in our families. For four weeks in a row, we lost someone. Between calling hours and funerals and emotional stress- it impacted me and my work schedule.
Slide1
Well, I hope that this information helps you in regards to some of the things I account for in a custom painting contract. It is so important that you not only deliver an incredible, high quality piece to your customers that knocks their socks off, but also- protect yourself from a business perspective. Now- if you can help me in return….. : )

If you ever need to purchase Annie Sloan Products –I would hope you would consider doing so through me! (The Purple Painted Lady) I ship out every week day all over the US. I included a link below to my on-line shop below. We offer the lowest flat rate UPS shipping cost so if you are one town away or 10 states away- the shipping cost is the same. Also- it is my paint sales that keep me in business and allow me to be here to help you. (my shameless but honest plug) And I will be here to help you as you progress through your future project! And if I do say so myself- we offer the BEST customer service that you will ever experience!
Rochester Woman Mag Ad Proposal before and after
And lastly- if I was helpful to you- ….please consider leaving a comment on my Facebook business page sharing your positive experience or thoughts about The Purple Painted Lady. Click HERE to access my Facebook page.

Stay warm everyone!
Trish ~ The Purple Painted Lady

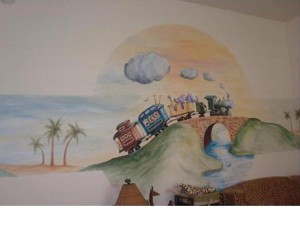
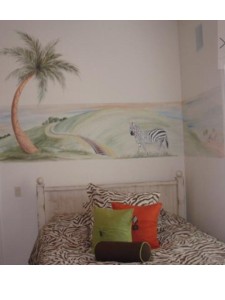
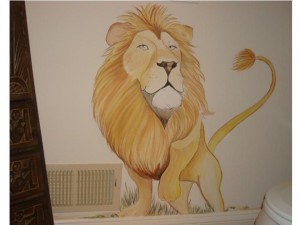
If you are interested in the child’s bed I did above- it was an additional project from the mural job I completed at a home. After I was done with the walls- I just felt the bed needed to weight the room better- so I stained it and added simple store bought letters that I painted in animal prints. I used Velcro to attach the letters. Super easy and cute! Here are some images of the mural I did.

Train The Little Engine That Could
Zebra JACKS Full wall shot
monkey elephant
lion with grass

Do You Paint Pieces Professionally – Always Wrap Pieces Before Delivering

Do you paint pieces of furniture for customers?

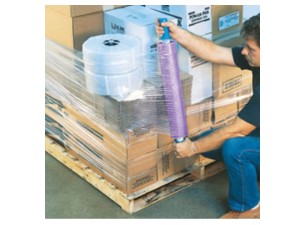
If yes, do you use stretch wrap to prepare them for delivery back to your customer?…

If your answer is “no” – you really need to get some. The stuff is awesome!

Stretch wrap

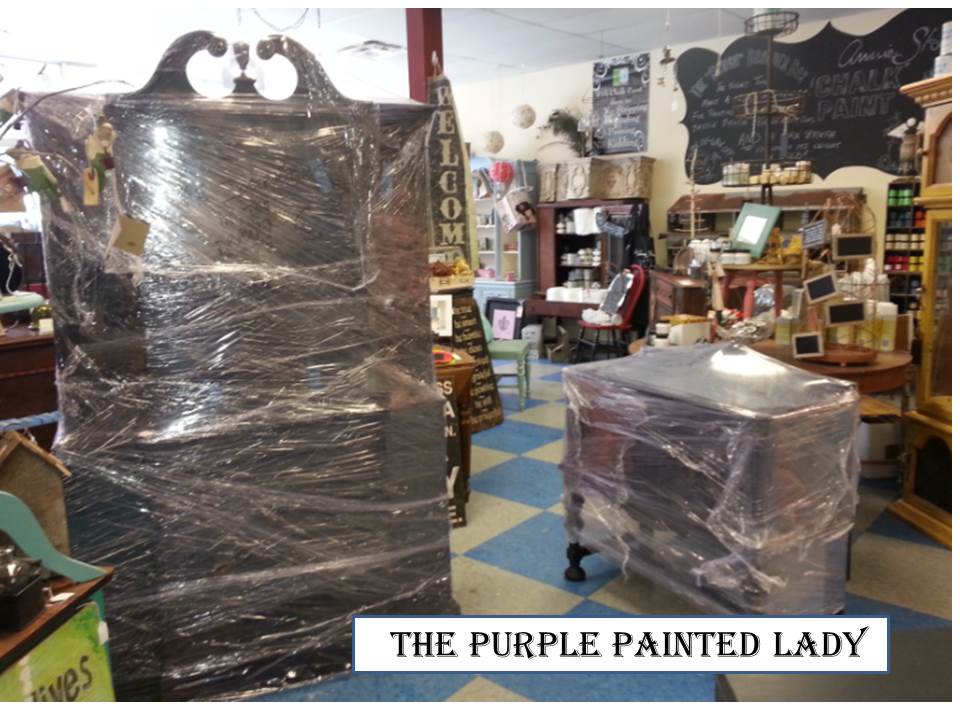
Today we are delivering a hutch and a buffet that I painted with Chalk Paint decorative paint by Annie Sloan using the color Graphite. I mixed three (1 ounce) bottles of India Ink in with the Graphite and it made the Graphite become a deep, rich black!

During the move, we are touching the hinges on the trailer, opening doors to get out, and the weather may not always be picture perfect. So, the stretch wrap totally protects a painted piece from all of those variables. And since the piece is painted in black- any little thing will be visible on it. Just like the example that in dark colored cars- finger prints, dirt and dings are more easily seen compared to light colored cars. Seriously- next time you are on the road- pay attention to the black cars and see how obvious the dirt is versus a white car. However, in my case- it does not matter what color I have painted a piece- every piece gets the “white glove” treatment and I use commercial stretch wrap all over to protect it.

Buffet Graphite India Ink Jan 2014

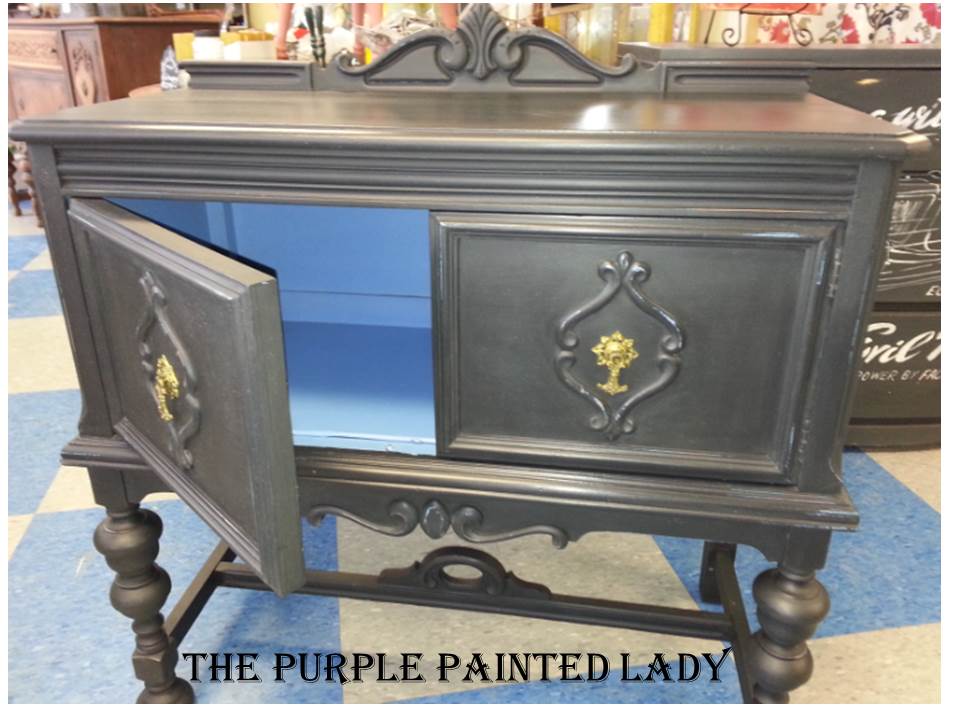
So, do you like the buffet? My customer requested that it be painted first with Greek Blue and then finished in “black.” The inside has that “Quiet Riot” effect that Annie Sloan references in her one of her awesome books since I painted the inside in Greek blue.

hutch buffet 2014 January Lower name

And- since this was painted in Graphite- by using stretch wrap, it really eliminates the issue of finger prints all over it. I just recommend that you wrap your piece just before it leaves your shop and unwrap it immediately once in place at your customer site.

So, if you paint pieces for customers, give them the “white glove” treatment and invest in some stretch wrap. It is awesome since it protects the piece and an additional benefit, is that it keeps doors and drawers from opening during the move. You do not need to worry as much if it is sprinkling out or in my case, snowing! It also looks very professional!

Uline is a great source for stretch wrap. Check out Uline HERE.

And….if you are interested in purchasing India Ink- click HERE.

If you are interested in purchasing Graphite Chalk Paint – click HERE.

Are you interested in purchasing one of Annie’s books – click HERE.

So, if you think the information I share here on my website is helpful- please consider LIKING my Facebook page. Click HERE to access my Facebook page and make sure to click the “LIKE” button that is to the right under the banner photos across the top of the page.
Facebook Interest Feed

Thanks so much!
Trish

Option For Making Graphite Chalk Paint

Chalk Paint® decorative paints by Annie Sloan are beautiful and I personally, love the color of Graphite.

It is a rich color -close to being a slate, or think …dark pencil lead. And depending on the orientation of the surface painted- it can appear darker or lighter. It does have depth and interest- and clearly plays wonderfully with other pieces painted in a true black. When decorating a room- try to avoid the whole “Matchy-matchy” approach. Layer texture, patterns and hues of color – including various shades of black.