French Gilding Wax- Adding Ooh-la-la For Minimal Moola-la!

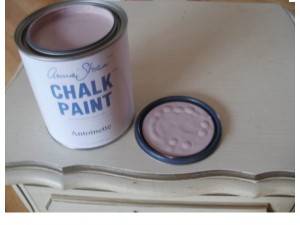
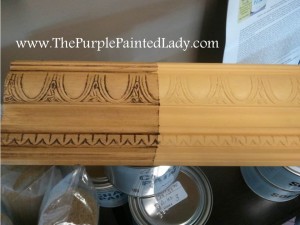
I was playing around the other day with a sample board at the shop. First I painted it with Antoinette Chalk Paint® Decorative Paint by Annie Sloan and then – while it was still wet- wiped a good amount of the Chalk Paint® off. Not sure why I chose to do that- but I did.

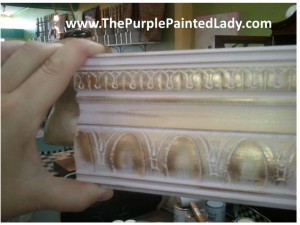
Although the washed off sample board had a simple look- I still thought it was pretty. But then I realized how much nicer it would be by applying a little French Gilding Wax.

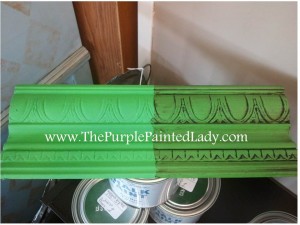
Immediately I realized how the French Gilding Wax transformed something that was simple & pretty- to something that was haute & exquisite. It made me think, “French Gilding Wax- Adding Ooh-la-la- for minimal Moola-la!” ..and thus, this post began to unfold. Click HERE to see all of the Gilding available on our website.

French Gilding Wax is so easy to use! No fancy tool, just literally opened the top of the 30 ml glass container and using my finger- lightly touched the creamy Gilding Wax. It has a smooth-silky feel to it! Very luscious.

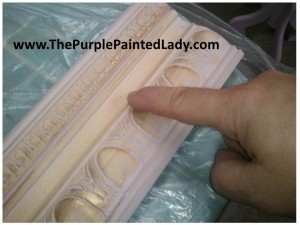
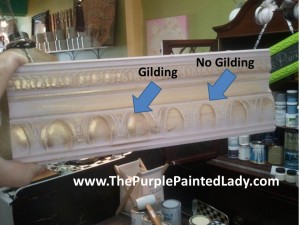
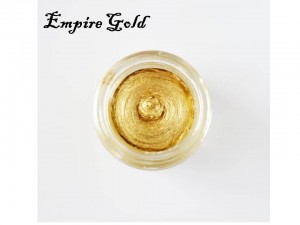
Using my pointer finger, I rubbed some of the Empire Gold Gilding Wax to my sample board…and WOW! The areas I wanted to accentuate- danced with luster. The French Gilding Wax was incredibly easy to use and I immediately started to think of all the projects I plan on using this with.

Click HERE to see a quick VIDEO showing me using Gilding Wax.

Then CLICK HERE to read another post with more examples that I used Gilding Wax on.

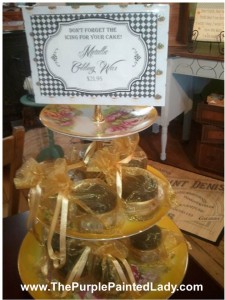
The Purple Painted Lady carries quite a few different colored French Gilding Wax colors. By clicking on the name of the gilding wax below, it will launch you to the item in my on-line shopping cart. French Gilding Wax is sold for $21.95 per container.:

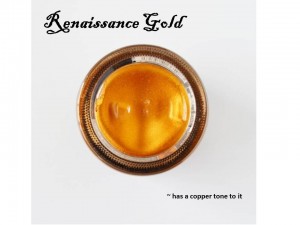
Renaissance Gold

This gilding wax is the darkest of them all. It has a slight copper tone to it- definitely more red within this gold compared to King’s Gold or Empire Gold.


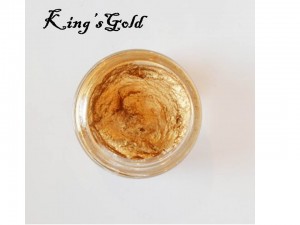
King’s Gold

In the spectrum of gilding wax- this color is not as deep as the Renaissance- but not as pale as the Empire Gold. If I was Goldy Lock’s – I guess I could say this one is just right.


Empire Gold

Empire Gold is more of a pale gold…softer and toned down compared to the King’s or Renaissance.


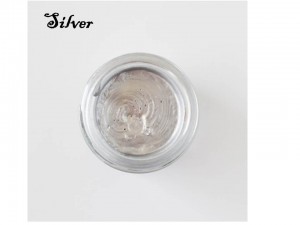
Silver

This is self-explanatory. Perfect compliment for a cool metallic, versus going with a warm gold.


Again, the French Gilding Wax is a beautiful way to accent a piece by either kissing just the corners of your piece with it or going all out and using it as a trim. The degree of icing is totally up to you.
So, what do you think about French Gilding Wax? Would you like to try it?


Here is another example of using the Pewter Tim Gilding:

the purple painted lady Leslie Pewter Gilding Graphite

The dresser above was done by Leslie. If you are going for that Industrial / Metal look- than follow the steps she did.

She used the Pewter Tin Gilding Wax and Chalk Paint®! We love the way this piece turned out!

Graphite with both Clear Wax and Pewter Tin Gilding. She applied the Pewter Gilding using her Ultimate Wax Brush like normal wax; first swirling and then ……she dragged it in direction of grain to finish. Love the high/lows giving it an”old” feeling. Looks old but with that contemporary flair.

Kitchen Cabinet Q&A from a Customer!

Seems like we have painted quite a few kitchens lately and I just received this question from Brenda in Ohio.

On 9/15/2012 2:09 PM, Brenda wrote:
Hi Trish -I ordered some chalk paint® and wax from you a couple of wks ago with the intent to use on my kitchen cabinets. Currently, they are that ugly orangey wood (pine, I think) with what looks like lots of poly coats. I am looking for a somewhat smooth finish – not planning to distress it at all. First, do you think this is the right paint for this job? If so, should I prime first? Should I sand it first (please say no, haha!) Can I use a roller to apply this type of paint (both for ease of painting and for a smoother finish than a brush will provide).
One more thing – is there a wax brush you can recommend besides the Annie Sloan one?
Any suggestions would be awesome! ~ Thanks! Brenda

Here is The Purple Painted Lady’s Response

Hey Brenda,

Thank you for choosing The Purple Painted Lady to give your business to. That is honor and we do not take it lightly. With that said- of course I do not mind helping you.

Your kitchen cabinet situation sounds like a typical scenario that Chalk Paint® would be perfect for. HOWEVER…you never mentioned what color Chalk Paint® Decorative Paint by Annie Sloan you are choosing to paint over the cabinets and I am curious of how many cabinets you are going to paint.

Here is how I would approach your specific cabinet job.

I would ……..

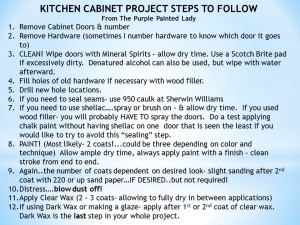
1. If these are not brand new cabinets- please wipe cabinets down with Mineral Spirits. I like to use the odorless spirits versus the “green” and would recommend Walmart Supercenter, Lowes or Home Depot for this. When you use the Mineral Spirits…the amount you need is not a lot- so your rag should not be dripping with Mineral Spirits. I use the analogy of nail polish remover. Take a rag and place on top of the mineral spirits and flip it over to get a few dabs of it on the rag. You want it moist, but not saturated. Hope that makes sense! Then- thoroughly wipe down the cabinets- concentrating a bit more around the handles and on the doors that are positioned in your kitchen that may get extra dirty (like near the dogs water and food dish OR near the garbage can) After wiping down the cabinets- (give it an hour for the mineral spirits to have totally evaporated) If you have filthy cabinets (sorry to insinuate anything) – but if your cabinets are well loved- and you have crud on them, use a Scotchbrite scrubbie with Mineral Spirits. These are those yellow sponges with the scratchy (abrasive) green fibers on one side.

2. I typically remove the doors and remove handle hardware (and other hinge hardware) if it is in the way when painting fronts. Leave the hardware and screws in the actual cabinet – so you know which hardware and screws go to which door. This can save you time afterward- since I had a job once where the screws were different sizes and it took forever to figure it all out during the installation part and I almost pulled out all of my hair in the process. If you have many cabinets- consider drawing on a piece of paper a layout of the kitchen and number the doors for easy installation once your painting project is completed. Number your doors and make a schematic on which door goes where. If you have an older home- this could save you a lot of frustration later when trying to rehang! (speaking from experience here)

3. I know you wrote you would rather not sand – and honestly- most likely you do not need to – but since you wrote that the cabinet has LOTS of coats of polyurethane, you may want to email me a clear – well lit photo I can confirm.) If you do sand- sand lightly using your hand with a 220 grit paper. Again- I stress- sanding lightly–and like spending 30 seconds on each door but making sure to get top to bottom and side to side …….basic coverage and sand in the same direction- not a circular motion. (Again, I am only suggesting this since I do not have a photo and you stated there are “lots of poly coats.”)

4. Since you mentioned the cabinet are very orange…..I would consider using shellac on the cabinets. (not because Chalk Paint® needs that- but since you stated they are painted orange this will prevent any of that from shadowing through- especially important if going with a light color…may not be necessary if painting with a dark color (you never mentioned the color you are going to paint them). You could always do a test door without shellac. Go ahead and paint it and see how it looks after 2 coats. If you do a test door- pick the smallest door to try it on.

Shellac in general is an excellent sealer.
I would remove the doors and use the spray shellac in a well ventilated area outside your home.
Brush the shellac over the actual cabinet boxes in your home.

Please read the post about using Shellac and please watch the “Shellac How To” video embedded in the post by clicking HERE.

5. Then go ahead and begin painting with your Chalk Paint®- most likely- 2 – 3 coats using a kitchen SPONGE Cabinet Roller (I like the Whizz brand at Lowes.) I am recommending a sponge roller since you communicated that you prefer a more smooth finish in your letter to me. (since I do not have a photo illustrating what the cabinets look like- (raise panel, etc???……I just want to mention to use a brush to cut in corners if any or to do small spots)
Note that I almost 100% of the time brush the paint on when I am doing a cabinet project.

Since you want a super smooth finish- lightly sand your paint with some 220 or UP (meaning 300 grit) sand paper and blow off any dust before beginning you begin the wax top coats. Again- this is done for a really smooth finish.

Another option for a smooth surface if using brush- is using a small amount of water with your Chalk Paint® in your final coat of chalk paint®. I do this by placing only a ¼ inch of water in a plastic cup. I dip my paint brush in the SMALL AMOUNT of water and then dip the tips of the brush into the quart of the paint. I am not gobbing my brush with paint here. This extra bit of water allows the paint to be a little thinner and smoother and it will glide on easier and you will use less paint. Every time I need more paint, I first dip my brush into the water, then the paint can.

Keep in mind when using a roller:

* You should apply uniform thin coats. Please do not think you will be further ahead applying thicker coats.
* Paint all cabinets with strokes going in the same direction- meaning either vertical or horizontal)
* Lastly- make sure to always finish the cabinet with a few clean passes as so to not have roller edge lines. The paint is self leveling- but help it by creating a smooth finish to level!

And when painting when a brush- always remember to “lay” your paint or do a finish stroke! Meaning take your brush and paint from one edge all the way to the other edge in one smooth sweep!

6. Once done with all coats of Chalk Paint® – I would use Annie’s soft wax. It was created and formulated to work perfectly with Chalk Paint®. The bulk of your project expense is the Chalk Paint® – which is well worth it since it will give you 50% greater surface coverage compared to latex. You asked specifically- if I could recommend a Wax Brush other than Annie’s. The Ultimate Wax Brush that I sell- is not an Annie Sloan Product. I carry it because I love it and I use it for ever project and as I state in my video that I recorded in June 2012…”it is worth its weight in gold.” Ultimate Wax Brushes are sold at $34.95 here on my on-line store (click here if interested in one) and sold at my shops. There are other ways to apply wax as in using your hand and a rag – but from my experience helping customers- the wax brush seems to be the tool to use to ensure success regarding uniform coverage! Please watch my video regarding “How To Apply Clear Wax” by clicking here.

Brenda- you did not provide the dimensions of your kitchen- but I would suspect based on an average job – 2 tins of clear wax would be more than enough for a kitchen.

ps I just looked at your past orders. You purchased one quart of Old White and a tin of Clear Wax…… are you using this for your cabinet? If yes- I am speculating it is a small job.

Thank you again for writing me- please let me know if this helped you!
Kitchen Cab ReFAB workshop WEBSITE post

Kitchen Cabinets Chalk Paint

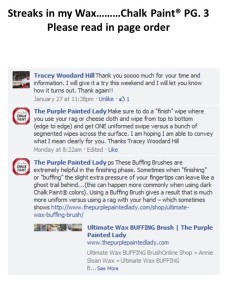
On my Facebook Page HERE– I post quite a bit of information for Chalk Paint® users. Here is one regarding preventing streaks in your paint and wax- which is very important when it comes to your kitchen cabinets!

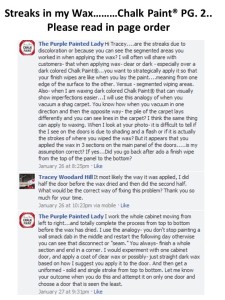
Streaks in Wax page 1

Streaks in Wax Page 2

Streaks in wax page 3

Old Ochre Cabinet with name

Duck Egg blue Primer Red Cabinet display Close Up view

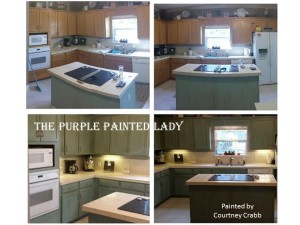
Painted Kitchen Cabinets Courtney Crabb MY CUSTOMER The Purple Painted Lady

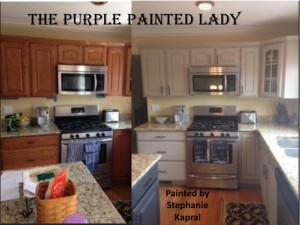
Kitchen Cabinet Stephanie Kapral MY CUSTOMER The Purple Painted Lady Chalk Paint

Look What Sally Scheele Did!

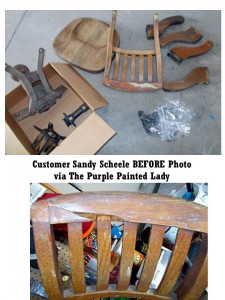
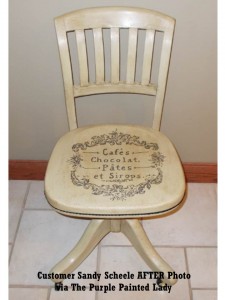
I love receiving notes from all of you – especially when photos are attached and show me what you have accomplished or how you were inspired. When I started writing posts to share information- I did it to be helpful to you. What a surprise it has been to receive so much gratification from your messages and this email was so awesome I had to share it! I received a letter from Charles and Albert’s cool mom, Sally Scheele last night. I really enjoyed her note and was so impressed with what she did! Especially with the chair project shown below- most of us would have tossed it to the curb. You did not just refurbish it- I feel you resurrected it! Sally, you have earned the title of “Salvage Sister!” So, dear Sally– YOU are being featured on The Purple Painted Lady!

Sally’s email

I re-read your “Fairy Godmother” article and wanted to share with you how I’ve taken all of your tips to heart.

First- I bought an old weathered wooden desk chair, where a huge chunk was broken out and held in place with years of duct tape, all the mechanical parts were extremely greasy and grimey, and the seat looked like it had housed a plant (watered) for years. Wow, this was my biggest vision.

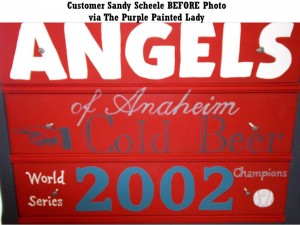
Second- I’ve always wanted to attempt a Subway Art Typography project. My youngest son is an avid baseball fan, a college pitcher, and a life-long Angel’s fan. For his b-day, we got him tickets to see the Angels when they travel to KC next month, and I needed a neat way to present him with the tickets. It also helps out a college life/ apartment/ needs a dresser/ single guy decor – type of way. ( I had to do this before there is a bride who says- “that piece has to go, it goes with nothing!” A perfect opportunity arose!

I borrowed our small parochial elementary school’s overhead projector, that they had buried in a back room. I bought them the bulbs, I get to use it. A great marriage. I followed all of your tips: tranparencies, watercolor pencils, Graphic Fairy, etc….. And when I re-read your article, I knew I had to send you a few before & after pictures to show you how we do listen, appreciate, and use all of your tips. Keep inspiring us, we’re definitely out there!! Thanks again!! These are not the type of pieces most people would do or want, but for me….. they made me smile. And I’m now the coolest, most talented mom out there, amongst the baseball guys anyway! Haha!! It’s all about SMILING! Thanks Again!

Click here to read the post that inspired Sally. It was titled, “Who Is Your Fairy Godmother?”

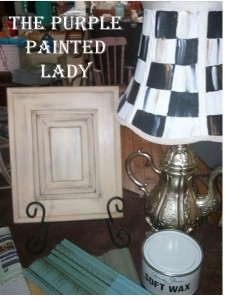
Chalk Paint™ Sample Boards showcasing both Clear & Dark Wax

I have been working on these photos longer than I would like to admit! And I am still not done. But I promise to have them all uploaded to Pinterest by the end of the weekend.

I hope that you enjoy these Chalk Paint™ Sample Boards showcasing both Clear & Dark Wax. They are a great way for you to see the possibilities of each color. And I have a lot of fun pairing up different colors to create new color combinations to paint future pieces in.

Each sample board was painted with two coats of Chalk Paint™. Then a layer of clear wax was applied to the whole sample board. Once dry- we taped off half and applied dark wax, and immediately wiped off the excess.

Click here to see Chalk Paint™ Sample Boards showcasing both Clear & Dark Wax or visit my on-line store to see each color.

A LITTLE Q & A on PURE WHITE Chalk Paint™

A LITTLE Q & A: PURE WHITE Chalk Paint™ question.

A very dear customer of mine asked…..Someone brought me some pieces to paint and said they want them WHITE. I have used old white several times, but I’m just ordering “pure white”. Do you have any suggestions? They’ve asked for a white, white piece lightly distressed. That’s my goal.

The Purple Painted Lady’s response:
(First- I apologize for the lousy photo. It was taken with my cell phone.)

You will want to use Pure White Chalk Paint™ Decorative Paint by Annie Sloan- like you ordered.

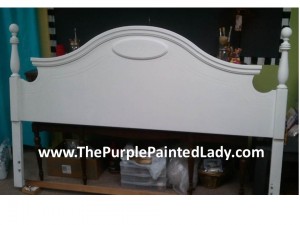
I did a king size headboard at Christmas for a woman and it came out great. Something I did not do ….and that I should have- was shellac’d the furniture using Zinsser prior to painting with the Pure White Chalk Paint™. I would have used less paint!!!

Now keep in mind- when painting a piece WHITE…and wanting that bright white..even after shellac…an average of 2 coats will be needed. So, when you compare the cost of paint to shellac = it is worth the extra step for the shellac. (and if you can spray the shellac it will not add much time to your process) This example I share was based on that in December I painted a maple wood bed. Depending on what you are painting over, some colors that have less pigment – like Pure White will require what I shared above. This is not always needed- but there are examples that will and it is important to know that.

Questions that I would have back for my customer were:

What is the state of the furniture now?
Does the customer understand- that whatever the base is- will be what you see slightly once distressed? Make sure that is ok and I don’t know about you- but I always write up a very detailed contract for custom jobs!

Lastly, for those of you who paint for others….If you can have the customer find “inspiration” photos on line that you can reference in understanding what their “end vision” is- it is extremely helpful and I recommend incorporating those photos in the contract! Otherwise- and often- people have a difficult time articulating their thoughts and you do not realize they wanted “B” until you have invested time and materials creating “A.”

To explain my comment further above where I state that the shellac can help in using less paint …I mean in the sense that many people will write me and say- I am getting bleeding through the paint from the wood underneath. Then they will share that they are on the 4th coat of paint!!!! WHOA! This is where I say, “back away from the paint brush!” Sometimes- it doesn’t matter how many coats of paint you applied- there is an issue beneath that the paint cannot prevent. (that sometimes happens) So, as soon as you start to see wood tannins bleeding or stain seeping through- shellac is TYPICALLY going to help you. Shellac is an ideal sealer…where polyurethane (I am about to answer a question I received from The Country Nook in Rochester, NY now. Check out their Facebook page by the way.) …Polyurethane is best to protect from abrasion…not sealing. Shellac is used both as a furniture finish (and a very good one) and sealer (both for furniture and covering spots that you think might bleed through paint). Don’t buy more shellac than you have to use in a short time. It will spoil in the can and if you open a can of spoiled shellac, it will smell to high heaven . One of the reasons I love the spray …or the quart sizes. I recommend shellac..Zinsser Shellac since that is what I use and have been happy with the results. As for polyurethane- it gives an incredibly hard finish…. some polys can take up to at least 8 hours to dry, thus gathering all of the bugs and dust that will be available during that time. Again shellacs are great for sealing.