Artisan Enhancement Project (faux effect products)

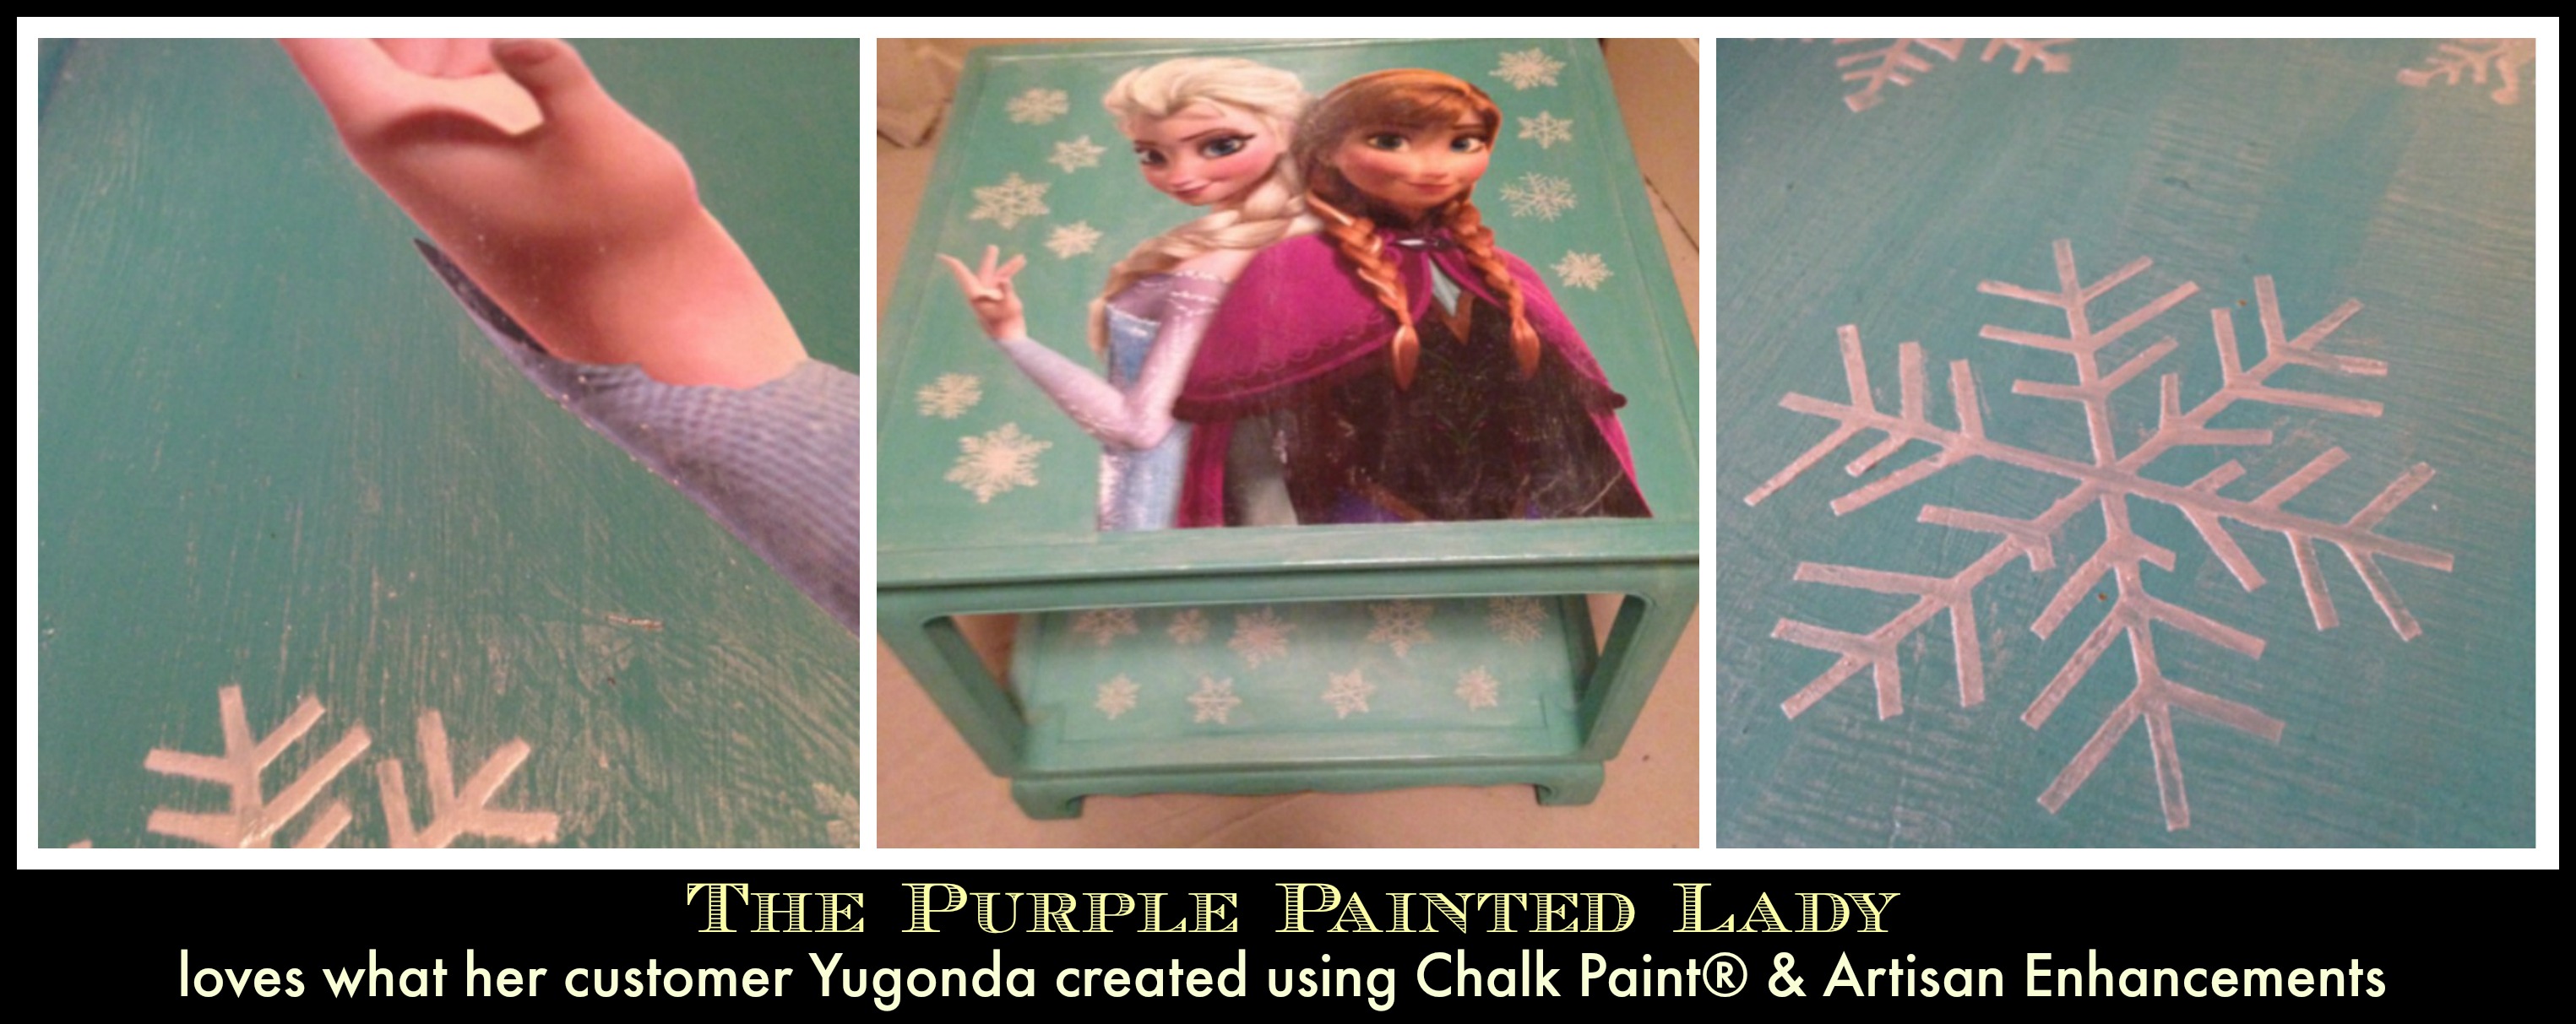
With these cold temps…are you “Frozen?”

One of The Purple Painted Lady’s marvelous customers, Yugonda created this awesome “Frozen” piece on a table she bought for only $3.
Slide1

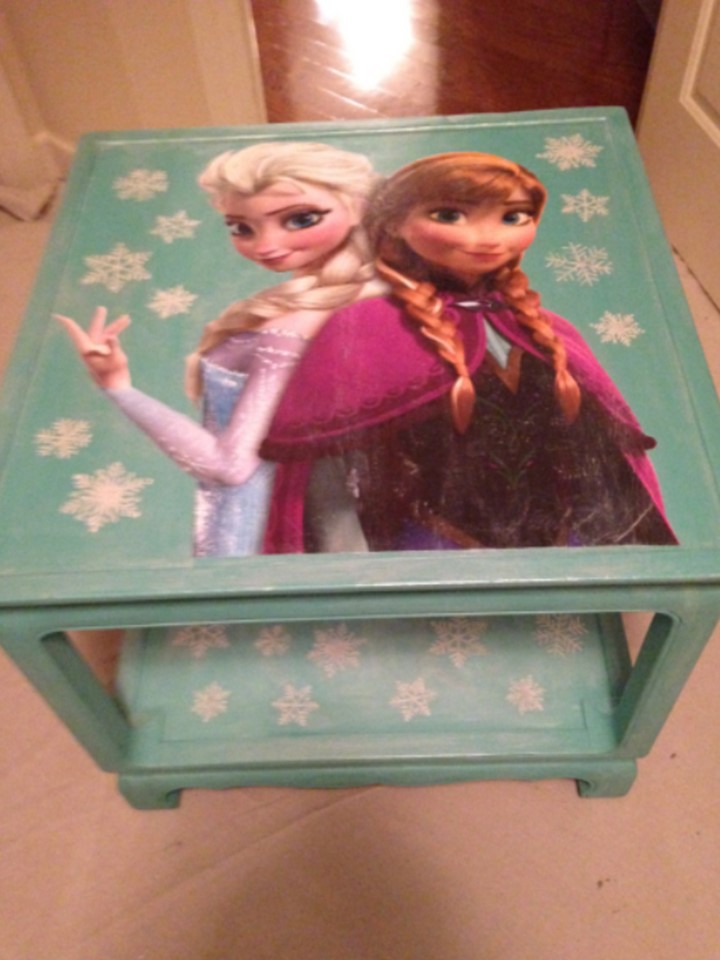
Yugonda said it needed a lot of work just to get it into a condition that it could be painted, but hey, for $3 – who can complain?!

She used wood filler and a sanding block, but no other prep like primer or shellac.

First she painted it with a mix of Florence Chalk Paint® and Artisan Enhancement’s Pearl Plaster.
Florence open canFlorence Sample Board

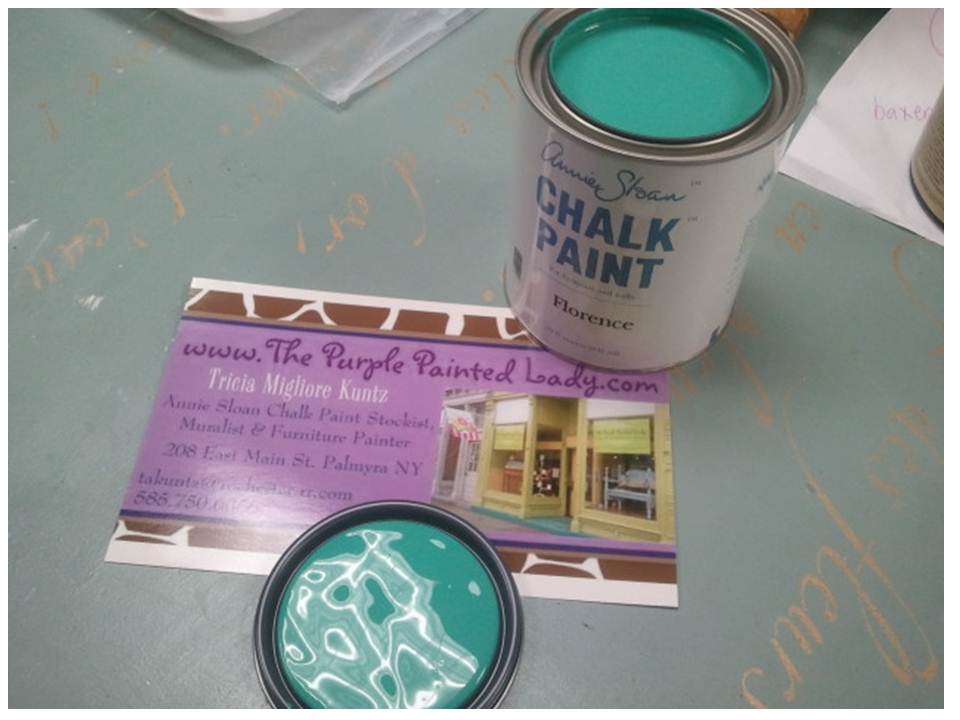
You might be thinking that the color of the piece in the above photo looks much lighter than what Florence typically looks like. And you are correct about that! That is because Yugonda added A LOT of the Pearl Plaster to the Florence and it really did change the color…. maybe a bit more subdued looking but she liked it.

She found that the Pearl Plaster does create shimmer when mixed with paint, but not quite as much as she wanted for this particular special project.
Pearl Plaster

So, she painted the AE Pearl Plaster straight from container with a small brush using snow flake stencils to the bottom of table. She held the stencil in place and lifted it right up. At The Purple Painted Lady we have used stencils with the Pearl Plaster and found it to be very easy to push through the stencil cutout and to get a smooth layer. PicMonkey Collage Pearl Plaster The Purple Painted Lady

Since this piece was for someone special – Yugonda wanted the piece really shimmery, so after waiting 10 minutes – she then applied a coat of the Pearl Plaster over the entire piece.

Once the PP was dry (and it dries very very quickly) – Yugonda’s next step was to swipe quite liberally the back of a poster she bought at WalMart with Artisan Enhancement Artisan Enhancements Transfer Gel. She also applied the Transfer Gel to the top of the table. She felt the Transfer Gel glided on like a dream. (NOTE- she did not remove the paper, but rather left it to work like a decoupage) Transfer Gel

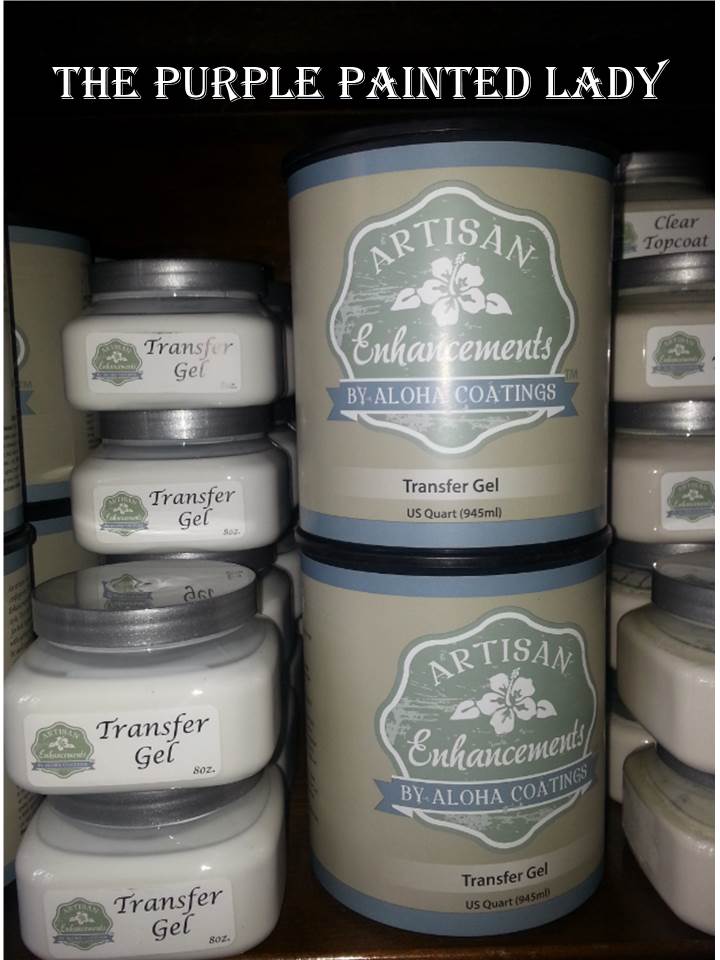
Yugonda used saran wrap over the top of poster and rolled with a hard plastic decoupage roller to smooth the surface. She shared that the piece was larger than what she had worked on before, so she had to work a bit faster so it wouldn’t leave a lot of air bubbles. There are still a few bubbles which make this project less than perfect but she said she is really happy with it! Yugonda felt it was more her technique that needs work. (personally- I think it looks great!)

Then- she stenciled more snow flakes on the top of the decoupage poster using Pearl Plaster again.

Once that was all dry- she painted Pearl Plaster all over again, brushing in all directions over the poster.

Lastly! (phew) -she finished the whole piece with Artisan Enhancement’s Clear Topcoat.

Yugonda wrote me that she had no idea how creamy feeling the Artisan Enhancement products were and that it made them glide better during the application versus other products she has used.

Her last note was, “I am still learning but, the Artisan Enhancements products made this project feel easy. And I like easy ”

PicMonkey Collage FROZEN The Purple Painted Lady Yugonda Duffy

The Purple Painted Lady (that’s me!) sells chalk paint® in three of her locations through out western NY and also- via her on-line store/website!

If you do not purchase through me…I hope you give us the opportunity to do business with you! We sell Chalk Paint at $34.95 per quart which is the lowest price I can legally sell it for based on the contract to be a distributor. I ship out every week day all over the US. We offer the lowest flat rate UPS shipping cost so if you are one town away or 10 states away- the shipping cost is the same. We ship same day if your order is placed before our daily UPS pick up. Also- it is my paint sales that keep me in business and allow me to be here to help you. (my shameless, but honest plug) Link to Our On-Line Store HERE.

: ) And I will be here to help you as you progress through your future project! And if I do say so myself- we offer the BEST customer service that you will ever experience!

Here is a little post about what I mean when it comes to customer service and what you should expect from us – click HERE.

Thanks so much!
Trish —

Come visit us:
77 Main street with phone number

At our MAIN STORE at 77 West Main Street in Macedon, NY 14502 OR

3200 West Ridge Road in Rochester, NY 14626 (The Shops On West Ridge)

Painting a Leather Cushion with Chalk Paint®

we are so proud of Gerri (shown in this photo) ~ one of our special customers in Syracuse, NY.

Gerri Olive leather The purple painted Lady

She painted her burgundy leather cushion with Chalk Paint® decorative paint by Annie Sloan.

Gerri painted a few thinned coats of the color Olive. We recommend that you apply your first coat- and allow 24 hours of wait time before you paint another coat.

Gerri thinned her paint slightly with water. (adding between about 20% water to whatever amount of Chalk Paint® you have)

Then- after her last coat of Chalk Paint® dried, she sanded the paint softly with some 400 grit sandpaper. In this step- make sure to be careful not to sand the edges or corners. Again- stay away from the edges so you do not accidentally wear thru the paint.

Once she polished the surface- the paint felt smooth and soft.

Lastly- she visited me at the Baldwinsville shop, and I helped her finish it off with an application of Annie’s clear wax.

APPLYING WAX TO LEATHER:

After the paint on your leather has been dry for about 24 hours, then wax.  (this extra time allows your paint to really set up, adhere and cure)

To apply the wax, we used a lint free cotton rag instead of a wax brush.  The leather is soft and subtle and we found using a rag to be best, but you may have a different opinion- and that is fine.  Go with what works for you.

Basically- we gently rubbed the wax around and in and then stopped when it felt smooth and almost dry to the touch. This was a super easy process and the wax sealed the paint and made it feel like the most luxurious leather coat you have ever felt.

If you apply too much wax and need to remove the excess, just take a fresh, clean, lint free rag and gently wipe off the excess.

Be gentle when rubbing near the seems , corners or edges so that your removing of the wax does not act like a “wet distress” where you remove the paint.   It is normal to get some color transfer on your rag that you are applying your wax with, so do not panic when that happens.

Have you painted anything leather? If yes- please post a photo on our Facebook page and one of you will be selected to WIN a free gift from The Purple Painted Lady on Monday, December 29th, 2014.

The Purple Painted Lady (that’s me!) sells chalk paint® in three of her locations through out western NY and also- via her on-line store/website!

If you do not purchase through me…I hope you give us the opportunity to do business with you! We sell Chalk Paint at $34.95 per quart which is the lowest price I can legally sell it for based on the contract to be a distributor. I ship out every week day all over the US. We offer the lowest flat rate UPS shipping cost so if you are one town away or 10 states away- the shipping cost is the same. We ship same day if your order is placed before our daily UPS pick up. Also- it is my paint sales that keep me in business and allow me to be here to help you. (my shameless, but honest plug) Link to Our On-Line Store HERE.

: ) And I will be here to help you as you progress through your future project! And if I do say so myself- we offer the BEST customer service that you will ever experience!

Here is a little post about what I mean when it comes to customer service and what you should expect from us – click HERE.

Thanks so much!

Trish —

Can you wash the towels or rags that you use for waxing furniture?

“Can you wash the towels or rags that you use for waxing furniture?”

That is a question I am often asked. My response is yes….BUT! …..I would NOT wash them in my washing machine or place them in my clothes dryer.

Here is what you should do:

Cheese cloth for shopping cartPlace the dirty towels in a plastic bucket (the kind you would use to wash your car) and fill it with really hot – hot water and dish soap. (use a dish soap that contains a degreaser like Dawn Platinum.) Then swirl them around using a wooden stick. Make sure there enough hot water that it covers the towels totally and they have room to agitate.

Dawn Platinum The Purple Painted Lady to clean dirty wax rags

Once the hot water cools a bit, feel free to ring them out. Then- (and VERY important) …hang them on a clothes line to dry.

Two important reasons why NOT to use your washing machine or dryer! 1. you do not want any residual wax getting in your washer or dryer- where it could then transfer onto your nice clothes! 2. wax can be flammable. (So, with that said- let’s keep it away from a heat source – like a dryer.)

Better Than Cheese Cloth The Purple Painted LadyClick HERE to access the Better Than Cheesecloth available on our website to buy.

Click HERE to access the Cheesecloth available on our website to buy.

How to Paint the Hinges or Hardware on Your Cabinets or Furniture

Painting the hinges or hardware on your cabinets or furniture? YES!

Sometimes- on a piece I do not want to remove the hinges or the hardware. I am either being lazy OR…the hardware is not super special and I want it to blend in with the piece versus stand out.

When it comes to painting hinges. I have done that many times- and more often- I am only painting the hinges BUT NOT the hardware.

The advantage of removing hardware versus painting it in place- is that it leaves the door open to easily change it out in the future! Once you paint over in place- it creates a paint seam that will be void of paint beneath. Also- it will be difficult to remove the hardware later if you change your mind about it.

As for painting the hinges though (and hardware) …. it holds up perfectly. Often- on kitchen cabinets- we will paint the hinges- as so to make them visually disappear. That way they are not screaming out, “hey, look at me – I am a hinge.” Who cares about hinges. It is the handles and knobs that we want to have fun with. This is is similar to choosing jewelry for your self- but in this case- it is going on the drawer or cabinet.
Louis Blue Old White Hutch base painted

The piece shown above is painted with Louis Blue & Old White Chalk Paint®.

The most important thing to understand when painting hinges- is to apply Chalk Paint® lightly. Basically – like you were “dry brushing” the paint on- and build up the paint slightly in a couple layers after the previous has dried.

When painting hinges, I open the doors too to expose the hinge in different angles- so I get complete coverage.

You do NOT want the paint to be applied thick or have it “caking” in the crevices of the hinge- because that is when it will chip off once dry.

Make sure to wax the hinges also using a rag that already has some residual wax on it from when the cabinet or furniture piece was waxed.

Not sure what it means to “dry brush?” Check out this link HERE.

And remember- we sell Chalk Paint at $34.95 per quart. I ship out every week day all over the US. We offer the lowest flat rate UPS shipping cost so if you are one town away or 10 states away- the shipping cost is the same. We ship same day if your order is placed before our daily UPS pick up. Also- it is my paint sales that keep me in business and allow me to be here to help you. (my shameless, but honest plug) To access our On-Line Store click HERE.

: ) And I will be here to help you as you progress through your future project! And if I do say so myself- we offer the BEST customer service that you will ever experience!

Here is a little post about what I mean when it comes to what you should expect from us- click HERE to read that.

Thanks so much!
Trish —

Chalk Paint® on a Floor With Annie’s Lacquer for Protection

I had to share this AMAZING transformation by Red Living of a pine plank floor painted in Chalk Paint®.

PicMonkey Collage The purple Painted Lady Red Living

Paris Grey was the color of choice for this chic…well, soon to be chic Hair Salon – that opened a few stores away from their shop. They painted the whole floor using Annie’s newest 2 inch flat brush.

Slide2

If interested in checking out Annie’s flat LARGE paint brush that gives a smoother finish, click HERE.

Red Living stated that they loved the “bounce” in this brush – along with water – they covered 1200 sq feet with 2 quarts of Paris Grey Chalk Paint®. (YES! You read that correctly- they watered down the paint and since they only did one coat- they covered the entire salon floor!)

The Purple Painted Lady Annie LARGE FLAT PAINT BRUSH

The floor is protected using Annie’s Lacquer. Her Lacquer was created for inside use on floors with high traffic!

Annie retails her Lacquer in both a MATTE finish and also a GLOSS finish.

If interested in learning more about Annie’s Lacquer – click HERE.

The Lacquer did pull up some of the tannins from the pine wood through the paint- (since a coat of shellac was not applied prior) but this turned out brilliant cause it looks like they added more colours – like chateau grey and duck egg which “appeared” on some of the boards – love – looks very custom. (the mirror frames are old white/cream.)

IF USING LACQUER OVER A DARK COLOR PAINT?  =>    KEEP IN MIND…..as with any matte finish product, it is recommended that you use a gloss finish first , then apply the matte when going over darker colors. The flattening agents in the product that give it a matte finish will show as a cloudy look over dark colors. You have to cover with a gloss first. Annie Sloan Lacquer in the 750 mL containers comes in both a GLOSS and MATT.

To read more about when to use shellac, click HERE.

Red Living used 5 litres of Lacquer. The first coat was watered down a slight bit and they used a wide brush.


Here is an important tip! Get a nice brush that is specifically for applying Lacquer!)


The wide brush used to apply the Lacquer- they said made it go on beautifully. Most importantly with Lacquer- is that you do not dilly-dally. Apply it fast, with a confident brush stroke and do not back brush. To read about Annie’s Lacquer – click HERE.

For cleaning painted floors coated with Annie’s Lacquer, you can use just about any household cleaner. A current fav of our Annie Sloan technical instructor is Fabuloso … they shared that they love the smell.

WHEN YOU START PAINTING YOUR FLOOR (if going for a solid coverage effect) ….. after your first coat has dried…..if you get bleed through (and this is different then a lack of brush strokes that has a void and that is showing the floor beneath) ….apply two thin coats of Zinsser Bullseye Clear Shellac and lightly sand.  Then paint your second coat of Chalk Paint®.

It is important that you use the Lacquer to finish the floor if you do not want to see natural scuff marks. 

I feel it is important to paint the whole floor and seal with Lacquer all at once OR….. versus dividing it in half and sliding furniture to one side and doing the floor in sections on different days because you will potentially see that break once all is done.  Sort of like painting a wall red.  If you do not do it all at once….you will see the “seam.”

Slide3

If interested in purchasing Annie Sloan products, please visit our website if interested in ordering Chalk Paint®. We have Chalk Paint® every day, we offer low/flat rate shipping and it always ships same day (as long as Pete, our UPS guy has not come already!)

In fact- there are many reasons we think buying through us is the best. Read THIS little post about what sets The Purple Painted Lady apart from the rest.

To visit our on-line store- click HERE.

Lastly, we share a lot more information to help you get the most functionality out of your Chalk Paint® on our Facebook page. Consider checking it out by clicking HERE. While there- kindly consider LIKING us.

Thanks again,
Tricia Migliore Kuntz ~The Purple Painted Lady ~
Design/Consulting, Kitchen Cabinet Refurbishing, Custom Painted Furniture, Chalk Paint® & Miss Mustard Seed Milk Paint Retailer & herRochester Blogger

PHONE: 585-750-6056

Come visit us:

At our 2620 NY 31 Palmyra NY 14522