Are you like me, biting at the bit for any possible sign that winter is over? It seems relevant since daylight savings in the north east started today and that is when we “spring” the clock forward. So, Mother Nature knows that is when warmer weather, tulips and baby birds should also be here, right?
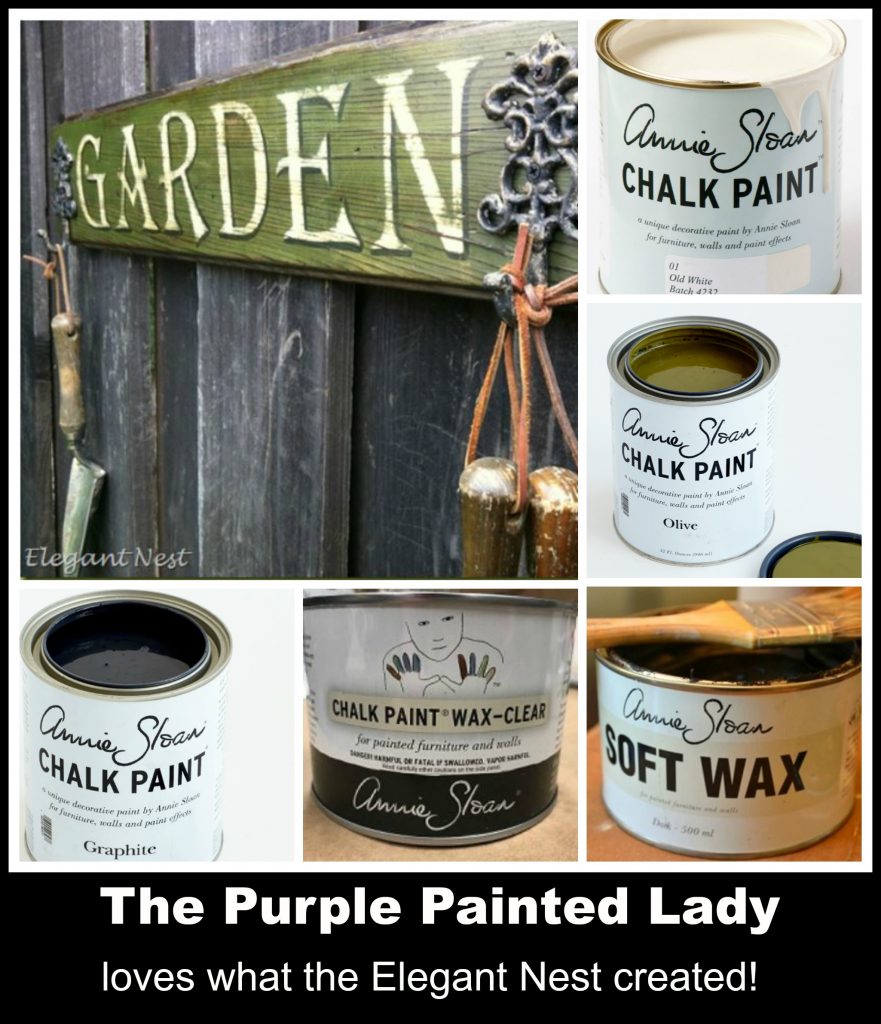
Well, while cruising the wonderful world wide web I found this adoreable garden sign completed by the Elegant Nest located in the UK. Laura is the designer behind this great project! Check out Laura’s Facebook page HERE.
So, this is the gorgeous Garden sign created using Chalk Paint® by Annie Sloan.

Personally, I would achieve a similar look using the following products for your vintage GARDEN sign.
MATERIAL LIST: (note links are to quarts or larger sizes of wax, BUT sample pot sizes would absolutely be more than enough for this project!!!)
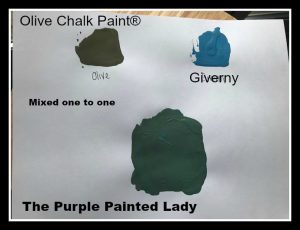
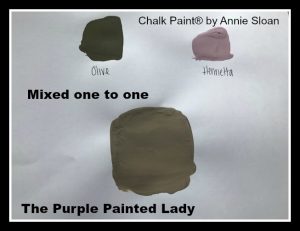
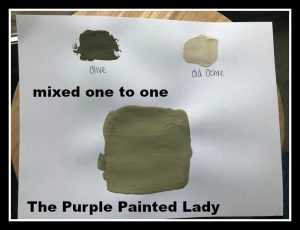
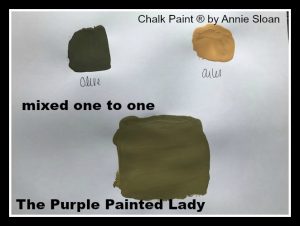
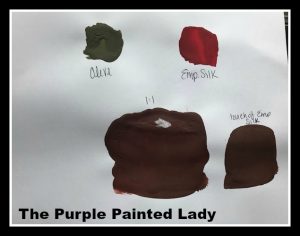
Olive Chalk Paint®
Old White Chalk Paint®
Graphite Chalk Paint®
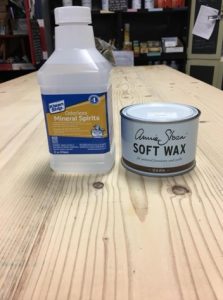
Clear Wax
Dark Wax
Annie Sloan Sanding Sponges
Assortment of Brushes
Weathered piece of Barn Wood or a random piece of tongue and groove flooring
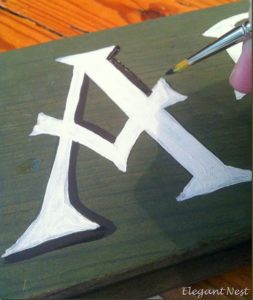
Note: Laura used the Algerian Font to create the lettering for this sign
SUGGESTIONS for steps to take using Chalk Paint® by Annie Sloan:
Prepare Wood:
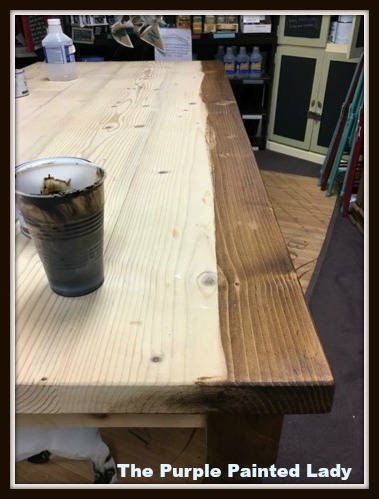
If I was to try and create something similar, first find your piece of wood. If you have access to barn wood, that is the best. Just be careful to not get a sliver if the wood is dry and brittle when distressing or waxing. If you pick up a piece of tongue & groove flooring from your local hardware store, feel free to take a hammer or metal chain to it prior to painting to give it some “aged” character. Bang it up and add some indentations. Even a pointed object hammered into the wood creating a cluster of worm holes will make your finished sign look more authentic once the distressing and wax applications are complete.
Paint:
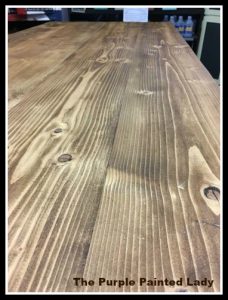
Step 1. Using your Olive Chalk Paint® (or Amsterdam Green)… pour a small amount of paint (like a teaspoon worth of paint or two) in a small container. I would then add 1/2 teaspoon of water to the Chalk Paint® and mix it in to thin the paint. The dgree of how thin you make the paint is based on the degree of translucency you want. If you want the “green” to be like a stain or a wash, add a little more water. I would not go more than a one to one ratio of paint to water though. Paint your entire board. If looking for more of a washed effect, wipe off some of the excess paint from the surface.
Let your “green” base coat dry completely.
Stencil:
Now, determine your layout for the “GARDEN” letters. If you have a stencil maker, like a Silhouette machine or Cricuit ~ create your letters. Laura, from the Elegant Nest suggested to use the Algerian Font. I love how her letters turned out – so I ageee!
If you do not have access to a machine to create your stencil, no worries. Do it the old fashion…and reliable way! Using your favorite word processing software, print the letters out onto paper using your basic printer. Create your “stencil” by cutting the letters out with a scissors. Lay the letters on your wood to get the right spacing. Then, using a piece of chalk or white colored pencil – begin sketching/tracing around the letters over your green paint.
Paint Letters:
Once your layout is complete, grab an artist brush and paint in the letters using your Old White Chalk Paint®. Do not worry if you build up the paint or have texture from your brush strokes. In fact, brush strokes are good! We plan on sanding over this later and it will only add more character to your sign!
Paint Shading of Letters:
Once the Old White Chalk Paint® is dry, to create some vintage magic using Graphite Chalk Paint® and another fine point artist brush – do an outline on one one side of the letters like Laura did. Note how Laura, of the Elegant Nest applied the Graphite Chalk Paint® to “one” side. Meaning, do NOT outline the entire letter. But use the Graphite Chalk Paint® on only the right side of the outline of each letter which will create that vintage illusion of shadowing.
Distressing:
Once the Graphite Chalk Paint® has dried, take your blue Annie Sloan Sanding Sponges which is the course grit, and begin to distress your “vintage sign.” Personally, I would distress it in a linear fashion in the same direction of the grain of the wood. Once done, blow off any residual dust outside.
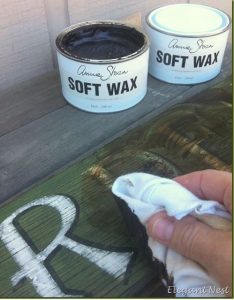
Waxing:
Clear Wax:
To finish your sign and to seal the paint, first apply a uniform, thin coat of Annie Sloan’s Clear Wax. Follow the instructions we give you for applying wax- so you apply it and then – wipe off the excess immediately.
Dark Wax:
To finish your sign and to add that “aged” effect, finalize your sign using Annie Sloan’s Dark Wax. Again, follow the instructions we give you for applying wax- so you apply it and then – wipe off the excess immediately.
Hooks:
Pick up some decorative hooks or cute knobs to mount on either side to hang your garden tools from. Hobby Lobby has a great assortment and they are like, 50% off every other week.
And voila! Your vintage GARDEN plaque is complete.
You should really check out Lauren’s Facebook page for other inspirational project ideas!
BUY PRODUCT FROM …..THE PURPLE PAINTED LADY®:
Come visit us at
EAST SIDE OF ROCHESTER (Our MAIN store!) 77 West Main Street in Macedon, NY 14502 OPEN Mon – Wed 10– 4, Thurs 11–7, Fri 10 –5 & Sat 10-4.…CLOSED SUNDAY
If you live out of NY state, if you have a local stockist- go visit them and build a relationship with them. Go to them with your questions and project issues. BUT- if you do not have a local stockist- we invite you to try our customer service!
As for buying any of the products we mentioned earlier in this post- I hope that you select The Purple Painted Lady® to be your one stop resource! We have two locations in western NY. Check out our Information tab and come and meet us! Otherwise- if you are not located near me- the following information may apply to you.
This information is directed to those who do NOT have a local stockist. Because if you do – go and meet them, shop from them and build a relationship with them!!! The guidance, information and knowledge they share with you – will be invaluable. Get inspired by their shop that they lovingly curated – just for you! Enjoy that one on one experience!
But for those who are in a location where there is no one selling paint products- and you must buy on-line- consider us. With that said, visit www.anniesloan.com to find a stockist near you.
We are here to help you, our customers! We want you to be successful!
SOME OF THE REASONS WE THINK THE PURPLE PAINTED LADY® CUSTOMER SERVICE IS THE BEST:
* We love our customers and it shows!
* We want you to be succesful the first time you use this product, so you fall in love with Chalk Paint® and tell all your friends about it! So, with that said, we promise to provide you with all the “know how” information you need to be a DIY Warrior!
* Ordering online? If you order before 3 pm EASTERN TIME any day Monday thru Friday – we will ship out your package that SAME day. We ship orders out every since week day all over the US. (THIS IS DIFFERENT than SAME DAY DELIVERY. We do not offer that)
* We offer low flat rate UPS shipping cost so if you are one town away or 10 states away- the shipping cost is the same.
* We have awesome follow up customer service, too!
: ) And I will be here to help you as you progress through your future project! And if I do say so myself- we offer the BEST customer service that you will ever experience! Lastly- if I was helpful to you- ….please consider leaving a positive review on my Facebook business page sharing your positive experience or thoughts about The Purple Painted Lady®. Here is a link to my Facebook page=>
http://www.facebook.com/pages/The-Purple-Painted-Lady/291882785710 This really helps me! (wink, wink!)
XO
Trish
The Purple Painted Lady® ~ the serial no. is 86/641,416 with the US Trademark Office