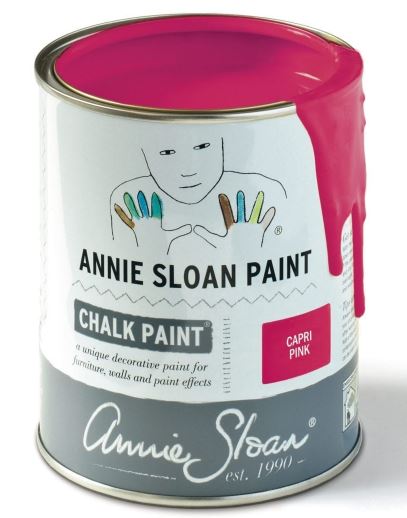
New Year- New Color! And this one is HOT! Capri Pink is a hot, strong, head-turning pink and dropped (which is a cool way to say, became available for purchase) on Thursday, January 21, 2021.
Fashion designer Elsa Schiaparelli championed this directional pink, (as did her surrealist friends Jean Cocteau and Dali) because of its empowering, joyful, confidence. Use with clashing brights to reference the vivid pinks used throughout the world in folk art – from Mexican textiles, via Pakistani truck art, to bohemian Romany gypsy caravan interiors. Alternatively, pair with rich browns for a luxurious, minimal look. Named for the upscale Italian island resort, wherever you use this colour you’ll inject glamour and confidence.
Want a chance to win a free litre? Hop over to our Facebook page asap and play along!
We were so excited about Capri Pink– we even got our UPS guy, Mike to join in on this fun video we made for it!
If you are interested in purchasing Chalk Paint® by Annie Sloan or would like some help with a project- reach out to us! And….consider purchasing from us too, although we always encourage you to visit your local Chalk Paint® stockist if you have one …but if you are stuck at home and do not have anyone local… The Purple Painted Lady is here to help and can ship your order right to your front door step. Please just place your order online and we will ship it out ASAP! In fact, if you place an order- be confident in knowing that The Purple Painted Lady has everything in stock! What does this mean in the end? With the team we have in place- your order will get packed and picked up by FedX, UPS or USPS. We pack up your order ship your order out our doors the same day you place it – Monday through Saturday. (note however, this is as long as your order came in before 3pm EASTERN TIME, because most of the carriers pick up our packages around 3 or 3:30pm)
SIGN UP FOR OUR MONTHLY NEWSLETTER: Okay- well maybe we actually send this out about every 2 months ~ but still – you will want to join this! Click HERE to get on board with The Purple Painted Lady’s Monthly Newsletter and get in on the fun.
Don’t be afraid to do this! Especially if you really dislike your floor. @thepurplepaintedlady is here to help you!
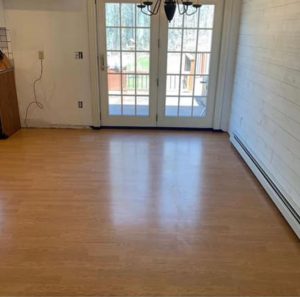
So, let us introduce you to one of our amazing customers, Stephanie (find her on Instagram as @stephburg64) She used Annie Sloan Chalk Paint® in Pure and Graphite to paint her laminate floor and Annie Sloan’s Matte Lacquer. The stencil is from @royalstencils and is called Lisboa.
Steph’s laminate floor was the kind with a faux wood grain. It had a yellow orange tone and she was over it! So, Annie Sloan to the rescue!
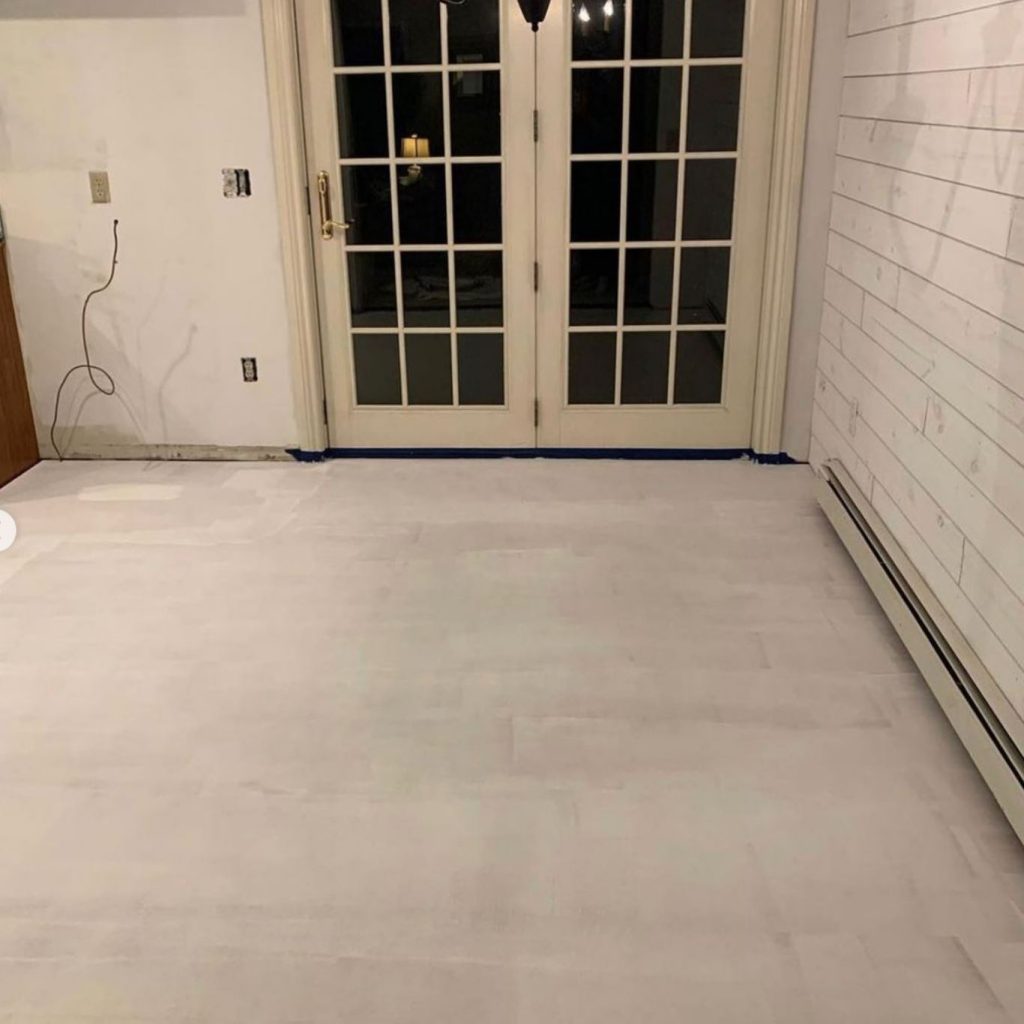
Prior to painting, she did two coats of Zinsser Bullseye Clear Shellac as an undercoat which truly helped to keep any tannins from showing through.
The she used painter’s tape around the edge to help with minimizing getting paint on the wall. (this means you do not need to be as careful when painting the floor up next to the wall) LOL
Next, Steph applied a few coats of the Pure Chalk Paint® using a 4 inch foam roller. Keep in mind, “white” colored paints do have as much color blocking pigment compared to a paint like French Linen or Duck Egg. Be prepared to do three coats of paint for the base – and in some cases depending on how dark your floor is, a fourth coat of the Pure Chalk Paint® may be needed. Seldom, but I would never say never.
For applying the stencil, Steph used Annie Sloan’s Graphite which is a dark charcoal or slate color. For smaller sized stencils, try using one of Annie Sloan’s foam roller. If you have a small stencil template, use Annie Sloan’s Foam 2″ Roller like Steph did. However, for large stencils, use Annie’s Foam 4″ roller. These have their own unique fit, so purchase refills to go with because not all replacement roller refills will fit. To read some tips on stenciling, check out this post HERE. Little tips such as off loading your brush or roller prior to applying the paint to the stencil is STENCIL 101 info. I don’t want to take for granted you all know all tips, so check out this YOUTUBE video we did on painting and stenciling floors.
Now don’t let this intimidate you but when applying Lacquer, you want to know what you are doing, so it is important that you read my post with tips and tricks HERE.
Steph suggests using Annie Sloan’s Large Flat Brush for applying the Matte Lacquer but you can use Annie’s Foam 4″ roller too. Please read the post I wrote about Lacquer tips because there are some basic instructions you want to follow. Steph followed directions and applied two coats of Annie Sloan’s Matte Lacquer.
There was a lot of trimming of the stencil in the very end to go around the edges to have a complete & balanced look, thankfully Steph’s husband has a “math” brain
Well, what do you think? Personally, I really like it!
EXTRA STENCILING TIPS FOR FREE FROM ME: This type of project is going to take you a couple of days to complete. Make sure to only wear clean socks on the painted floor prior to using Annie’s Lacquer. Have lots of paper plates available to set rollers or brushes that still have paint on them to. Use a bath towel as a small drop cloth under your paper plates or paint pan to protect the painted floor. Work from one side of the room to the other as so to not have to step near wet paint and don”t paint yourself into a corner! Make sure to get an extra stencil piece that you are able to cut and use in odd areas around the trip. Or, plan out a deliberate boarder. Personally, I want to have my stencil start at the midpoint of my space and work out to either side from there. If there is a main door way into the room, I may layout my stencil so there is on full stencil in the center of the entrance. In a kitchen or dining room, or living room – invest into new little felt pads for beneath the legs of chairs or tables to prevent scratching! (Lowes or Home Depot sell these)
If you are interested in purchasing Chalk Paint® by Annie Sloan or would like some help with a project- reach out to us! And….consider purchasing from us too, although we always encourage you to visit your local Chalk Paint® stockist if you have one …but if you are stuck at home and do not have anyone local… The Purple Painted Lady is here to help and can ship your order right to your front door step. Please just place your order online and we will ship it out ASAP! In fact, if you place an order- be confident in knowing that The Purple Painted Lady has everything in stock! What does this mean in the end? With the team we have in place- your order will get packed and picked up by FedX, UPS or USPS. We pack up your order ship your order out our doors the same day you place it – Monday through Saturday. (note however, this is as long as your order came in before 3pm EASTERN TIME, because most of the carriers pick up our packages around 3 or 3:30pm)
SIGN UP FOR OUR MONTHLY NEWSLETTER: Okay- well maybe we actually send this out about every 2 months ~ but still – you will want to join this! Click HERE to get on board with The Purple Painted Lady’s Monthly Newsletter and get in on the fun.
Have you seen any of my social media on Facebook and Instagram that my husband Steve and I are doing a kitchen addition onto our 1890 Queen Anne farmhouse? Well, we are!
Our general contractor is named Jason McPike and he is a local guy from the town where we live – which is in Palmyra NY. Although, sometimes I think he is from Krypton -because we think he is Superman. Reason being- we had a nightmare of a time with a different business we originally signed with at the end of May 2020. We had always communicated we wanted to have the addition completed by Christmas and lots of promises were made, but by the middle of October and nothing had been done- we knew it was time to bail. Then, Jason walked into our lives and within two weeks, he coordinated a full foundation with a basement was dug and poured by Zurich Masonry. Seriously, Jason met with us, heard our story and immediately said, you want to do a business with a builder – where once the job is done, you want them to come back and eat dinner over. To be honest – I laughed at that and didn’t quite understand what he meant, but heck, now I understand what he means because he has made this process fun. I would even say enjoyable and exciting versus stressful! He literally held our hands, navigated us through some ideas and proposed improvements that without- the addition would have lacked!
This kitchen addition is something I have wanted to do for a very long time. Although, our original kitchen was perfectly nice and actually, quite beautiful…..it was just too small for the gatherings I host and ideas I have of hosting women’s retreats for art and to help others with growing their business in the future. We live in this big looking house from the outside, but then you get in it …and it is cut up and rooms are small. It is like an oxymoron. I had a total of 7 lower cabinets and 2 uppers in my old kitchen and my fridge was in an odd spot that did not make sense at all- so after trying to make things work in the original footprint multiple times, one night my husband Steve said, “let’s just add on!” And me being who I am …..I asked him to repeat himself just so I could make sure I heard him right. LOL Then, I immediately grabbed my phone and started to make calls to make it happen! Fast forward to today….and although the path was not totally straight to where we are now- we are where we are suppose to be with the best team of contractor, roofer, spray insulation and plumbing and electrical. And, the benefit is we are enjoying the process verses having anxiety.
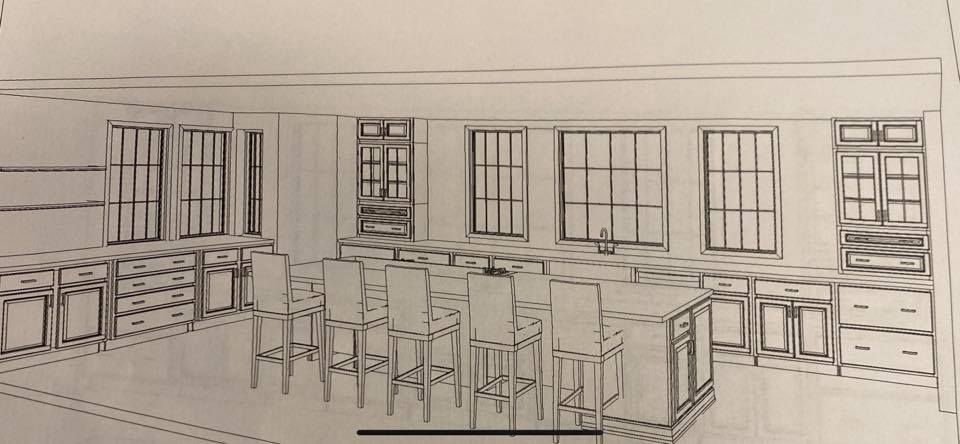
Here is a rough design of the new addition but I just want to add that there are some things that are not accurate….like the shape of the windows and coloring of cabinets, but this will give you an idea of what we are going for.
Jason, our GC is managing the cabinets and having them built. They will be raw wood and I will paint them. At first I was like- I just want someone else to do everything for a change, but then….I am like, gosh, I am “The Purple Painted Lady.” How do I not paint my own cabinets! Sometimes it takes me a minute to come to my senses. I am far from perfect.
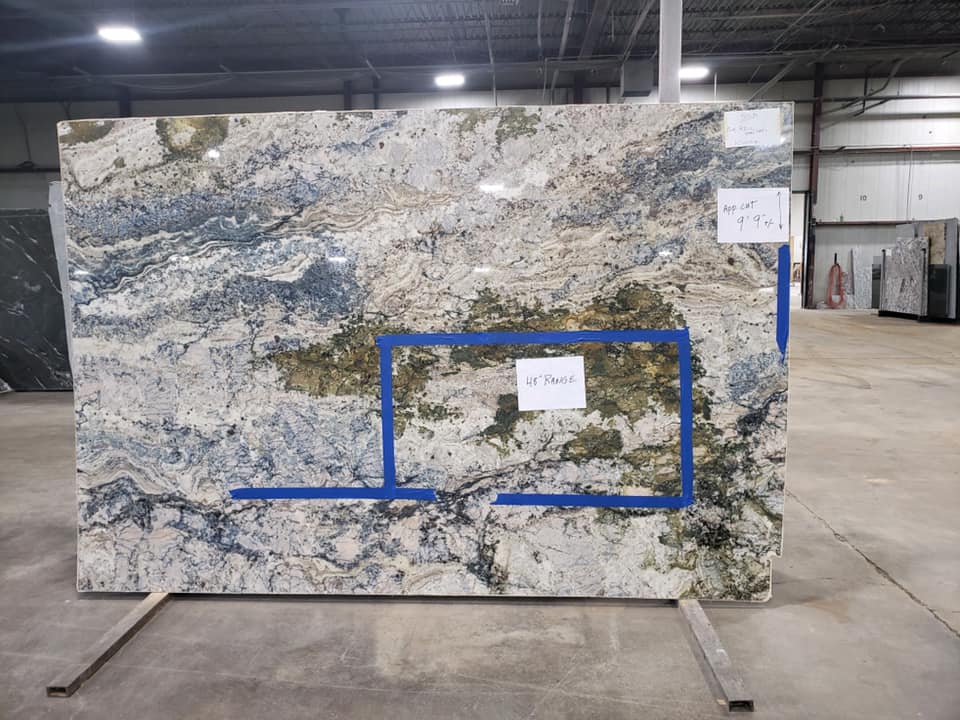
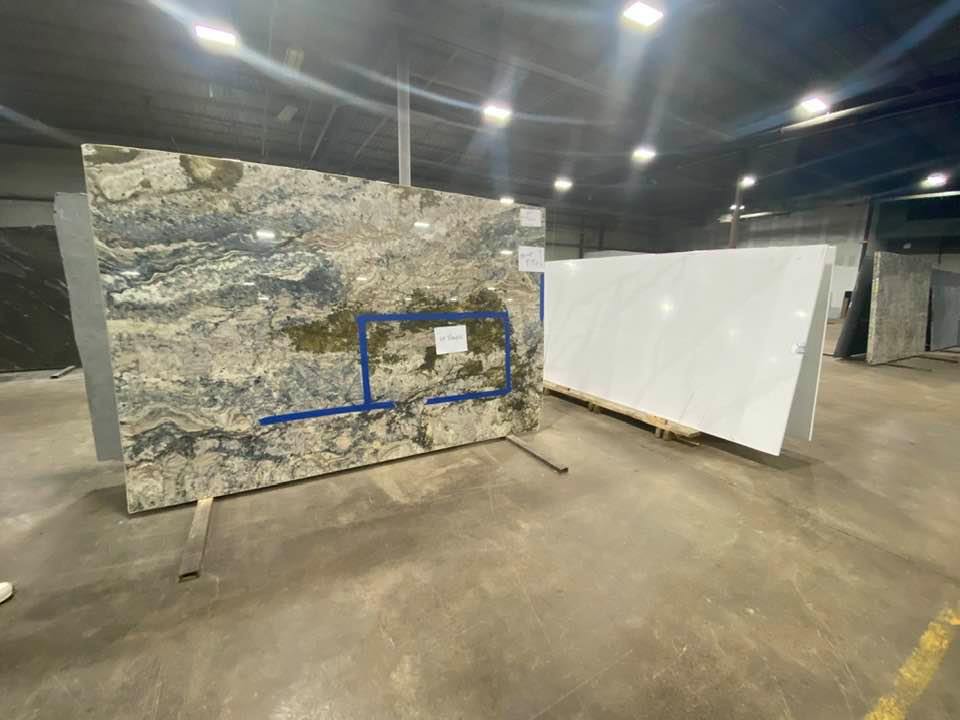
We are working with MCM Natural Stone for the countertops. They are located in Rochester, NY and have been incredible! They were who I did my stone work in the past and I was really happy with their attention to detail and customer service. A business should know when you get a repeat customer you are doing things right. So – here I am …back again! The new kitchen island will have a piece of granite called Azul .Fantasy which is quarried from a bedrock quarry in Brazil. The granite has different shades of blue, gray, soft white, specs of burgundy that sparkle and also green in it. We already had this Azul granite in our “old” kitchen and I am going to reuse some some of the old countertop on the new wet bar area. But below is a photo of the new slab for the island in the addition.
The outer countertop – that will be on the cabinets against the outer walls will be Calacatta Gold Quartz by Silestone.
MCM Natural Stone came out to the house recently and removed the existing granite before we removed the cabinets in the “old” kitchen space. They were so careful to not break anything since they knew I had a wish to reuse some it to save on cost. I appreciated that greatly because they really respected my budget and wanted to help me with saving the stone I already had. At their warehouse, they pulled out the new slabs and placed them next to each other so we could visit and see how they will looked side by side. And since we are going to have the range in the island- they were patient in me tweaking the layout when we marked the spot for the placement of it.
The first time Steve and I redid the kitchen, about 8 years ago- we purchased Azul .Fantasy we said to each other, the look of this, people will either love it or hate it. LOL I don’t think there is middle ground with it. That is all okay- because Steve and I love it and in the end- I decorate for us. : )
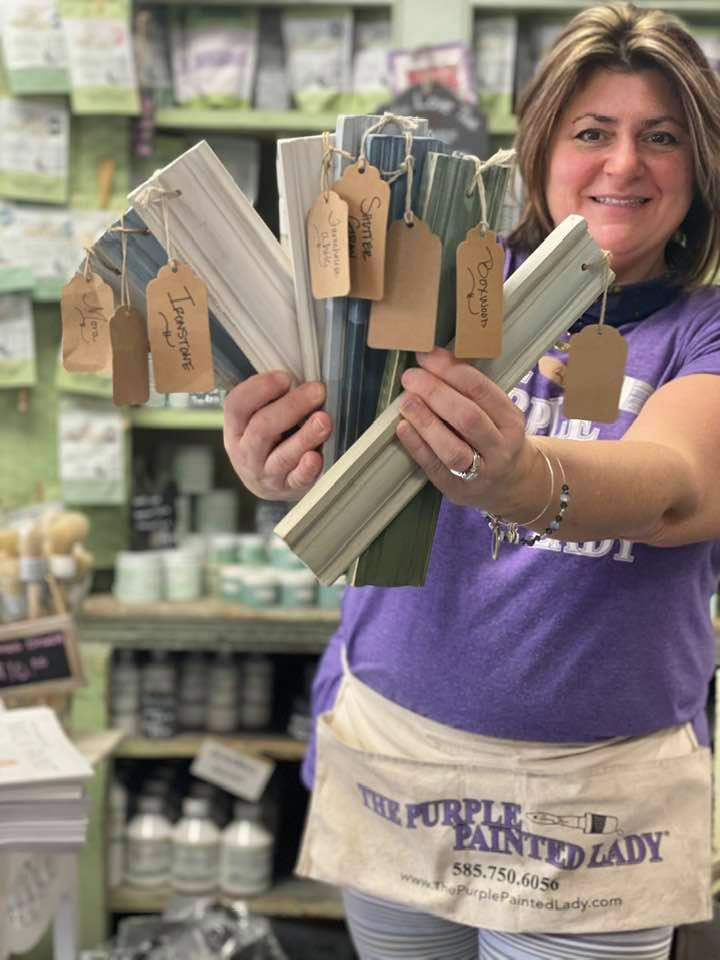
Okay, I am finally getting to the raw wood cabinets and what I an going to do with them. I have decided to paint all of the lower cabinets using Miss Mustard Seed’s Milk Paint. Why? Because Milk Paint will perform almost like a stain does on the the raw wood. It will get absorbed into the raw wood- meaning the wood will literally drink it up. I also am choosing Miss Mustard Seed’s Milk Paint because I like the aesthetic the paint has once dry. My home was built in 1889 and finished in 1890. It is far from a new home. Milk Paint has a velvety, matte finish and fits the whole vibe! I am considering using a white wax after sealing the cabinets and I promise to blog, share on social media what I do and share videos and some Facebook LIVES too.
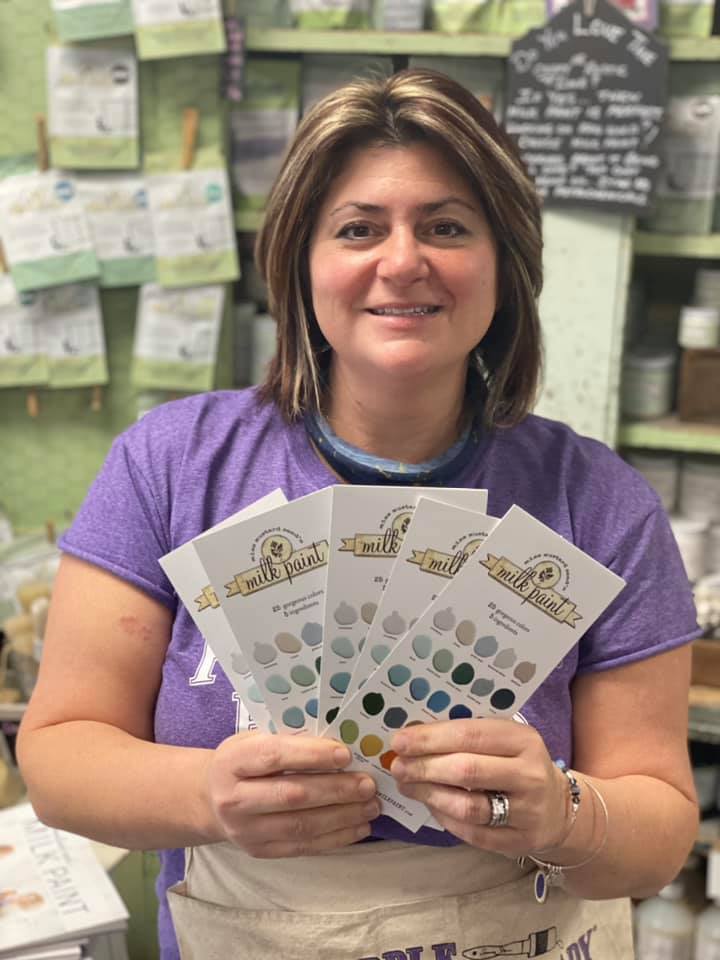
I have a fair number of colors that I really love, but will choose two. The cabinets on the outer wall will be one color and the island – a different color. The two upper cabinets will be stained wood. At a high level – here is a list of all the Miss Mustard Seed’s Milk Paint colors I like and will choose from. I will add photos later of the sample boards near the granite once I get home for you to see and hey, you can help me and share your personal favorite.
Well, I hope you follow along with me on this kitchen reno! Starting out the new year with this to look forward to is definitely a blessing which I am very grateful for after the year we all have had!
If you are interested in purchasing Milk Paint by Miss Mustard Seed or Chalk Paint® by Annie Sloan or would like some help with a project- reach out to us! And….consider purchasing from us too, although we always encourage you to visit your local Milk PAint or Chalk Paint® stockist if you have one …but if you are stuck at home and do not have anyone local… The Purple Painted Lady is here to help and can ship your order right to your front door step.Please just place your order online and we will ship it out ASAP! In fact, if you place an order- be confident in knowing that The Purple Painted Lady has everything in stock! What does this mean in the end? With the team we have in place- your order will get packed and picked up by USPS. FedX or UPS the same day you place it – Monday through Saturday. (note however, this is as long as your order came in before 3pm EASTERN TIME, because UPS picks up our packages around 3:30pm)
MONTHLY NEWSLETTER: Okay- well maybe we actually send this about sometimes likes every 2 months ~ but still! Do you receive our monthly newsletter? If no, you should consider joining. Click HERE to get on board with The Purple Painted Lady’s Monthly Newsletter and get in on the fun.
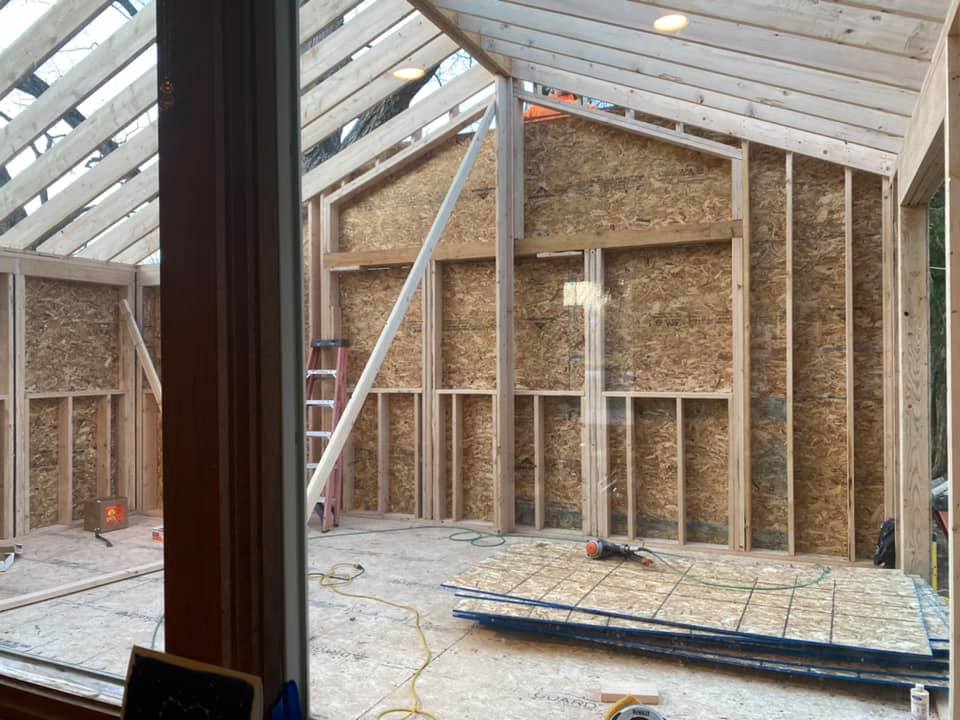
Can you see the steel beam beneath the addition in the photo below? Jason McPike ~ our new contractor said if we had built this addition with the large island in our plans and the big stove and accounted for 10 to 20 people standing in this space….. based on the first companies original plans that I canceled my contract with – I would have had a serious problem. The morale of this story- get referrals PRIOR to signing a contract and putting down a deposit. No matter how excited you are. Hope you learn from my mistake!
This next photo always makes me feel like the addition is blessed because of the cross they built to stabilize everything else.
Little details are important. The architect who came originally shared how critical the height of the windows and door was so it would match and be in line to the existing house. The sliding glass door is going to be 8 foot tall. Otherwise, if it was only 7 feet – it would have been one foot shorter than everything else and looked totally funny. “The devil is in the detail” is an idiom that refers to a catch or mysterious element hidden in the details, meaning that something might seem simple at a first look but will take more time and effort to complete than expected. Select a General Contractor who is not rushed to work with you and who appreciates this and is proud of their work!
You can get an idea of the window placement in the photo below.
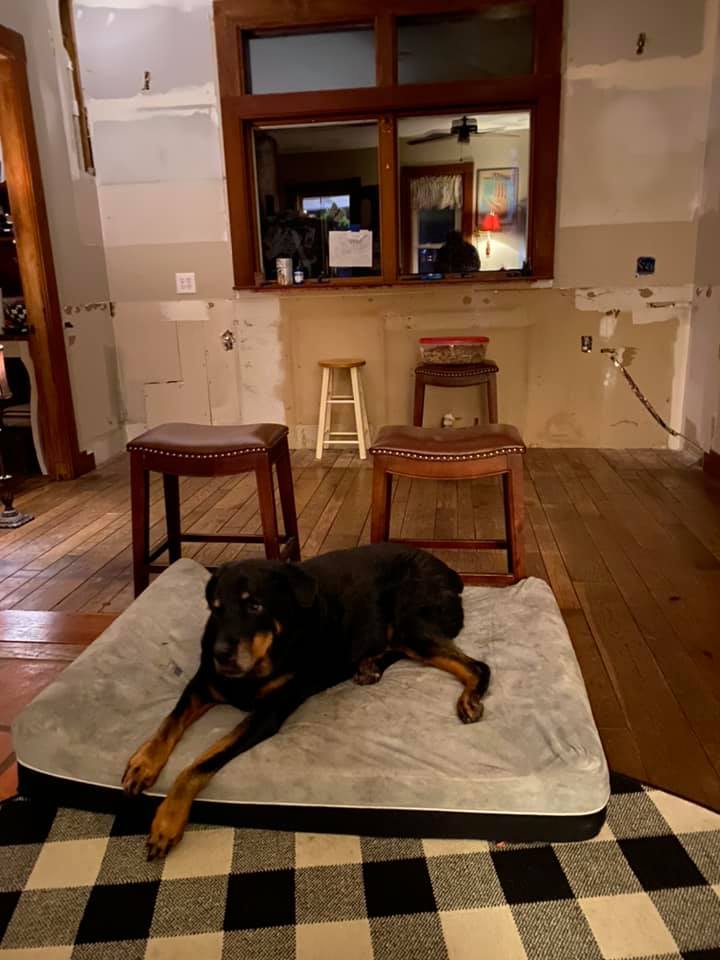
Here is a photo of the “old” kitchen after we removed all the cabinets that I sold on Facebook Marketplace for a steal. (check out my amazing 12 year old Rottie Nikko)
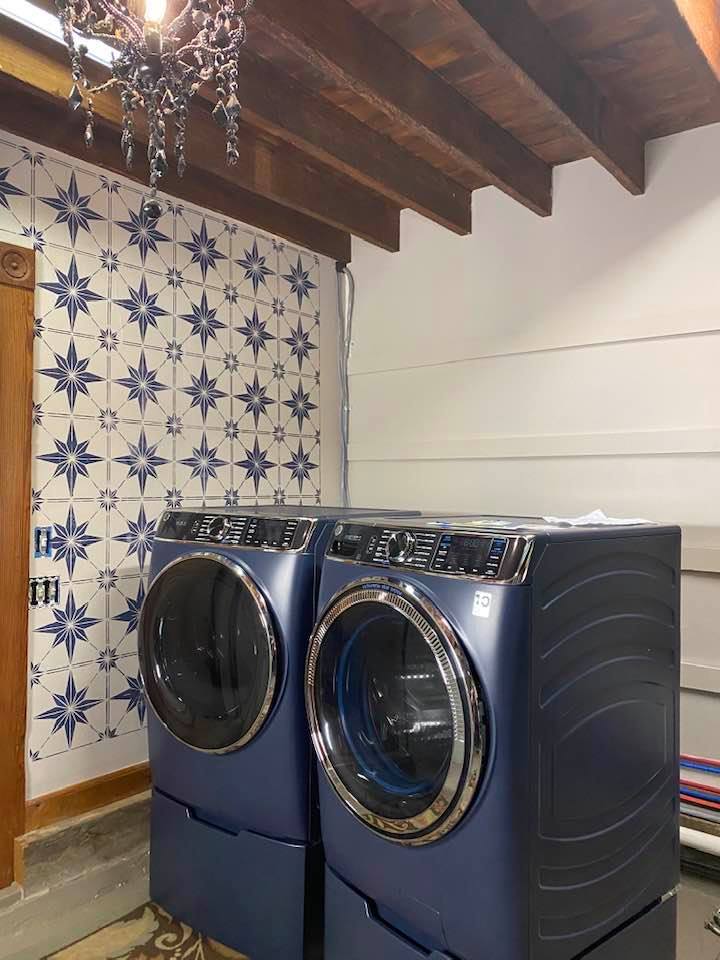
I used Chalk Paint® by Annie Sloan to stencil over my latex painted walls. Chalk Paint® will basically adhere and grip to any surface and I did not need to seal it. And since I wanted it to be a dark navy with a slight grey…. I went for it! And I am glad that I finally decided to invest the energy to make my mudroom that is the first room into our house off the garage – into my laundry room. In all truths, my mudroom was more of a dumping ground for my “stuff.” Sadly, I will admit I found things in there that had sat there a few years and I was just too busy or – honestly- too lazy to either put them away where they should go …maybe because I did not have a space for whatever it was or – I should have just thrown it away because I do have the tendencies of being a bit of a hoarder. (there- I said it.) My name is Trish and I am a hoarder. Not a terrible one- but I sometimes need help in letting things go. But this mudroom is a cool space. Our home was built at the end of the 1880’s – so there are some cool things about it. For example- I really like the height of the ceiling in this space.
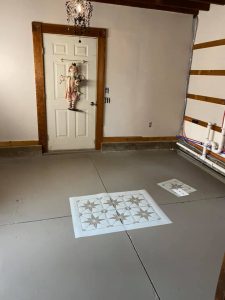
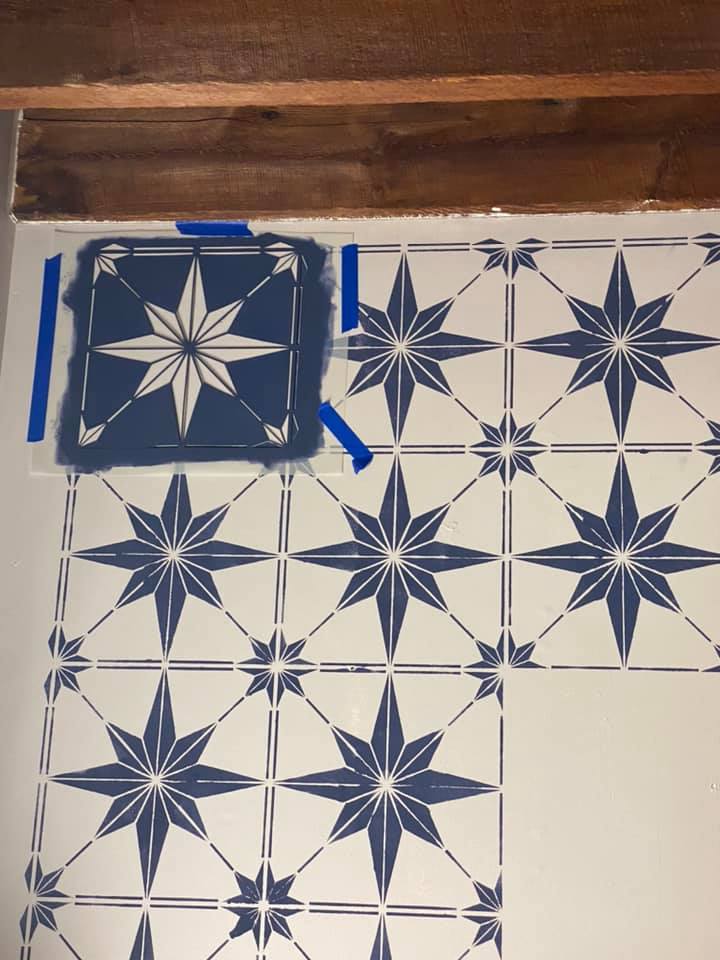
Well, let’s cut to the chase. Below is a photo of the space minus all my junk and after I painted the walls and concrete floor. (you didn’t really think I was going to show you the space when it was full of my clutter did you?) Actually, I could not find a “before” photo so this will have to do. And- then a photo of how the wall looked with the stencil finished and the appliances just placed in front. The room is still not 100% completed, but it gives you an idea of the difference. The stencil took me two evenings to complete. The wall size is about 15 foot wide and 10 feet tall, minus the opening of the door to the garage.
I love this stencil. I found it on etsy by a seller named Dizzy Duck Designs UK. You can find some similar here in the US, but I did like this one specifically. The stencil took a few extra days to arrive but it was not a super long time at all. I purchased the largest sheet and it also was shipped with a single square to get into those smaller spaces.
If you have never stenciled before- it is not hard. Something to keep in mind first- is the end layout. I just got lucky and chose to center the first square I did above the door that led out to the garage. In the end- this made the most sense- but truly – I just got lucky in that choice. So put some thought about where the stencil will end on the side walls or around doorways or placement from the ceiling to the floor. That way- you have full designs versus a partial. (unless you could care less about that.) I have a blog post about stenciling HERE you could read afterwards from more tips. Keep in mind I used Annie Sloan’s foam 4″ roller to apply my paint versus a stencil brush.
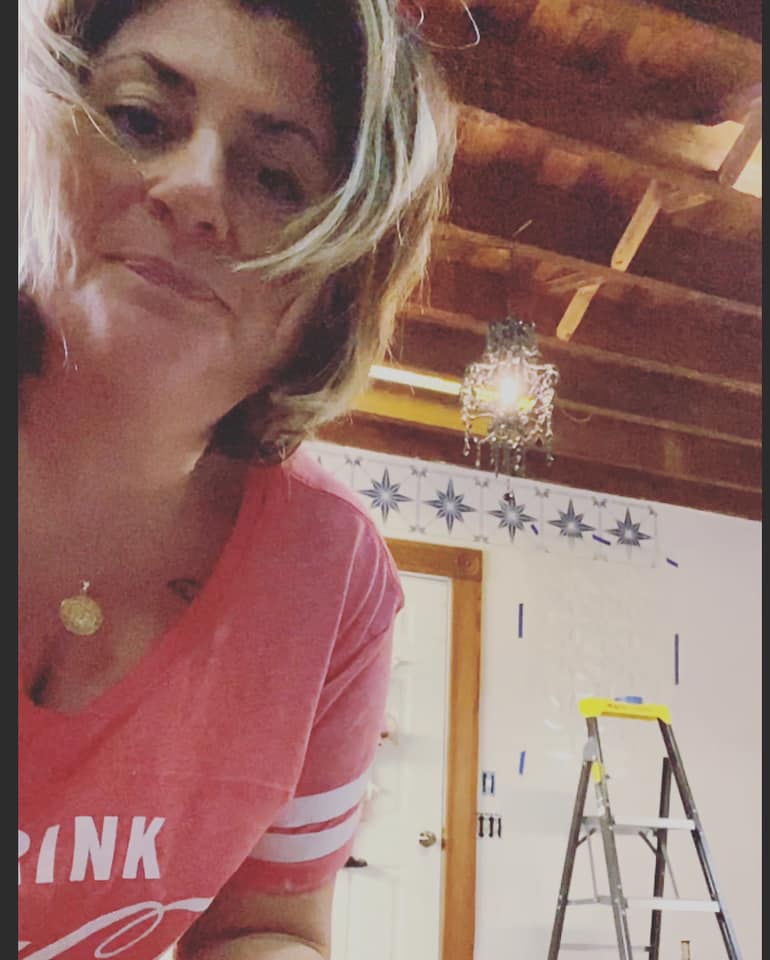
Here I am below after just starting the stencil process. That expression on my face, will it is because I was wondering if I should have hired someone to do this for me. LOL (joking, not joking!) In the end- I am glad I did it because I really like the result.
This is after I had most of the wall done using that single square Dizzy Duck Designs UK includes.
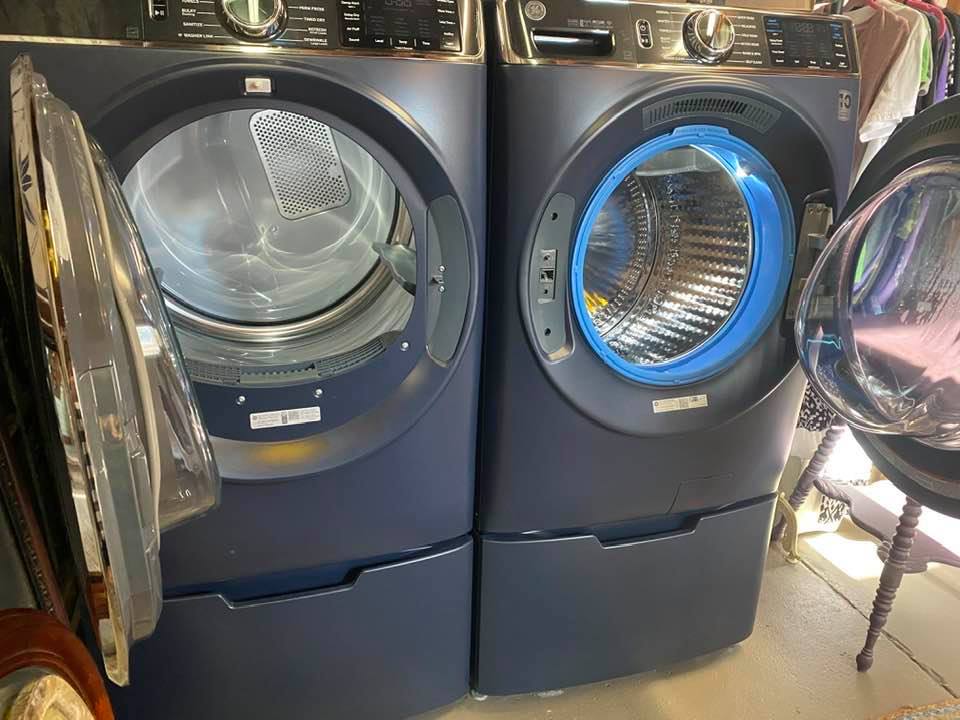
This transformation all started because we were upgrading from our older top loading washing machine to one of those super duper front loaders that has a gazillion bells and whistles (that I probably will never learn how to use.) But the location of where we had the washer and dryer before was too small for these new ones. Aren’t these pretty? I purchased them from a local store called Charlotte Appliances from a friend named Rich Ayers who works there and that I went to high school with. We also got the bases for them too- which I strongly recommend since it raises the height of the doors up and makes it much easier to put clothes or take out. I would recommend that you consider the placement of the hinges on the doors when you purchase them. I knew I wanted the doors to open so I could stand in the middle and move clothes from the washer to the dryer.
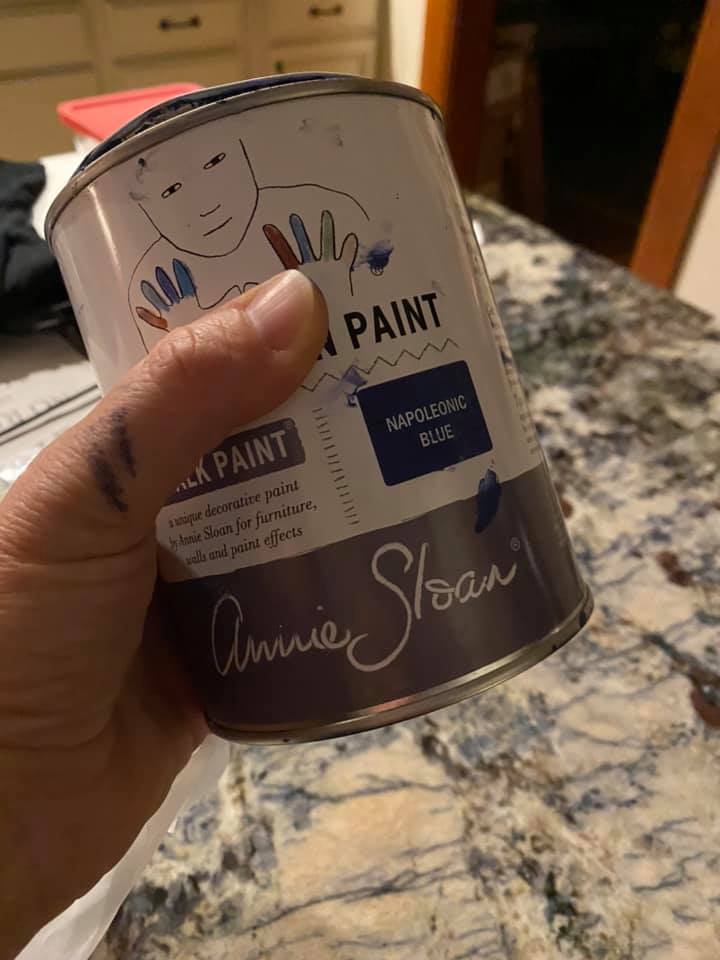
I painted the walls and floor with paint I purchased from Sherwin Williams. I used Napoleonic Blue Chalk Paint® by Annie Sloan mixed with a little India Ink for the stencil.
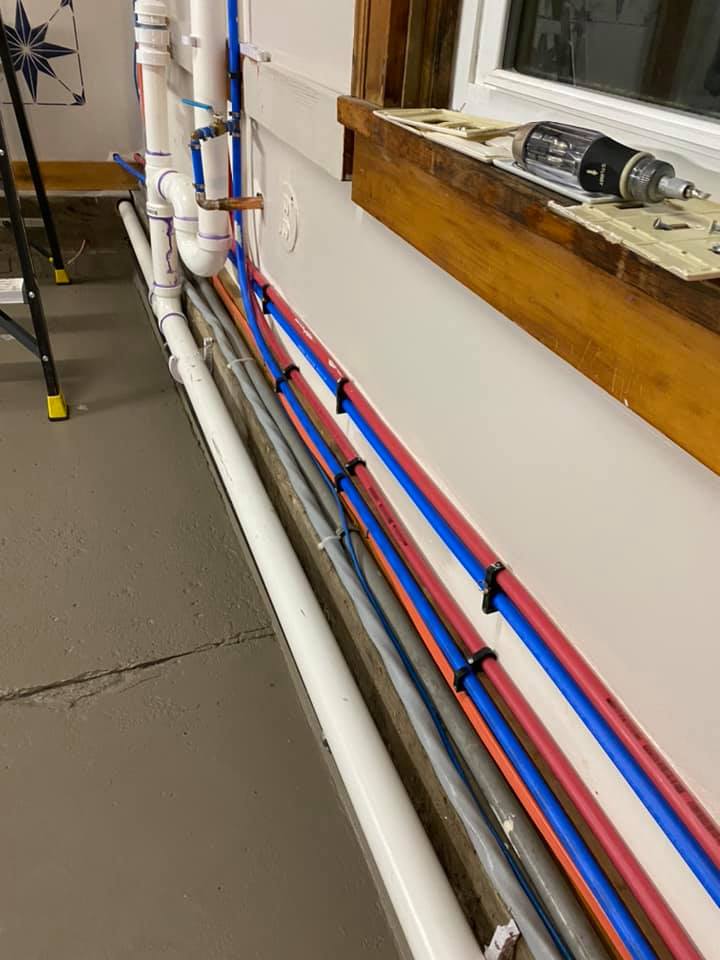
Since we needed water and sewer lines run from the basement along the wall I plan on having a wood cap made to hide them and also, a top and side panel for to go over teh washer and dryer too.
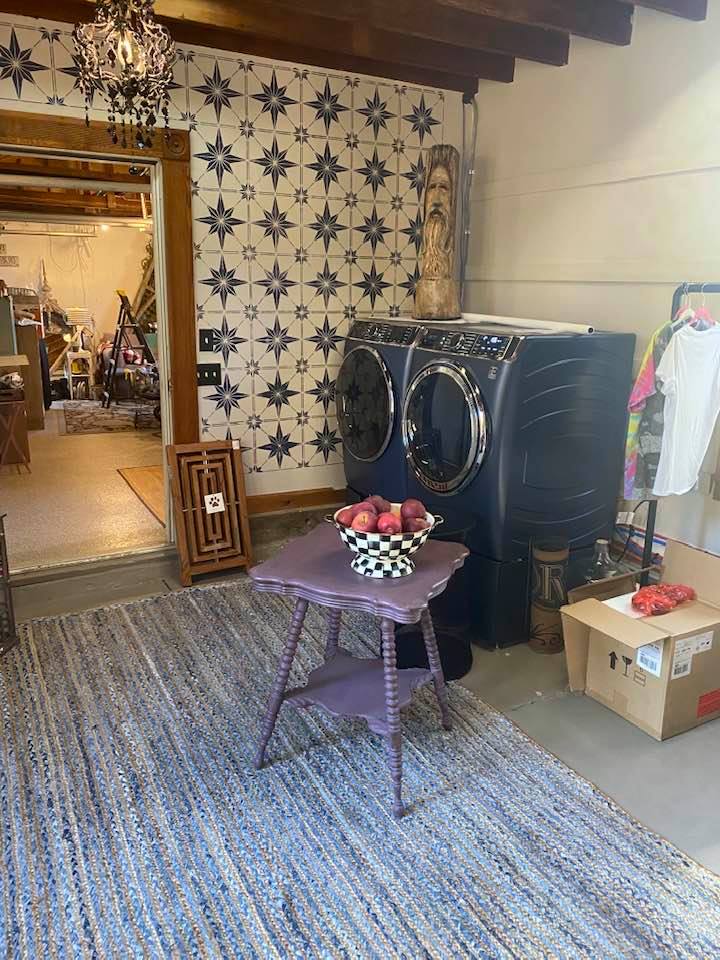
Here is an image of the space a little more finished. I promise to upload another photo once it is all done though.
What do you think? I like it!
Well, if you are interested in purchasing Chalk Paint® by Annie Sloan or would like some help with a project- reach out to us! And….consider purchasing from us too, although we always encourage you to visit your local Chalk Paint® stockist if you have one …but if you are stuck at home and do not have anyone local… The Purple Painted Lady is here to help and can ship your order right to your front door step.Please just place your order online and we will ship it out ASAP! In fact, if you place an order- be confident in knowing that The Purple Painted Lady has everything in stock! What does this mean in the end? With the team we have in place- your order will get packed and picked up by USPS. FedX or UPS the same day you place it – Monday through Saturday. (note however, this is as long as your order came in before 3pm EASTERN TIME, because UPS picks up our packages around 3:30pm)
MONTHLY NEWSLETTER: Okay- well maybe we actually send this about sometimes likes every 2 months ~ but still! Do you receive our monthly newsletter? If no, you should consider joining. Click HERE to get on board with The Purple Painted Lady’s Monthly Newsletter and get in on the fun.
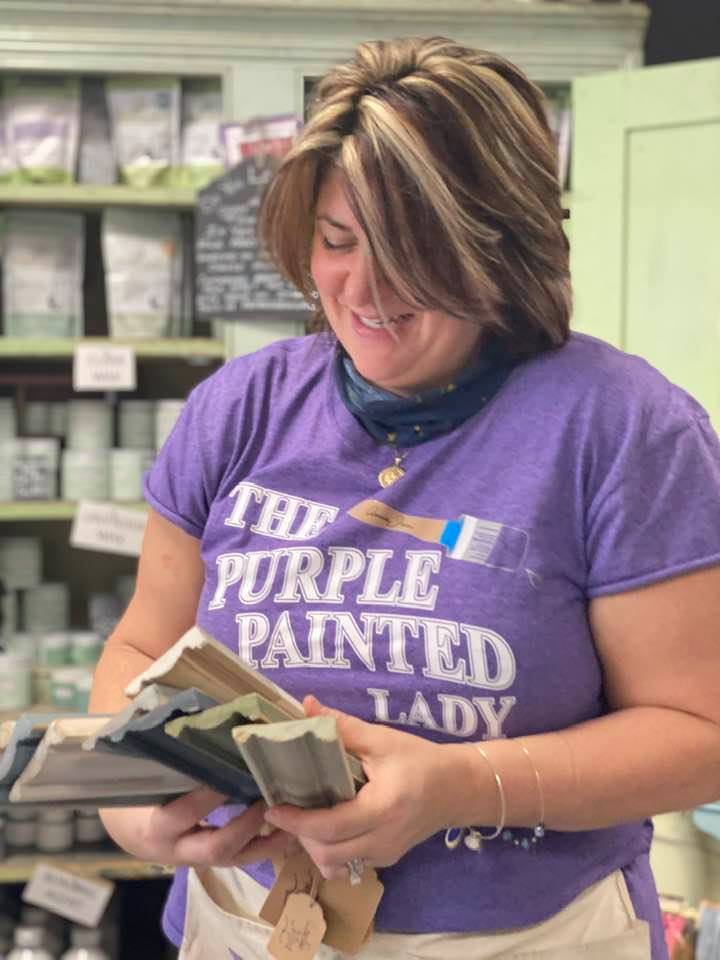
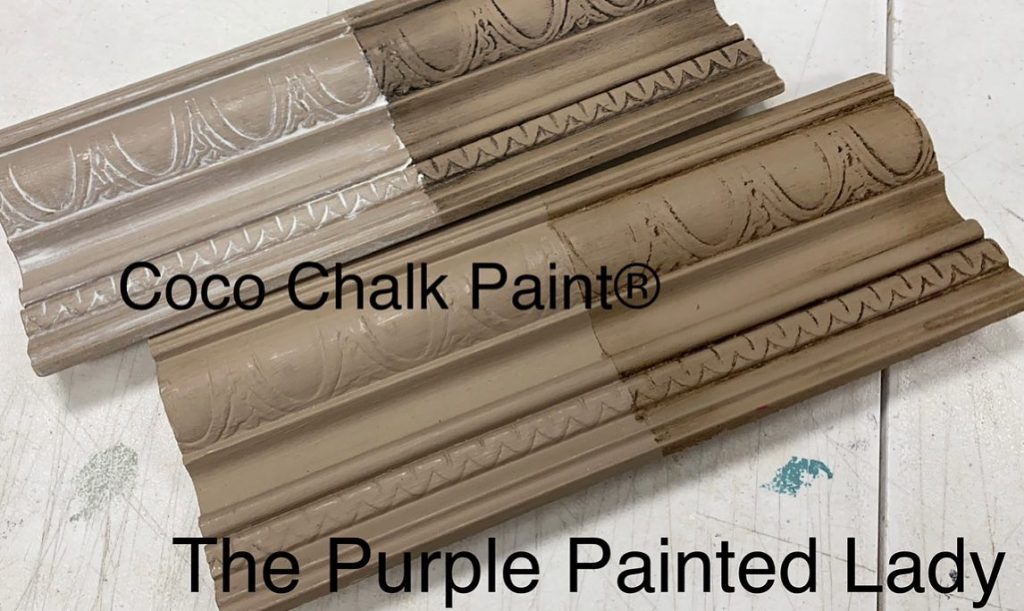
A little cold out? How about some Coco? As in Coco Chalk Paint® by Annie Sloan. Coco is the sophisticated side of neutral. We feel it is more like a latte, similar to Annie’s color French Linen but Coco is more brown or chocolatey versus French Linen which is a bit of a gray. Shown here are two pieces of crown molding painted with two coats of Coco. They all have a coat of clear wax over them and then the upper board shows white wax on the top left and black wax on the top right. The bottom board shows clear wax on the left and dark wax – which is brown on the right.
VIDEO OF COCO: Want to see a video of Coco Chalk Paint® by Annie Sloan being stirred right in the tin? Clear here to jump to our Youtube video. We give you a little description of Coco while doing it too. See the YouTube video HERE.
We always encourage you to visit your local Chalk Paint® stockist…but if you are stuck at home and do not have anyone local… The Purple Painted Lady is here to help and can ship your order right to your front door step. Please just place your order online and we will ship it out ASAP! In fact, if you place an order- be confident in knowing that The Purple Painted Lady has everything in stock! What does this mean in the end? With the team we have in place- your order will get packed and picked up by USPS. FedX or UPS the same day you place it – Monday through Saturday. (note however, this is as long as your order came in before 3pm EASTERN TIME, because UPS picks up our packages around 3:30pm)
MONTHLY NEWSLETTER: Okay- well maybe we actually send this about every 8 weeks. But still! – Do you receive our monthly newsletter? If no, you should want to consider joining! Click HERE to join The Purple Painted Lady Monthly Newsletter and get in on the fun