Chalk Paint® For My 125 Year Old Cupola!

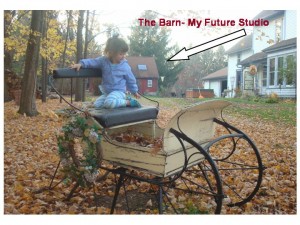
So, I have always wanted a cupola for the top of my “barn.” The “barn” is really more like just a very nice out building, in the sense it lacks the hugeness of what I would typically imagine for a barn. The “barn” was my studio for a long time before I moved to my storefront in the village. It was a great place to paint. This photo was taken – geez, back in 2009. I was taking some fun fall photos of my cute daughter Danni here. This was when I was only painting murals and before I really started to focus on furniture.


Can you see the skylights across the front? Boy, they let in great natural light. And the barn has two 6′ wide windows that are side by side on the end of the barn. Talk about light, I love painting in there! The “barn” now primarily holds a lot of great “junk.” Well, that is what some people refer to it as. But to me…all that “stuff” – is my inventory. Something to keep in mind when debating on venturing into the furniture painting business versus selling jewelry, is that furniture takes up a lot of space! Make sure you have room to store all of your stuff!

Anyway, trying to get back on subject here! My barn needed a cupola for some time and the new ones cost a small fortune and seemed to small. So, I started searching on Craigslist. Every day for almost a year, I would type in “cupola.” And I would always receive back, “Nothing found for that search.” Except, one day…it happened!!!!!! A post appeared from a location 2 hours away from me. A Copper Roof Antique Cupola For Sale!!! And it was authentic! 125 years old, authentic! Well, I had to have it! So, off I drove!

That was almost 2.5 years ago. Since then, we found the copper rooster weathervane for the top, had the base rebuilt by my friend John (who is a saint and an amazing friend with how many times he has driven back & forth to my home to get the profile of the roof cut out just right!)

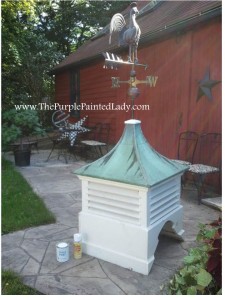
When John dropped this off – like a month ago for me to paint (and I am just finally getting to it now…..I have been a little busy) he had it all primed. He did not know that I planned on using Chalk Paint™ Decorative Paint by Annie Sloan, which requires no stripping, sanding or priming! Oh well, that was ok. Even though John primed the cupola with a quality – stain covering primer….the knots in the wood still bled through.
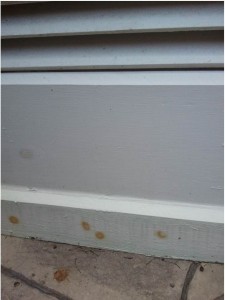
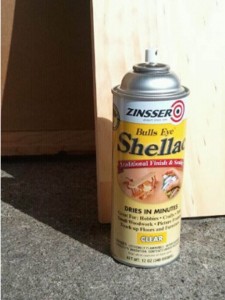
So, I used my Zinsser Shellac (and you know I love that stuff by how much I promote it.) You can purchase it at any big box store and it comes in a spray and a quart. I like the spray since it is easy and quick. Literally dries in about 5 minutes (or less!) So, all I did was spray it on the base in a uniform thorough coat. 2 times in fact! Since I am using Pure White Chalk Paint™, the 2 coats of Zinsser will prevent those wood tannins from bleeding through again. And based on how high this baby is going to be, I do not want to have to do any touchups later once it is mounted!
Then, I shook my quart of Pure White Chalk Paint™, opened it up and began painting. 2 coats of Pure White Chalk Paint™ and this beauty is all set for another 125 years! Remember, since I am using the Chalk Paint™ outdoors, I do NOT use the wax.

Now, when I write that I have a barn, that is because I live in the country! Yep, the country as in the place where you can randomly hear gun shots going off from people target shooting. Or, as you drive down the road, you get stuck behind a tractor. Seriously, and to show you just how “country” we are…here are some of my hens being curious to what is going on.

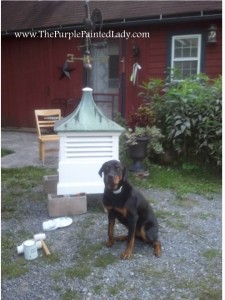
After painting the cupola- I think it looks great! The wood tannins are sealed and have not bled through!
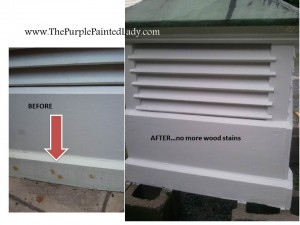
One of my Rotties kept me company during this little project, and well, I think he is handsome and made him sit for this photo. Sorry I did not paint it some crazy color that would have showed off a contract from the “before” state, but I love it and am so excited to see it mounted now. I will update this post as soon as John returns to carry this 150 pound beast up to the roof of my barn! Thanks for reading my post and a very special thank you to our dear friend John!!!! Without him (and his crew of men) we would not have been able to afford the total tear off and replacement of our roof last year. He is a very kind, compassionate man…who we are very lucky to call our friend!

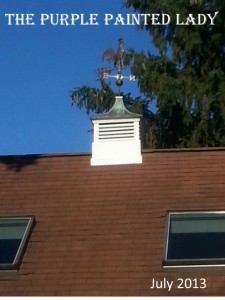
Just wanted to post an update now that it has been almost a year that my barn’s cupola was painted with Chalk Paint® decorative paint by Annie Sloan. It looks just as perfect as the day I painted it. The cupola is exposed to all of the elements- snow, rain, freezing ice, beating sun, and wind! Hope this helps in understanding the potential of Chalk Paint®!

Cupola July 2013

How To Apply Clear Wax- VIDEO

BEST TOOLS TO USE TO APPLY WAX:

Perfect Wax Brush (nice brush if you are on a budget)

Annie Sloan’s Small Wax Brush (if you are painting your kitchen cabinets- do not skimp and get this brush!)

White Scott Shop Towels to remove residual wax from light colored paint

Blue Scott Shop Towels to remove residual wax over darker colored paint

Cheesecloth Great to remove excess wax over “white” colored chalk paint.  This is a nice upgrade if you are doing your kitchen cabinets.  Consider getting the roll of White Scott Shop Towels also!

I love the Perfect Wax Brush which is good brush if you are on a budget and I especially love Annie Sloan’s Small Wax Brush (which in my opinion- is like the Bentley of Wax Brushes)  for applying wax and strongly recommend it to all of my customers as the ONE serious tool you should consider purchasing! It will guide and help you in applying the wax correctly, not to mention efficiently!


How To Apply Clear Wax-

I receive many questions on a daily basis from people around the USA about the proper process to apply Clear Wax. I primarily use Annie’s Clear Wax over Chalk Paint® Decorative Paint by Annie Sloan, but also enjoy Miss Mustard Seed’s Milk Paint and waxes, for the most part, the application of wax is fairly the same.
So, this information applies to all of the above.

Whenever product is purchased through The Purple Painted Lady®, instructional information is always included! Click here to access our on-line shop. Instructions are very helpful, but I personally learn from seeing, hearing and doing. If you are like me, and need to see wax being applied, please feel free to click on this link to watch a very high level video regarding “How To Apply Clear Wax”. I created a bunch of little videos that I have available at my shop – mostly I did this to save on my voice since I would literally have a customer walking out the door and another walking in – and I would be repeating the same information all day!

Again and very important….please also take a few minutes to read the information below!

It is important to apply clear wax in thin and uniformed coats with 100% coverage. I hope this analogy helps in your understanding of how thin to apply it. When I say thin- I mean – not sparse where you are missing sections- but rather a reasonable amount.  Basically, as if you are applying a facial moisturizer before bed.  A light veil of wax that is gently rubbed into the surface.  Some people explain that applying wax it is like buttering toast.

Will the wax change the color of my Chalk Paint®?

No, it will not change the color, but when wax is applied over the Chalk Paint® – it does intensify the color.  Imagine having a wet finger and wiping it on a black board or chalkboard.   You can see the deepening of the color from the moisture.  That is similar to applying wax over Chalk Paint®.

As you apply the wax- make sure the pressure is uniformed and that you get coverage all over – so apply the wax 100% all over your painted area. Not just in some spots. This is easiest when working with colors versus a white Chalk Paint®.    You cannot always “correct” this after the wax has dried.

Apply the wax and as shown in my video- gently push the wax into the paint. (please make sure to watch my video since reading instructions is very different then seeing someone actually do it.)

How long does the chalk paint® have to dry before I can apply clear wax?

It needs to be completely dry.  This could take a total of 30 to 45 minutes.  I think it is important to understand- that if you only apply one coat of Chalk Paint® to your project – and then begin to apply the wax right away……if you press too hard when applying the wax or removing the wax…that on the corners and edges- that may effect your project as though you are attempting to do a wet distress effect and remove some of your dried paint.  Keep in mind- there is a lot of chemistry and science to paint products.  The paint will continue to adhere and grip over a period of time as it cures.  You can wax right away- but you should be aware of this and be conscientious on the edges and corners. You should not be breaking into a sweat or hurting your shoulder or wrist when applying or removing wax.

Chalk paint and wax is just like putting conditioner on your hair:

Just like when you wash your hair and put conditioner on it- what do you do next?

You rinse all the conditioner off. And why is that?

Because your hair absorbs only what it needs. If you leave extra conditioner on your hair thinking it is going to make your hair better, what does it actually do?

It gives you a lousy hair day! This same concept applies to the wax.

Chalk Paint® Decorative Paint by Annie Sloan will absorb the wax that it needs. All excess beyond that- will just sit on your piece and make it feel tacky, gummy, or even sticky. (often this is where someone phones me and says- I applied the wax days ago and it is still tacky)

After I apply the wax and remove it as I show in my video…I can run my fingers over the surface and my fingers glide over the painted and waxed surface. The surface is not tacky – it may feel moist and cool…but there is no drag.

If I want to make the surface feel like glass after waxing (and multiple coats of clear wax are needed for this technique) …… after the surface has cured for a day – I might take some Steel Wool Grade 000 or a very fine piece of sand paper and lightly rub my painted and waxed piece with the grain of the brush strokes. This option only works if you have a couple coats of wax applied.  And you need to be careful if your paint is a light color.  I do not recommend doing this over “white” colored paints since it can leave a grey color behind.  Click HERE to read more about the steel wool.

IS YOUR WAX BALLING UP when you apply it and looks like crumbs from a sugar cookie?

If you are getting little granules that look like crumbs from a sugar cookie when you apply your clear wax, that happens because:
1.  You are using a damp wax brush…OR 
2. You are pushing down a little too hard with wax brush that it starts to ball up…like when you make a snowman …OR
3. Your wax may be a little too hard or cold?  Sometimes people may take the tin of wax….and while the lid is tightly secured, they will warm the container by placing it in a bowl with hot water.  This will soften it and make it more malleable.  With that said, NEVER heat your wax with a heat source.  It could be a fire hazard!
 
Usually- the “cookie crumbs” blend in when using a cotton rag when you remove the excess wax.  If they do not- you may follow the steps below.  

Now- some of you may be thinking- how do I know if I have too much wax?

A. When you apply the wax- if you can run your finger across it and see a mark or a ridge left behind- YOU HAVE TOO MUCH WAX on it!
B. Your project was a small side table or short shelf unit and you used a half tin of wax. Guess what…YOU HAVE TOO MUCH WAX on it!

Keep in mind- even if you applied too much wax it is not horrible if you like the look of your piece! So, do not worry about it! And move on to your next project- be more aware or present when you apply the wax. Learn from your first project and save money by not overusing your materials.

But again -you know you have too much wax or your wax is not applied uniformly when you see streaking in the wax. All is not lost if this is your situation! And again- we want you to LOVE your piece and want to prevent you from using too much wax because it causes more work for you and wastes your product and your money.

So… to remove excess dried wax (TOO MUCH WAX…feels tacky):
1. Take a clean lint free rag (an old undershirt works great)
2. Grab your low odor mineral spirits (I have found that the “GREEN” mineral spirits do not work well for this application) and put your cloth on the mouth of the container and get 2 dabs of it on the rag. DO NOT SATURATE the rag with mineral- we do NOT want a wet rag dripping mineral spirits.
3. “Wipe” the excess wax off your piece. Do not scrub- and do not work in a small circular motion- you want to remove the wax evenly. So wipe from side to side.

Another option- in case someone has a smaller piece and does not want to bother with the mineral spirits- is to:

1. Let your wax totally dry
2. Sand lightly if surface seems uneven
3. Blow or wipe off dust
4. Re-paint with Annie Sloan Chalk Paint™ right over what you have done! No stripping or priming necessary!

The point of this post – is to help you avoid problem! I don’t want you to waste your time or product.
If you are local to me- I would invite you into my shop for a free quick demo on waxing! : ) Or visit your local Annie Sloan Stockist to inquire about a workshop or assistance they can provide to you.

How To Clean Your Ultimate Wax Brush VIDEO and WAX Information

Hi all! We have the Ultimate Wax Brush available here on our site and if you need one- click here).

SHORT CUT to VIDEO! Click here to watch it.

If you have ever met me in person or talked with me on the phone regarding wax- you will know that I feel an Ultimate Wax Brush is worth its weight in gold when it comes to applying furniture wax. I feel it helps you to apply a uniformed application of wax, and guides you to push the wax into the paint. Often, those who are beginners and use a rag will have issues such as streaking due to uneven application. Since this post is about how to maintain your Ultimate Wax Brush, if you would like to read more about how to apply wax- jump to the end of this post. : )

With all shipments of product that you purchase from The Purple Painted Lady – you will receive an instruction sheet on everything! Not just a page with some high level itemized notes, but typically 2 pages worth of information! When it comes to cleaning your Ultimate Wax Brush- it is only a 1 page sheet because it is quite simple. I also have a quick video if you would rather hear me talk about it, click here to watch it. Please pardon my lack of “hair & make up.) We filmed this after working 13 hours at the shop last Thursday.

Here is some other “WAX” information & posts that I hope are helpful to you:
Wax seems to cause the most confusion for customers… So, I hope the following is helpful for you!:

How Much Wax Do I apply?
If all you take away from what I say and do is this…you will be ok! We are not icing a cake! We are waxing furniture. So, very thin – uniform coats are best. Just like when you put moisturizer on your skin- you do not put a thick coat on, but rather a THIN coat and rub it in- so that it will be absorbed into your skin. OR when you use hair conditioner…you apply it and then do what? Rinse it off. That is because your hair will absorb what it needs. Annie’s Chalk Paint will do the same thing in regards to the wax! And you should never have so much wax on your brush that it is “caked” up the sides. You are using too much wax and more importantly- wasting your wax.
CLEAR WAX- this is how The Purple Painted Lady uses it:

1. I take a plastic spoon and a paper plate. Using the backside of the spoon- I take a good tablespoon amount of wax out of the tin and put it on the paper plate. (Place the cover back on the tin of wax until you need more)
2. I use my wax brush and pull some of the wax from the glob (for lack of better words.) Only the tips of your wax brush bristles should have wax on them- there should not be wax “gobbed” up the side of the brush. A little goes a long way! Again- you are not icing a cake where you want a generous amount of thickness. We are applying the wax very thin- pressing uniformly with steady pressure- but not so much that you are bending the bristles on the wax brush. I like to use the analogy that this is similar to waxing your car…you apply the wax- BUT NOT SO MUCH that when it is time to wipe it off or buff- you need a power tool to do it! So- apply a thin layer of wax and GET IT IN THE GROOVES OF THE PAINT.
3. APPLY WAX IN SECTIONS: I work in about 1 foot sections … I use a circular motion when applying the Clear Wax. Then after applying the wax, I rub the wax into my piece and wipe the residual wax off with a lint free cotton rag or piece of cheese cloth. I ALWAYS finish with a few clean straight wipes with my rag in the direction I painted. If I was doing a dresser top- I would start at the back reaching across while standing in front of the piece and as I apply the Annie Sloan wax – I work my way toward the front as so I don’t lean into a previously waxed area. You will see where you waxed prior because it does deepen the hue of the paint a slight amount but be aware of where you just waxed. 4. WIPE OFF WAX: After applying the wax to one section, I will notice when the wax is not covering as much- that is my queue I need more wax. But before reloading your wax brush….use a lint free cotton t-shirt (an old one from my husband or an old sheet) and I wipe off the residual wax with a couple wipes ..circular or in the same direction as I just waxed. (I am not buffing the wax at this stage! Merely just removing or incorporating any small wax “crumbs” that may be present.) Again- a few uniformed swipes or circular rubbing – and that is it.
5. Resume waxing the next area- I wax strategically – meaning in an organized direction so I do not miss a spot. And I overlap my last “section” just a smidge so I don’t miss any of the surface.
6. The wax will dry (meaning no longer be tacky to the touch within a short time….maybe within an hour) However a variable in the dry time is the temperature and humidity where you are located. Is it is humid and cooler- cure time will be longer. If it is taking a long time and your wax is still tacky and you are not in the rain forest- reread my warnings above regarding applying the wax thin!

Number of Coats of Wax?
Depending on the piece I am finishing- I may have different amounts of wax coats. For instance…..a dresser. I may have 2 – 3 coats of wax on the top, but only 1 coat of wax on the sides and front.

7. Once the piece is no longer tacky- if you want to have a shinier finish- buff your piece. If you like it as is- then you are done! It does not take much rubbing and the piece will be quite shiny- so pay attention and have good lighting so that you do not over do it.
8. Remember NO WAX when painting pieces for outside.

Be careful in regards to “touching up” an area of paint after the wax has been applied and dried. Even if you rewax- spot painting always shows in certain lighting. I have found that when I “touch up” areas with paint once waxed- you either need to do the whole surface or don’t do it at all. OR, if you are distressing your piece, see if you can strategically blend an area to make it deliberate.

9. Surfaces that will get serious use (wear and tear) like tops of dressers and tables – should receive 2 to 3 coats of wax. Follow the procedure above – always allow wax to dry between additional coats.

I will always lead my customers on a path to get the best value from their purchase. If a person walks in and is describing an application where another product would be better- I let them know! Now when it comes to tools- in the sense of brushes – I strongly believe that wax brush is a necessary purchase if you plan on doing multiple pieces. I understand that they are not inexpensive, but if you maintain them- they will last forever and will make your waxing process much faster and from a cosmetic perspective- will significantly improve your application! I always say- this is similar to applying make up. I honestly don’t think the applicator you choose for putting on eye shadow is a big deal- but try putting blush on with a skinny brush versus a nice big soft brush and you are going to look ridiculous. Invest in a wax brush and get a professional quality finish. You will not regret it.

WHY IS WAX IMPORTANT?

The wax is important to protect the paint – like polyurethane does when using Latex. Also – in regards to water protection, especially in kitchens and bathrooms. In that case- you need something made from wax and or oil….ie.oil and water don’t mix. (and not to be too odd here- that is why when you install a new toilet- they set the piece on a very THICK wax ring) I have tested waxes that are water based and they just don’t work as they come off when you wipe them with a cloth! Petroleum wax, also known as paraffin wax, is a by-product of the petrochemical industry…it is a residual from another manufacturing process. Annie Sloan Wax upcycles… in that the petroleum by-product is used in our wax versus of it being disposed. It is a good and economical base for Annie Sloan’s wax and besides that- there is also bees wax (which comes from bees!) added to make it soft and carnauba wax (from a plant) to make it very water repellent. The paint because of its particular structure allows the wax to soak in- like quality skin lotion will on your body. This is why Annie Sloan Chalk Paint and Annie Sloan waxes marry each other perfectly- they were created to do so and no other mixing of products will produce the same results.

BUFFING:
I would like a shine to my piece…. The equation of how much sheen you get is simple…the more you buff the wax once dry/cured- the shinier the surface will become! It does not take much rubbing- we are talking a minute or two – at most!
WANT YOUR PIECE TO BE SUPER SMOOTH? HIGH grit Sandpaper! Purchase some sand paper from an Autozone or a car supply place. Sandpaper like 400 to 800 grit and up, is great to use to polish the whole piece after all of your painting is complete. I also like to polish the wax after it has dried with sandpaper like this. This will give you a finish like the side of a new corvette! Seriously- this is where you can take advantage of the incredible finish Chalk Paint™ Decorative Paint by Annie Sloan can produce. The finish will feel as smooth glass! This is my favorite finish!

WILL THE WAX PROTECT THE FINISH?

Annie Sloan also wrote-
Yes the wax does completely harden! It’s hard and is water repellent.
I have never known it to melt in the sun and I have had pieces in the hot sun in the window of my shop – yes…. I know its England but with the sun on it through glass it must hit pretty high temps and we have been selling it in the South of Spain for years and years where it is more or less tropical!

No a glass will not leave a water mark. Sometimes a coffee cup leaves a ring and I just wipe it off with water or something like (Clorex Wipes) or at the very worst a spray kitchen cleaner. You don’t want to use anything too strong or the wax will come off too much. Once I left a vase on a table and it leached water so when I took the vase away the paint and wax had sort of lifted. I just left it and it all settled back and was fine. When it dried I just wiped some wax over it. Annie

Click here if your Wax is still tacky

Click here if you think you Applied too much wax

I recommend painting and waxing inside at room temperatures, Click here to learn why =>Wax inside

Click here if you are wondering, How durable is wax

Click here if interested in Dark Wax Info

New Website Features

As husband of the talented Purple Painted Lady and sole member of the IT department, it falls on me to maintain the website. I’ll be adding some new features over the coming weeks, so stay tuned.

We’ve received a lot of requests by people searching for a certain post they saw in the past, so I’ve added a new menu item up top called “Search Posts by Category”. Underneath that menu title, there are options for each category of post. We’ll try to assign a category to each post that we make, so that you can easily find posts that interest you. The initial categories I’ve created are:

  • How To – All educational posts showing how to use the products or achieve a certain look
  • Furniture – Posts about furniture
  • For Sale – Furniture or other products for sale
  • Stores – Information about our Palmyra or Greece store, or other stores which carry our products
  • Workshops – Information about upcoming workshops
  • Projects – Projects being worked on by The Purple Painted Lady
  • Annie Sloan – Information about happenings in the Annie Sloan world
  • Miss Mustard Seed – Information about Miss Mustard Seed
  • Promotions – Sales or promotions
  • Customers – Posts about one of our customers, or else pieces painted by customers

A post can have more than one category, so it may appear in multiple places. These categories may change as we figure out the things that we like to talk about. Keep checking back, or subscribe to our RSS feed, to find out what’s happening.