Cleaning Furniture & Cabinets Before Painting

I think we all scavenge Craigslist for incredible finds and sometimes we find the most gorgeous piece- minus all the crud covering it. Or- it is just a piece that needs to be cleaned prior to painting. And I always recommend cleaning down cabinetry in the kitchen, bath, or laundry room prior to painting. No matter the painting occasion, this is what I do at The Purple Painted Lady:
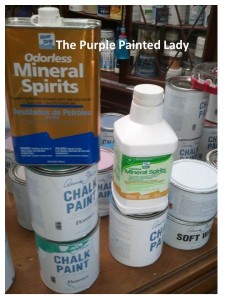
First clean with Mineral Spirits…THEN…wipe it down with a rag that is moistened with clean fresh water!

Using old towels or t-shirts cut up- I apply a little odorless mineral spirits on it and then wipe down the piece.

The rag should be slightly damp, but not dripping! I like to use “real” Mineral Spirits..meaning not the “green” Mineral Spirits that have that milky white appearance. I personally feel it does not work as well as the original Mineral Spirits.

Take your rag and place it on the opening of the Mineral Spirits. Flip the container a couple of times in different areas of the rag. (Think like how you would put nail polish remover onto a cotton swab or ball)

With a tiny bit of Mineral Spirits on your rag, rub the piece in the direction of the grain of the wood. The mineral spirits on the rag will remove grease or dirt. Again, I always do this prior to painting a cabinet job. In the bath- I wipe off residual toothpaste and in kitchens- the cabinets near the dog’s food dish or garbage can are the dirtiest. Such as life though- and we all live in our homes versus using them as a show room.

After wiping down your piece with Mineral Spirits, give it a bit of time to allow the Mineral Spirits to totally evaporate prior to painting. (If you are doing a few pieces- by the time you finish cleaning the last piece- the first will be ready.)

THEN- finish with a clean water rinse!  

The washing with Mineral Spirits will remove any residual oil or grease from the wood if there is any. Mineral spirits will evaporate from the wood completely without leaving any residue. This is the purpose in waiting some time – up to a day after cleaning with mineral spirits… for the mineral spirits to evaporate.

Some people recommend using TSP to clean your furniture- and that is fine too. I personally- have had many customers have issues with this method since they do not thoroughly rinse the furniture or cabinets with water or denatured alcohol after using TSP. I get emails asking, “what did I do wrong? The paint is peeling.” 9 times out of 10- it is because of this!

So I prefer to just use odorless Mineral Spirits. With that said- DO NOT USE THE “Environmentally Green” brand of Mineral Spirits!

Mineral Spirits are a staple in my painting closet and I always have it on hand. Also- if you make a glaze out of your wax using Mineral Spirits- I recommend staying away from the “Green” Mineral Spirits – which has a milky white look to it.

TSP was commonly used prior to the 1970’s to clean walls prior to painting them. The reason for cleaning with TSP was because it etched the gloss of oil based paint, making it rougher so that the next coat of paint would stick better. If you have an oil based paint on your wood, then I’d clean them with TSP if you intend to repaint that wood. But, there is no point whatever in cleaning bare wood with TSP, or latex painted wood with TSP.

If you do use TSP, then I would also clean the residual TSP off the piece of furniture with a clear water wash or denatured alcohol.

Another option:

Use Denatured alcohol. Create a ratio of 60/40 = alcohol to water. Then as stated above, moisten a rag (not soak it.) Wipe down the piece of furniture or cabinets, and then let dry.

OR

Personally- I stay true to using Mineral Spirits again. It is ideal to clean a surface free of any waxy or oily/greasing substances. But Chalk Paint® in general has great bonding capabilities.

But if you cannot purchase Mineral Spirits where you live, or have personal reasons not to use it~ here are some additional options:

Cleaning with one of the following (they are all biodegradable and grease cutters) … Motsenbocher’s TSP Substitute, Dirtex, or Krud Kutter.

THE MOST IMPORTANT THING TO KNOW = is that it is extremely important to rinse away any cleaning material to neutralize the Ph after you have cleaned the furniture. That is because you do not want any residual cleaning product left behind. You also want to furniture to be dry when you start to paint.

Hope this little post was interesting and helpful!

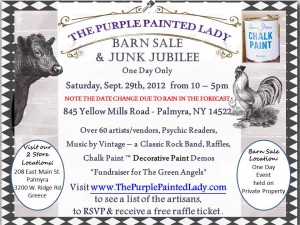
The Purple Painted Lady Barn Sale & Junk Jubilee happening on 9/29

This is going to be a HUGE event for upstate New York! Just about a week away from The Purple Painted Lady Barn Sale & Junk Jubilee! Happening on Saturday, September 29th from 10 – 5pm! Please visit our Barn Sale Page here to see a list of the over 50 artisans that will be there!!!!! We have a Class Rock Band, Psychic Village, Food Vendors, and decorative painting demos! Come and meet Jami from freckled laundry and learn how to faux zinc a table top, or learn about “Keeping Bees” from Sally…or check out my Chalk Paint™ demos! We will have ZumbAtomics happening through out the ay for the kids (& grown ups too) This is a fundraiser for The Green Angels…bring & donate an item from their Wish List and receive a FREE RAFFLE TICKET. http://www.the-green-angels.org/wish.html

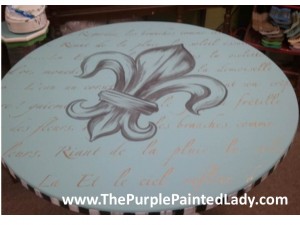
The Purple Painted Lady will have some painted pieces available for sale – one of which is this funky whimsical table for your breakfast area! It is the perfect size- not too big and not too small!!! 36″ round X 31″ tall. Hand painted with Old White & Provence & Graphite Chalk Paint™ Decorative Paint by Annie Sloan. $235 …Come and see her at The Purple Painted Lady Barn Sale & Junk Jubilee!


To RSVP and receive a FREE Raffle Ticket for the items being donated- please visit our EVENT Facebook page by clicking here!

Thanks and hope to see you there!

Chalk Paint™ Sample Boards showcasing both Clear & Dark Wax

I have been working on these photos longer than I would like to admit! And I am still not done. But I promise to have them all uploaded to Pinterest by the end of the weekend.

I hope that you enjoy these Chalk Paint™ Sample Boards showcasing both Clear & Dark Wax. They are a great way for you to see the possibilities of each color. And I have a lot of fun pairing up different colors to create new color combinations to paint future pieces in.

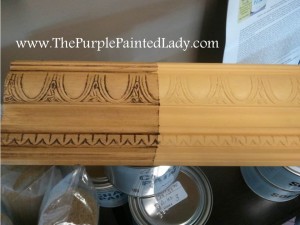
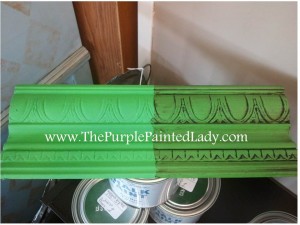
Each sample board was painted with two coats of Chalk Paint™. Then a layer of clear wax was applied to the whole sample board. Once dry- we taped off half and applied dark wax, and immediately wiped off the excess.

Click here to see Chalk Paint™ Sample Boards showcasing both Clear & Dark Wax or visit my on-line store to see each color.

A LITTLE Q & A on PURE WHITE Chalk Paint™

A LITTLE Q & A: PURE WHITE Chalk Paint™ question.

A very dear customer of mine asked…..Someone brought me some pieces to paint and said they want them WHITE. I have used old white several times, but I’m just ordering “pure white”. Do you have any suggestions? They’ve asked for a white, white piece lightly distressed. That’s my goal.

The Purple Painted Lady’s response:
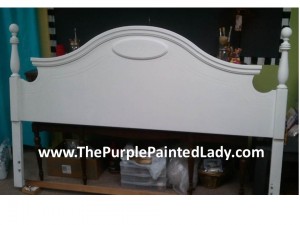
(First- I apologize for the lousy photo. It was taken with my cell phone.)

You will want to use Pure White Chalk Paint™ Decorative Paint by Annie Sloan- like you ordered.

I did a king size headboard at Christmas for a woman and it came out great. Something I did not do ….and that I should have- was shellac’d the furniture using Zinsser prior to painting with the Pure White Chalk Paint™. I would have used less paint!!!

Now keep in mind- when painting a piece WHITE…and wanting that bright white..even after shellac…an average of 2 coats will be needed. So, when you compare the cost of paint to shellac = it is worth the extra step for the shellac. (and if you can spray the shellac it will not add much time to your process) This example I share was based on that in December I painted a maple wood bed. Depending on what you are painting over, some colors that have less pigment – like Pure White will require what I shared above. This is not always needed- but there are examples that will and it is important to know that.

Questions that I would have back for my customer were:

What is the state of the furniture now?
Does the customer understand- that whatever the base is- will be what you see slightly once distressed? Make sure that is ok and I don’t know about you- but I always write up a very detailed contract for custom jobs!

Lastly, for those of you who paint for others….If you can have the customer find “inspiration” photos on line that you can reference in understanding what their “end vision” is- it is extremely helpful and I recommend incorporating those photos in the contract! Otherwise- and often- people have a difficult time articulating their thoughts and you do not realize they wanted “B” until you have invested time and materials creating “A.”

To explain my comment further above where I state that the shellac can help in using less paint …I mean in the sense that many people will write me and say- I am getting bleeding through the paint from the wood underneath. Then they will share that they are on the 4th coat of paint!!!! WHOA! This is where I say, “back away from the paint brush!” Sometimes- it doesn’t matter how many coats of paint you applied- there is an issue beneath that the paint cannot prevent. (that sometimes happens) So, as soon as you start to see wood tannins bleeding or stain seeping through- shellac is TYPICALLY going to help you. Shellac is an ideal sealer…where polyurethane (I am about to answer a question I received from The Country Nook in Rochester, NY now. Check out their Facebook page by the way.) …Polyurethane is best to protect from abrasion…not sealing. Shellac is used both as a furniture finish (and a very good one) and sealer (both for furniture and covering spots that you think might bleed through paint). Don’t buy more shellac than you have to use in a short time. It will spoil in the can and if you open a can of spoiled shellac, it will smell to high heaven . One of the reasons I love the spray …or the quart sizes. I recommend shellac..Zinsser Shellac since that is what I use and have been happy with the results. As for polyurethane- it gives an incredibly hard finish…. some polys can take up to at least 8 hours to dry, thus gathering all of the bugs and dust that will be available during that time. Again shellacs are great for sealing.

We have MOVED OUT of The Shops on West Ridge June 2022

The Purple Painted Lady is located at 2620 State Route 31 Palmyra NY 14522.  Come and visit us any time between 10 – 5 Monday through Saturday.  And if those hours are not convenient for you- please call us and we can make arrangements to be available at a time that is.